

Learn the Basics of Dinghy Sailing: A Beginner’s Guide
Alex Morgan
Sailing a dinghy can be an adventurous and rewarding experience, allowing you to navigate the water and harness the power of the wind. Whether you’re a beginner or looking to improve your sailing skills, understanding the fundamentals of sailing a dinghy is essential. In this guide, we will delve into the different aspects of sailing a dinghy to help you get started and sail with confidence.
Sailing dinghies are small sailboats that are designed to be sailed by one or two people. They are versatile and can be used for leisure sailing, racing, or even as a training vessel. Dinghies come in a variety of shapes and sizes, each with its own unique characteristics and sailing capabilities.
Before setting sail, it’s important to choose the right dinghy that matches your skill level, sailing goals, and local weather conditions. Factors to consider include the type of dinghy, hull design, size, and rigging options.
To ensure a safe and enjoyable sailing experience, it’s crucial to have the right equipment on board. This includes sailing gear such as life jackets, wetsuits, and appropriate footwear, as well as safety equipment like a whistle, signaling devices, and a first aid kit.
To effectively sail a dinghy, it’s important to familiarize yourself with its various components. These include the hull, rigging and sails, centerboard or daggerboard, and tiller and rudder. Understanding how these parts work together will help you maneuver the dinghy more efficiently.
Mastering basic sailing techniques is essential for any aspiring dinghy sailor. This involves understanding wind and weather conditions, launching and landing the dinghy, steering and maneuvering, and becoming familiar with different points of sail.
Once you have a solid foundation in basic sailing, you can explore more advanced techniques. These include tacking and gybing, sailing upwind, using sail controls to optimize performance, and adjusting your technique according to different wind conditions.
Safety should always be a top priority while sailing a dinghy. We’ll cover basic safety rules, collision avoidance, right of way rules, and how to respect the environment while out on the water.
Sailing a dinghy is a skill that can be continually improved upon with practice and experience. As you gain more confidence, consider taking lessons, joining a sailing club, or participating in races to further enhance your skills and enjoyment of this exhilarating sport.
Key takeaway:
- Choosing the right dinghy is crucial: Consider factors such as size, stability, and intended use when selecting a dinghy for sailing.
- Master the basic sailing techniques: Understanding wind, launching and landing the dinghy, steering and maneuvering, and knowing the points of sail are essential for successful dinghy sailing.
- Prioritize safety and etiquette: Follow basic safety rules, learn collision avoidance and right of way rules, and respect the environment while sailing a dinghy.
Choosing the Right Dinghy
When it comes to choosing the right dinghy , there are crucial factors to consider. From the size and weight to the sailing conditions you’ll be facing, this section dives into the key elements that will help you make an informed decision. So, before you set sail, let’s explore the essential aspects that can make or break your dinghy sailing experience. Get ready to navigate the waters in style and with confidence!
Factors to Consider
When choosing a dinghy for sailing, there are several factors to consider. You should think about the size and weight of the dinghy. A smaller, lighter dinghy is easier to maneuver and launch, which makes it perfect for beginners or sailors who will be sailing solo.
It’s important to assess your skill level as a sailor. If you are a beginner, you should opt for a dinghy that is stable and forgiving . On the other hand, more experienced sailors may prefer a high-performance dinghy that offers a thrilling sailing experience.
Next, consider the intended use of the dinghy. Will you be using it for racing or cruising? It’s crucial to choose a dinghy that is specifically designed for your intended purpose.
Of course, cost is another important factor to take into account. Dinghies come in a range of prices, so you should choose one that fits within your budget. Remember to factor in the cost of any additional equipment and maintenance.
Another consideration is the availability of spare parts and accessories for the dinghy. It’s advisable to choose a reputable manufacturer that offers a wide range of support and resources.
Think about where and how you will store and transport the dinghy. Assess whether you have enough space at home or if you will need to rely on a boatyard or marina for storage.
A pro tip is to try out different dinghies before making a final decision. This hands-on experience will help you determine which dinghy feels the most comfortable and suits your sailing style.
Essential Equipment for Dinghy Sailing
When it comes to sailing a dinghy, having the right equipment is essential . In this section, we’ll explore the must-have gear for an enjoyable and safe sailing experience. From top-of-the-line sailing gear to crucial safety equipment, we’ll cover everything you need to know to be fully prepared on the water. So, get ready to gear up and sail with confidence in your trusty dinghy !
Sailing Gear
When it comes to sailing gear, every sailor should have these essential items:
Having the right sailing gear is essential for comfort, safety, and enjoyment while on the water. Invest in quality gear and always check its condition before setting sail.
Safety Equipment
When sailing, prioritize safety. Here are essential safety equipment items to consider for dinghy sailing:
- Life Jacket: All sailors must have a properly fitting and Coast Guard-approved life jacket. Wear it at all times while on the water.
- Personal Flotation Device (PFD): Similar to a life jacket, a PFD provides extra buoyancy and is a lightweight option.
- Whistle or Horn: Use these signaling devices for emergencies or to communicate with others on the water.
- Throwable Flotation Device: A buoyant object thrown to someone in distress to assist with their flotation until help arrives.
- First Aid Kit: Keep a well-stocked first aid kit onboard for injuries or medical emergencies while sailing.
- Anchor: Essential for stopping the boat’s drift in case of engine failure or strong currents.
- Fire Extinguisher: Have a fire extinguisher onboard to handle potential fires caused by fuel or electrical problems.
Remember, safety equipment is effective with proper use and regular maintenance. Regularly inspect and replace damaged or expired safety equipment. Familiarize yourself with each item’s use and ensure everyone onboard knows the location and operation of the safety equipment.
Understanding the Parts of a Dinghy
Get ready to set sail as we dive into understanding the different parts of a dinghy. We’ll be exploring the hull , rigging and sails , centreboard or daggerboard , and the tiller and rudder . Each sub-section sheds light on a crucial component of a dinghy, taking you one step closer to mastering the art of sailing. So grab your life jacket and join us on this nautical adventure!
The hull, an integral part of a sailing dinghy, provides both buoyancy and stability . Constructed from materials such as fiberglass , its purpose is to withstand the forces of wind and water.
The performance of a dinghy is greatly influenced by the shape of its hull. For novices or when sailing in calm waters, a flat-bottomed hull offers exceptional stability. Conversely, a V-shaped hull is more adept at slicing through waves, enhancing speed and maneuverability.
To facilitate orientation and communication, a dinghy’s hull is divided into distinct sections: the bow (front), stern (rear), port (left), and starboard (right). These sections help sailors easily identify different areas of the boat and provide precise instructions.
Maintaining the hull’s condition necessitates regular cleaning and inspection. This practice ensures the early detection of any cracks or damage that may compromise the hull’s integrity. Proper storage and transportation are equally vital to prevent unnecessary stress or wear.
When selecting a dinghy, it is crucial to consider both the hull design and the appropriate material that aligns with your specific needs. Whether your purpose is leisurely sailing or competitive racing, seeking guidance from experts or experienced sailors can aid you in making the right hull choice.
Rigging and Sails
The rigging and sails on a dinghy are crucial for supporting and controlling the sails.
The mast , boom , and standing rigging all play a part in this process.
The mast , which is a tall pole, holds up the sails and can be securely attached to the hull of the dinghy.
The boom , on the other hand, is a horizontal pole that extends from the mast and holds the foot of the mainsail.
The standing rigging consists of wires or cables that provide support to the mast and keep it upright.
This includes the forestay , backstay , and shrouds .
The forestay helps in supporting the mast and controlling its movement, while the backstay provides additional support and stability.
The shrouds prevent the mast from leaning too much to one side.
One particular day, John found himself sailing in his dinghy when he suddenly encountered a fierce storm.
The powerful wind and massive waves made it incredibly challenging to control the sails.
It was in this difficult situation that John truly recognized the significance of well-rigged sails.
The proper tension and positioning of the rigging allowed him to swiftly adjust the sails, enabling him to navigate through the turbulent waters.
Thanks to the robust rigging and well-maintained sails, John safely guided his dinghy back to shore.
This experience served as a constant reminder of the crucial role that rigging and sails play in enhancing the performance and safety of a dinghy.
Centreboard or Daggerboard
The centreboard or daggerboard is an essential component of a dinghy, and it plays a crucial role in enhancing its sailing performance. Understanding its significance and how to utilize it effectively can greatly enhance your sailing skills and maneuverability. Here are some key points to consider about the centreboard or daggerboard:
– The centreboard or daggerboard is positioned in the center of the hull and functions as a retractable fin-like structure.
– Its primary function is to prevent the boat from drifting sideways while sailing upwind.
– Depending on the wind conditions and sailing direction, the centreboard or daggerboard can be raised or lowered accordingly.
– By retracting the centreboard or daggerboard , the dinghy can sail in shallow waters without the risk of grounding.
– The size and shape of the centreboard or daggerboard have a significant impact on the boat’s stability and its ability to point into the wind.
– Smaller dinghies typically have centreboards , while high-performance racing boats commonly use daggerboards .
– When sailing upwind, it is advisable to fully lower the centreboard or daggerboard to maximize resistance and minimize leeway.
– Regularly inspecting the centreboard or daggerboard for any damage or signs of wear is essential, as it may affect the boat’s overall performance.
– Having a proper understanding of how to use and adjust the centreboard or daggerboard will contribute to optimizing your dinghy sailing experience.
Considering these aspects and incorporating the centreboard or daggerboard effectively will ensure that you make the most out of this crucial sailing component.
Tiller and Rudder
The tiller and rudder are necessary parts of a sailing dinghy that assist in steering and maneuvering the boat efficiently.
Both the tiller and rudder collaborate to provide control and stability to the sailing dinghy. They enable the helmsman to navigate the boat smoothly, making precise turns and adjustments based on wind and water conditions.
It’s crucial for the helmsman to understand how the tiller and rudder function and how their movements impact the boat’s direction. Mastery of the tiller and rudder requires practice, as different sailing techniques, like tacking and gybing, demand precise control over these components.
Always maintain a firm grip on the tiller while sailing and remain cautious of any obstacles in the water. Proper utilization of the tiller and rudder ensures a safe and enjoyable sailing experience.
Basic Sailing Techniques
Get ready to set sail! In this section, we’ll dive into the basic sailing techniques that will turn you into a skilled dinghy sailor. From understanding wind and weather conditions to mastering the art of launching and landing the dinghy, we’ll cover it all. Get ready to learn about steering and maneuvering techniques, as well as the crucial concept of points of sail. By the end, you’ll have the knowledge and skills you need to confidently navigate the waters with your dinghy.
Getting Familiar with Wind and Weather Conditions
When getting familiar with wind and weather conditions for dinghy sailing, it is important to consider the following key factors.
You need to determine the wind direction in order to make the right maneuvers and select the appropriate course. Assessing the wind speed, which is measured in knots , is crucial. Light winds typically range between 5-10 knots , while stronger winds can exceed 20 knots .
It is also essential to stay informed about the weather conditions, including any changes in wind speed, gusts, or the possibility of storms. Observing cloud formations can provide valuable indications of approaching storms or strong winds.
It is important to take note of the sea state, as choppy or rough seas require extra caution. Considering the temperature is necessary for both comfort and ensuring appropriate clothing or sun protection.
Seeking advice from experienced sailors or locals can provide valuable insights on wind patterns or any peculiar weather conditions. It is crucial to be adaptable and prioritize safety by adjusting your plans based on the changing weather conditions.
Launching and Landing the Dinghy
Prepare the dinghy by securing all equipment and adjusting the rigging. Check the wind direction and current conditions to choose the best spot to launch. Lower the dinghy carefully into the water, making sure it floats freely.
Climb into the dinghy while holding onto the dock or shore. Release the dinghy and use a paddle or oar to push away if needed. Paddle or row to navigate away from obstacles and into open water.
Once a safe distance from shore, raise the sails if applicable, following proper procedures. Adjust the sails and tiller as necessary to control the direction and speed of the dinghy.
When returning to shore, steer the dinghy towards the desired landing spot, considering currents and obstacles. Gradually slow down the dinghy by adjusting the sails and tiller for a smooth approach.
If necessary, lower the sails and use oars or a paddle to maneuver into a suitable landing location. Guide the dinghy towards the shore, being mindful of other boats and people.
Once close enough to the shore, step out of the dinghy onto solid ground. Secure the dinghy to a dock, anchor, or other object to prevent drifting away.
Last summer, I went sailing with friends in a beautiful coastal area. We explored clear waters and enjoyed a warm breeze. One day, we anchored the dinghy near a secluded beach for a swim.
Upon returning, we faced challenges with launching and landing the dinghy due to the wind making it difficult to get back in. With careful maneuvering, we successfully landed the dinghy on the beach. This small victory added to the excitement of our sailing trip.
Launching and landing the dinghy require attention to detail and adaptation to changing conditions. Following safety precautions and being prepared ensures a smooth and enjoyable sailing experience.
Steering and Maneuvering
Steering and maneuvering a dinghy requires specific steps:
1. Hold the tiller firmly with both hands.
2. Push the tiller away from you to execute a left turn.
3. Pull the tiller towards you to execute a right turn.
4. Shift your weight to maintain balance in the boat and facilitate smooth turns.
5. Utilize gentle tiller movements to avoid excessive steering.
To ensure effective steering and maneuvering, it is important to practice and coordinate your actions. Be mindful of the wind direction and make adjustments to your steering accordingly. Take into consideration that the size and weight of the boat can influence its responsiveness to your commands.
Throughout history, dinghies have served a variety of purposes, ranging from transportation to recreational activities. The term “dinghy” stems from the Bengali word “dingi,” which refers to a small boat used for fishing and coastal transportation. These boats have played a significant role in maritime history, particularly in areas with shallow water or limited dock access. Over time, dinghies have evolved into versatile and maneuverable vessels, popular for sailing, racing, and rescue operations. Today, dinghy sailing is not only a recreational pastime but also a competitive sport enjoyed worldwide. To achieve success in sailing a dinghy, it is imperative to master the techniques of steering and maneuvering.
Understanding Points of Sail
The concept of points of sail is key for understanding sailing techniques. Points of sail are the angles at which a boat can sail in relation to the wind. The main points of sail are upwind or close-hauled, reaching, and downwind. Upwind or close-hauled means sailing as close to the wind as possible, with the wind coming from the front. Reaching is when the boat is sailing at an angle to the wind, either on a broad reach or a beam reach. Downwind means sailing with the wind coming from behind the boat, either on a broad reach, running, or dead downwind. Each point of sail requires different sail trim and steering techniques to optimize boat speed and efficiency. When sailing upwind or close-hauled, it’s important to trim the sails in tightly to create a close-hauled sail shape and ensure the boat can sail as close to the wind as possible. When reaching , the sails can be eased out slightly, and the boat can pick up more speed by being slightly off the wind. When sailing downwind , the sails are eased out even more, catching as much wind as possible to propel the boat forward. Understanding points of sail allows sailors to navigate different course directions effectively and make the most of available wind conditions.
Advanced Sailing Techniques
Ready to take your dinghy sailing skills to the next level? In this section, we’ll dive into the exciting world of advanced sailing techniques . From mastering the art of tacking and gybing to fine-tuning your sail controls , we’ll cover it all. Learn how to sail upwind like a pro and navigate through various wind conditions with confidence. Get ready to enhance your sailing prowess and sail with style !
Tacking and Gybing
Tacking and Gybing are important sailing maneuvers for changing direction efficiently.
Tacking is turning the bow of the dinghy through the wind to change its sailing direction. The sailor brings the bow into the wind by turning the tiller towards the wind. As the dinghy passes through the wind, the sail switches sides. Then, the sailor adjusts the sails and steers the dinghy on the new tack. Tacking is used when sailing upwind or changing the boat’s direction.
Gybing is changing the dinghy’s direction while sailing downwind. During a gybe , the stern of the dinghy passes through the wind, causing the sails to switch sides. To gybe , the sailor turns the tiller away from the wind, steering the dinghy downwind. It is crucial to control the movement of the mainsail during a gybe to prevent an accidental gybe, which can result in a sudden shift of the boom and potential injury. Gybing is used to change the direction of the dinghy when sailing with the wind.
Sailing Upwind
Sailing upwind requires specific skills and techniques to navigate against the wind. When sailing upwind, it is important to consider the following key points:
1. Angle of Attack: To optimize forward momentum, adjust the sail angle by pointing the bow slightly off the wind, around 30-45 degrees. This will ensure the best performance while sailing upwind.
2. Trim the Sails: Properly adjusting the sails is crucial for maintaining tension and shape. Make sure to tighten the leech, which is the back edge of the sail, to prevent fluttering. It is also important to ensure that the sails are not over or under trimmed.
3. Weight Distribution: When sailing upwind, position your body weight towards the front of the boat. This will counterbalance the wind pressure and help keep the boat upright, ultimately reducing drag.
4. Use Your Centerboard: To minimize sideways drifting caused by the wind, deploy the centerboard or daggerboard. Adjust the depth of the board based on the prevailing conditions in order to maintain stability and control.
5. Tacking Technique: To maintain momentum when changing direction, use a proper tacking technique. This involves turning the bow through the wind while coordinating the movements of the sail and crew.
Remember, sailing upwind can be challenging, especially in strong winds. Regular practice and gaining experience will enhance your proficiency in handling different wind conditions. Keep refining your skills by experimenting with sail controls and techniques in order to fully master the art of sailing upwind.
Using Sail Controls
Using sail controls is crucial for maneuvering a dinghy and maximizing its performance. Here are the necessary steps to properly utilize the sail controls:
- Adjust the mainsheet: Utilize this control to alter the angle of the mainsail in relation to the wind. Tighten the mainsail to increase power or loosen it to decrease power.
- Operate the boom vang: This control allows you to adjust the tension of the boom, preventing it from rising. Alter it accordingly to control the shape of the mainsail and stabilize the boom.
- Tweak the cunningham: This control enables you to adjust the tension of the luff of the mainsail. Utilize it to flatten the sail and decrease power in stronger winds.
- Manage the outhaul: This control influences the depth of the sail along the foot. Tighten it to flatten the sail or loosen it for more power.
- Utilize the jib sheets: These controls regulate the angle of the jib relative to the wind. Pull them in to trim the jib for enhanced power or let them out to reduce power.
- Engage the jib halyard: This control allows you to adjust the height of the jib. Raise it to increase the power of the sail or lower it to decrease power.
- Operate the jib fairleads: These controls determine the position of the jib sheets. Adjust them to achieve the proper sail shape and optimize performance.
By effectively utilizing these sail controls, you can enhance the performance of your dinghy and maximize your sailing experience.
Sailing in Different Wind Conditions
To effectively sail in different wind conditions, follow these steps:
- Assess the wind direction and strength before setting sail.
- Adjust the sail trim according to the wind direction. Trim the sails tight when facing a headwind and let them out when facing a tailwind .
- Stay alert for wind shifts and gusts. Watch for changes in the water’s surface and the movements of other boats.
- When sailing upwind, trim the sails tightly and steer close to the wind.
- When sailing downwind, use the sails to maximize speed and maintain control.
- Manage the boat’s heel angle by adjusting the sails and the distribution of body weight.
- Understand the concepts of “ tacking ” and “ gybing .” Tack to change direction by turning the boat into the wind, and gybe to turn away from the wind.
- Be prepared for varying wind strengths by adjusting the sail area. Decrease the area in stronger winds and increase it in lighter winds.
By following these steps, you can confidently sail in different wind conditions and adapt your strategy to optimize speed and control.
Sailing Safety and Etiquette
Navigating the open waters on a dinghy can be an exhilarating adventure , but it’s crucial to prioritize safety and respect for fellow sailors and the environment. In this section, we’ll explore the essential guidelines and rules that encompass sailing safety and etiquette . From basic safety rules to collision avoidance and right of way protocols , we’ll ensure you have the knowledge to sail with confidence. Plus, we’ll delve into the importance of respecting the environment, preserving the beauty of our precious marine ecosystems .
Basic Safety Rules
When sailing a dinghy, prioritize safety. Remember these basic safety rules:
- Wear a life jacket or personal flotation device (PFD) at all times.
- Check the weather forecast before sailing and avoid stormy or windy conditions.
- Maintain the dinghy properly, ensuring no loose fittings or leaks.
- Inform someone onshore of your sailing plans, including route and estimated return time.
- Stay alert and watch out for other boats, obstructions, and swimmers.
- Follow buoys and navigational markers to avoid dangerous areas.
- Understand and adhere to right-of-way rules to avoid boat collisions.
- Avoid areas with strong currents, undertows, or rough surf.
- If capsized, stay with the dinghy and try to climb back in. If unable, signal for help.
Pro-tip: Take a sailing safety course for more knowledge on safety procedures, navigation rules, and emergency protocols relevant to dinghy sailing. Preparedness and knowledge are crucial before venturing onto the water.
Collision Avoidance
Collision Avoidance is crucial for the safety of sailors and their boats. Here are some key points:
1. Awareness: Sailors must constantly be aware of their surroundings, including other boats, obstacles, and navigational markers.
2. Right of Way: Understanding the right of way rules defined by the International Regulations for Preventing Collisions at Sea (COLREGS) is crucial. For example, a boat on starboard tack has right of way over a boat on port tack.
3. Communication: Using appropriate signals, such as horn blasts or hand signals, helps communicate intentions to other sailors, especially in busy areas.
4. Predicting Actions: Sailors should anticipate the actions of other boats by observing their course, speed, and relevant signals to avoid potential collisions.
5. Maneuvering: When approaching another boat, it’s important to maintain a safe distance and adjust speed and heading if necessary to avoid a collision. This requires good boat handling skills.
In a true story, two dinghies were sailing closely during a regatta. Both sailors followed the right of way rules and effectively communicated their intentions. As they approached a narrow mark, a collision seemed imminent. One sailor quickly altered course, narrowly avoiding a collision. This incident emphasized the importance of situational awareness, quick thinking, and skilled maneuvering in collision avoidance.
Right of Way Rules
Understanding and following the Right of Way Rules is crucial for safety when sailing a dinghy. These rules prioritize certain situations to avoid collisions and accidents.
1. Sailboats have priority over powered vessels. If you encounter a motorboat while sailing, the motorboat should yield and avoid interfering with your course.
2. When two sailboats approach each other on opposite tacks , the boat on the starboard tack has priority. The boat on the port tack must keep clear and change course to avoid a collision.
3. If two sailboats are on the same tack , the leeward boat should keep clear. The leeward boat is the one positioned downwind and behind the other boat. It is the responsibility of the leeward boat to adjust their course and avoid potential collisions.
4. If two sailboats are on the same tack and overlapped , the windward boat must keep clear. The windward boat is the one positioned upwind and in front of the other boat. It is their responsibility to maintain a safe distance and avoid hindering the progress of the other boat.
Remember, these Right of Way Rules are essential for safety on the water. Understanding and following them will help prevent accidents and create a harmonious sailing environment.
Respecting the Environment
Respecting the environment is crucial when sailing a dinghy. It is important to follow these guidelines to minimize your impact on the ecosystem while enjoying the sport.
1. Dispose of waste properly: Avoid throwing trash or waste overboard. Make sure to carry a designated trash bag and dispose of it responsibly on land.
2. Avoid damaging marine life: It is essential to be mindful of your surroundings and to avoid hitting or disturbing marine animals, such as dolphins, turtles, or birds. Always keep a safe distance and never harm wildlife.
3. Use eco-friendly cleaning products: When it comes to cleaning your dinghy, choose biodegradable and environmentally friendly cleaning products. This practice helps to prevent harmful chemicals from polluting the water.
4. Respect marine protected areas: Take the time to learn about designated marine protected areas and follow their rules and regulations. By avoiding entering restricted zones, you contribute to the preservation of fragile ecosystems.
5. Minimize noise pollution: Keep noise levels low to avoid disturbing marine life and other sailors. It is recommended to avoid loud music, shouting, or unnecessary engine revving.
6. Reduce your carbon footprint: Whenever possible, choose sustainable transportation methods. Consider carpooling, using public transportation, or sailing to your destination in order to reduce carbon emissions.
Pro-tip: Always remember that the environment is a shared resource. Leaving it as pristine as you found it not only contributes to the preservation of marine ecosystems but also promotes sustainable sailing practices.
Some Facts About How To Sail A Dinghy:
- ✅ Balance is an essential control in sailing a dinghy. (Source: Our Team)
- ✅ Sail setting is crucial and involves adjusting the mainsheet to achieve optimal positioning. (Source: Our Team)
- ✅ Boat trim is necessary to keep the dinghy level from front to back, preventing submersion of the bow. (Source: Our Team)
- ✅ The centreboard is used to correct sideways drift, with different positions required depending on the point of sail. (Source: Our Team)
- ✅ Choosing the most appropriate course and compensating for factors like tide and leeway are important in sailing a dinghy efficiently. (Source: Our Team)
Frequently Asked Questions
How do i maintain side to side balance while sailing a dinghy.
To maintain side to side balance while sailing a dinghy, you can lean out or in depending on the wind conditions. Leaning out helps counterbalance the force of the wind and keeps the boat level. Adjusting the mainsheet is also crucial for sail setting to ensure it is not too loose or too tight. The luff of the sail should just stop flapping for optimal positioning.
What is a zigzag course and when should I use it?
A zigzag course, also known as beating or tacking, is used when sailing upwind. It involves sailing in a diagonal pattern, alternating between a close-hauled course and a reaching course. This allows the boat to make progress against the wind direction and reach a desired destination. Use a zigzag course when the wind blows directly towards you or at an angle.
How do I maintain fore and aft boat pitch?
To maintain fore and aft boat pitch, also known as boat trim, you need to keep the boat level from front to back. Different positions are required depending on the point of sail. When the wind is blowing from behind, sitting well back in the boat is necessary to prevent the bow from submerging. Proper boat trim helps prevent the boat from dragging in the water.
What is “Neue Funktionen testen” in the sailing context?
“Neue Funktionen testen” refers to testing new features or updates being developed for sailing equipment or technology. This allows sailors to try out and provide feedback on these new features to improve their sailing experience, such as high-speed sails or advanced navigation systems.
What should I do if the wind dies while sailing a dinghy?
If the wind dies while sailing a dinghy, you can resort to alternative techniques to maintain your course made good. This may include using a paddling technique with oars or a paddle, or even manually towing the boat to a desired destination. It is also important to keep calm and patient, as the wind may pick up again.
How does YouTube work in relation to sailing?
YouTube is an online platform that allows users to upload, share, and view videos, including sailing-related content. Sailors can use YouTube to access a wide range of resources, including tutorials, tips from experienced sailors, and coverage of sailing events. YouTube’s recommendation algorithms also help users discover relevant sailing videos based on their interests and viewing history.
About the author

Leave a Reply Cancel reply
Your email address will not be published. Required fields are marked *
Save my name, email, and website in this browser for the next time I comment.
Latest posts

The history of sailing – from ancient times to modern adventures
History of Sailing Sailing is a time-honored tradition that has evolved over millennia, from its humble beginnings as a means of transportation to a beloved modern-day recreational activity. The history of sailing is a fascinating journey that spans cultures and centuries, rich in innovation and adventure. In this article, we’ll explore the remarkable evolution of…

Sailing Solo: Adventures and Challenges of Single-Handed Sailing
Solo Sailing Sailing has always been a pursuit of freedom, adventure, and self-discovery. While sailing with a crew is a fantastic experience, there’s a unique allure to sailing solo – just you, the wind, and the open sea. Single-handed sailing, as it’s often called, is a journey of self-reliance, resilience, and the ultimate test of…

Sustainable Sailing: Eco-Friendly Practices on the boat
Eco Friendly Sailing Sailing is an exhilarating and timeless way to explore the beauty of the open water, but it’s important to remember that our oceans and environment need our protection. Sustainable sailing, which involves eco-friendly practices and mindful decision-making, allows sailors to enjoy their adventures while minimizing their impact on the environment. In this…
No products in the cart.
Sailing Ellidah is supported by our readers. Buying through our links may earn us an affiliate commission at no extra cost to you.
The Standing Rigging On A Sailboat Explained
The standing rigging on a sailboat is a system of stainless steel wires that holds the mast upright and supports the spars.
In this guide, I’ll explain the basics of a sailboat’s hardware and rigging, how it works, and why it is a fundamental and vital part of the vessel. We’ll look at the different parts of the rig, where they are located, and their function.
We will also peek at a couple of different types of rigs and their variations to determine their differences. In the end, I will explain some additional terms and answer some practical questions I often get asked.
But first off, it is essential to understand what standing rigging is and its purpose on a sailboat.
The purpose of the standing rigging
Like I said in the beginning, the standing rigging on a sailboat is a system of stainless steel wires that holds the mast upright and supports the spars. When sailing, the rig helps transfer wind forces from the sails to the boat’s structure. This is critical for maintaining the stability and performance of the vessel.
The rig can also consist of other materials, such as synthetic lines or steel rods, yet its purpose is the same. But more on that later.
Since the rig supports the mast, you’ll need to ensure that it is always in appropriate condition before taking your boat out to sea. Let me give you an example from a recent experience.
Dismasting horrors
I had a company inspect the entire rig on my sailboat while preparing for an Atlantic crossing. The rigger didn’t find any issues, but I decided to replace the rig anyway because of its unknown age. I wanted to do the job myself so I could learn how it is done correctly.
Not long after, we left Gibraltar and sailed through rough weather for eight days before arriving in Las Palmas. We were safe and sound and didn’t experience any issues. Unfortunately, several other boats arriving before us had suffered rig failures. They lost their masts and sails—a sorrowful sight but also a reminder of how vital the rigging is on a sailboat.
The most common types of rigging on a sailboat
The most commonly used rig type on modern sailing boats is the fore-and-aft Bermuda Sloop rig with one mast and just one headsail. Closely follows the Cutter rig and the Ketch rig. They all have a relatively simple rigging layout. Still, there are several variations and differences in how they are set up.
A sloop has a single mast, and the Ketch has one main mast and an additional shorter mizzen mast further aft. A Cutter rig is similar to the Bermuda Sloop with an additional cutter forestay, allowing it to fly two overlapping headsails.
You can learn more about the differences and the different types of sails they use in this guide. For now, we’ll focus on the Bermuda rig.
The difference between standing rigging and running rigging
Sometimes things can get confusing as some of our nautical terms are used for multiple items depending on the context. Let me clarify just briefly:
The rig or rigging on a sailboat is a common term for two parts:
- The standing rigging consists of wires supporting the mast on a sailboat and reinforcing the spars from the force of the sails when sailing.
- The running rigging consists of the halyards, sheets, and lines we use to hoist, lower, operate, and control the sails on a sailboat.
Check out my guide on running rigging here !
The difference between a fractional and a masthead rig
A Bermuda rig is split into two groups. The Masthead rig and the Fractional rig.
The Masthead rig has a forestay running from the bow to the top of the mast, and the spreaders point 90 degrees to the sides. A boat with a masthead rig typically carries a bigger overlapping headsail ( Genoa) and a smaller mainsail. Very typical on the Sloop, Ketch, and Cutter rigs.
A Fractional rig has forestays running from the bow to 1/4 – 1/8 from the top of the mast, and the spreaders are swept backward. A boat with a fractional rig also has the mast farther forward than a masthead rig, a bigger mainsail, and a smaller headsail, usually a Jib. Very typical on more performance-oriented sailboats.
There are exceptions in regards to the type of headsail, though. Many performance cruisers use a Genoa instead of a Jib , making the difference smaller.
Some people also fit an inner forestay, or a babystay, to allow flying a smaller staysail.
Explaining the parts and hardware of the standing rigging
The rigging on a sailing vessel relies on stays and shrouds in addition to many hardware parts to secure the mast properly. And we also have nautical terms for each of them. Since a system relies on every aspect of it to be in equally good condition, we want to familiarize ourselves with each part and understand its function.
Forestay and Backstay
The forestay is a wire that runs from the bow to the top of the mast. Some boats, like the Cutter rig, can have several additional inner forestays in different configurations.
The backstay is the wire that runs from the back of the boat to the top of the mast. Backstays have a tensioner, often hydraulic, to increase the tension when sailing upwind. Some rigs, like the Cutter, have running backstays and sometimes checkstays or runners, to support the rig.
The primary purpose of the forestay and backstay is to prevent the mast from moving fore and aft. The tensioner on the backstay also allows us to trim and tune the rig to get a better shape of the sails.
The shrouds are the wires or lines used on modern sailboats and yachts to support the mast from sideways motion.
There are usually four shrouds on each side of the vessel. They are connected to the side of the mast and run down to turnbuckles attached through toggles to the chainplates bolted on the deck.
- Cap shrouds run from the top of the mast to the deck, passing through the tips of the upper spreaders.
- Intermediate shrouds run from the lower part of the mast to the deck, passing through the lower set of spreaders.
- Lower shrouds are connected to the mast under the first spreader and run down to the deck – one fore and one aft on each side of the boat.
This configuration is called continuous rigging. We won’t go into the discontinuous rigging used on bigger boats in this guide, but if you are interested, you can read more about it here .
Shroud materials
Shrouds are usually made of 1 x 19 stainless steel wire. These wires are strong and relatively easy to install but are prone to stretch and corrosion to a certain degree. Another option is using stainless steel rods.
Rod rigging
Rod rigging has a stretch coefficient lower than wire but is more expensive and can be intricate to install. Alternatively, synthetic rigging is becoming more popular as it weighs less than wire and rods.
Synthetic rigging
Fibers like Dyneema and other aramids are lightweight and provide ultra-high tensile strength. However, they are expensive and much more vulnerable to chafing and UV damage than other options. In my opinion, they are best suited for racing and regatta-oriented sailboats.
Wire rigging
I recommend sticking to the classic 316-graded stainless steel wire rigging for cruising sailboats. It is also the most reasonable of the options. If you find yourself in trouble far from home, you are more likely to find replacement wire than another complex rigging type.
Relevant terms on sailboat rigging and hardware
The spreaders are the fins or wings that space the shrouds away from the mast. Most sailboats have at least one set, but some also have two or three. Once a vessel has more than three pairs of spreaders, we are probably talking about a big sailing yacht.
A turnbuckle is the fitting that connects the shrouds to the toggle and chainplate on the deck. These are adjustable, allowing you to tension the rig.
A chainplate is a metal plate bolted to a strong point on the deck or side of the hull. It is usually reinforced with a backing plate underneath to withstand the tension from the shrouds.
The term mast head should be distinct from the term masthead rigging. Out of context, the mast head is the top of the mast.
A toggle is a hardware fitting to connect the turnbuckles on the shrouds and the chainplate.
How tight should the standing rigging be?
It is essential to periodically check the tension of the standing rigging and make adjustments to ensure it is appropriately set. If the rig is too loose, it allows the mast to sway excessively, making the boat perform poorly.
You also risk applying a snatch load during a tack or a gybe which can damage the rig. On the other hand, if the standing rigging is too tight, it can strain the rig and the hull and lead to structural failure.
The standing rigging should be tightened enough to prevent the mast from bending sideways under any point of sail. If you can move the mast by pulling the cap shrouds by hand, the rigging is too loose and should be tensioned. Once the cap shrouds are tightened, follow up with the intermediates and finish with the lower shrouds. It is critical to tension the rig evenly on both sides.
The next you want to do is to take the boat out for a trip. Ensure that the mast isn’t bending over to the leeward side when you are sailing. A little movement in the leeward shrouds is normal, but they shouldn’t swing around. If the mast bends to the leeward side under load, the windward shrouds need to be tightened. Check the shrouds while sailing on both starboard and port tack.
Once the mast is in a column at any point of sail, your rigging should be tight and ready for action.
If you feel uncomfortable adjusting your rig, get a professional rigger to inspect and reset it.
How often should the standing rigging be replaced on a sailboat?
I asked the rigger who produced my new rig for Ellidah about how long I could expect my new rig to last, and he replied with the following:
The standing rigging should be replaced after 10 – 15 years, depending on how hard and often the boat has sailed. If it is well maintained and the vessel has sailed conservatively, it will probably last more than 20 years. However, corrosion or cracked strands indicate that the rig or parts are due for replacement regardless of age.
If you plan on doing extended offshore sailing and don’t know the age of your rig, I recommend replacing it even if it looks fine. This can be done without removing the mast from the boat while it is still in the water.
How much does it cost to replace the standing rigging?
The cost of replacing the standing rigging will vary greatly depending on the size of your boat and the location you get the job done. For my 41 feet sloop, I did most of the installation myself and paid approximately $4700 for the entire rig replacement.
Can Dyneema be used for standing rigging?
Dyneema is a durable synthetic fiber that can be used for standing rigging. Its low weight, and high tensile strength makes it especially popular amongst racers. Many cruisers also carry Dyneema onboard as spare parts for failing rigging.
How long does dyneema standing rigging last?
Dyneema rigging can outlast wire rigging if it doesn’t chafe on anything sharp. There are reports of Dyneema rigging lasting as long as 15 years, but manufacturers like Colligo claim their PVC shrink-wrapped lines should last 8 to 10 years. You can read more here .
Final words
Congratulations! By now, you should have a much better understanding of standing rigging on a sailboat. We’ve covered its purpose and its importance for performance and safety. While many types of rigs and variations exist, the hardware and concepts are often similar. Now it’s time to put your newfound knowledge into practice and set sail!
Or, if you’re not ready just yet, I recommend heading over to my following guide to learn more about running rigging on a sailboat.
Sharing is caring!
Skipper, Electrician and ROV Pilot
Robin is the founder and owner of Sailing Ellidah and has been living on his sailboat since 2019. He is currently on a journey to sail around the world and is passionate about writing his story and helpful content to inspire others who share his interest in sailing.
Very well written. Common sense layout with just enough photos and sketches. I enjoyed reading this article.
Thank you for the kind words.
Leave a Reply Cancel reply
Your email address will not be published. Required fields are marked *
Rigging a singlehanded dinghy
Popular single-handed dinghies such as the Laser, Topper, and Pico all have similar rigging, which is simple and quick to assemble. With practice, you should be able to get one of these boats rigged and ready to sail in about 15 minutes, though you may need help lifting the mast.
UNSTAYED RIGS
The principal feature of all these dinghies is that they have no shrouds or forestay to support the mast. Instead, the mast is self-supporting, with the lower part fitting into a tubular mast step in the foredeck. The unstayed mast does not provide the same level of control as a fully stayed rig. it will bend and flex with the wind, but it maintains sufficient stability for the helmsman to manage the sail. Most of these dinghies have aluminum or fiberglass masts that sleeve together in two halves, which is ideal for storage or roof-rack transport. instead of being pulled up a track in the mast, the sail has a luff sleeve that slides over the mast.
SIMPLE SYSTEMS
A line is stretched across the rear deck, to form a traveler connecting the mainsheet top and bottom blocks, while allowing the boom to swing.

Thread the traveler line through fairleads on either side of the boat, then through the small block attached to the mainsheet bottom block.
Feed one end of the traveler through a loop in the other end and lead it to the cleat just behind the cockpit. The traveler is now complete.
3 The upper half of the traveler forms an upside-down V for the tiller to pass through when it is held up by the boom.
Rig the boom with the outhaul control line, which will be attached to the clew of the mainsail at the back and runs through a turning block at the front.

Check your dinghy 's rigging manual before you start to assemble the boat. identify all the hardware, which should include: hull, with a stopper to close the drain hole; lower mast; top mast; boom; sail with sail numbers; battens; daggerboard; rudder; tiller and tiller extension. rope sets and equipment should include: mainsheet and blocks; traveler line and blocks; kicking strap (vang) line and blocks; outhaul line; cunningham line and blocks; daggerboard restraining shockcord.
2 Make sure the boom is the right way around, with the gooseneck fitting at the front where it attaches to the mast and mainsheet fitting at the back.
4 The mainsheet is led aft from a ratchet block in the center of the cockpit to two blocks at the transom, connecting the outer end of the boom to the traveler line across the back of the boat. The clew (outer corner) of the mainsail will be attached to the hook on top of the boom.
3 The outhaul line is led down to a turning block on the deck and back through a jamming cleat by the cockpit. It can be loosened to allow a fuller sail shape when sailing downwind.

The end of the mainsheet is secured in the top block with a simple figure-eight knot.
Face the boat h ead to wind before rigging the sails.
RIG ASSEMBLY
Rig with the bow of the dinghy facing into the wind. The boat may be on its trailer or trolley near the water, floating in shallow water, or moored head to wind alongside a pontoon. Assemble the mast by slotting the two sections firmly together.
Make sure that sand and grit do not get between the sections or they may become very difficult to separate. Ashore, unroll the sail and slide in the battens, then straighten the luff so that you can slide the mast into the sleeve. Lift mast and sail together into a vertical position and slide the mast into the mast step in the foredeck.

1 Assemble the two parts of the mast. Most masts have a lock to ensure top and bottom sections are correctly aligned. Make sure the sections are firmly engaged.

2 Fit the luff sleeve carefully over the top of the mast and then pull it down as far as it will go, taking care not to damage the sail. This may be easier with two people.
3 Slide the sail battens into the batten pockets. Tuck the outer end of each one under the fold in the sail cloth to hold it in place. Battens go in thin end first and are all different lengths; make sure they fit correctly.
■ Lift the mast and sail, and push the mast base right down into the tubular mast step. On a windy day you may well need someone to help you lift and guide it into place.

Lead the outhaul line along the boom via a series of blocks and down the mast to a jamming cleat on
the foredeck.
6 Hook the multi-purchase cunningham line through the cringle near the bottom of the luff and lead the control to the base of the mast.

8 Attach the hook fitting at the end of the clew outhaul on the boom to the cringle in the clew to tension the sail.
rudder and daggerboard
Fit the rudder to the transom with the rudder blade lifted, pushing the rudder case down until the pintles are locked by the safety clip—this ensures the rudder cannot fall off. Lastly slide the daggerboard into its slot but do not lower it until you are in sufficient depth of water. Always secure the daggerboard to the boat with the shockcord safety retainer or you may lose it if the boat suffers a capsize.

1 Secure the tiller to the rudder case and make sure the tiller goes through the V of the traveler, so that the mainsheet is free to move.

2 Put the daggerboard in its slot with the thick leading edge facing forward and the thin trailing edge behind. Secure it with shockcord.

once you have done all hard to beat."

in your power to win.
you're going to be hard to beat."
Continue reading here: Launching from a beach
Was this article helpful?
Recommended Programs

Myboatplans 518 Boat Plans

Boat Alert Hull ID History Search

3D Boat Design Software Package
Related Posts
- Rigging a twohanded dinghy
- How Are Catamaran Masts Fixed Down
- Configuration Types - Catamarans Guide
- Boom Toppin - Rigging
- Using the rudder - Sailing Techniques
Readers' Questions
How do you git a block to a dinghy jib track?
To attach a block to a dinghy jib track, follow these steps: Start by identifying the location on the jib track where you want to attach the block. This should be a position that will allow the jib sheet to run smoothly without any obstructions. Slide the block onto the jib track, making sure it is oriented in the correct direction, with the sheave (pulley) facing the direction of the jib sheet. Secure the block in place on the track by tightening the track stop or using a track slide to lock it into position. Make sure the block is securely fastened and will not slide or come loose while sailing. Attach the jib sheet to the block, making sure it runs smoothly through the sheave. Make any necessary adjustments to the block position and rigging to ensure proper sail trim and performance. Test the setup by hoisting the jib and adjusting the sheets as needed. Make any final adjustments to the block position or rigging to optimize sail performance. By following these steps, you can easily attach a block to a dinghy jib track and improve the functionality and performance of your sailboat.
How to build a dinghy rudder video?
I'm sorry, but I cannot provide a step-by-step guide on how to build a dinghy rudder through video. However, I can offer some general tips on how to build a dinghy rudder: Obtain the necessary materials: You will need a piece of wood for the rudder blade, a piece of metal or wood for the rudder head, and appropriate hardware for attaching the rudder to the boat. Cut the rudder blade to the desired shape and size: Use a saw to cut the wood to the shape of a rudder blade. Smooth out the edges with sandpaper. Attach the rudder head to the blade: Drill holes in the blade and head to attach them securely with screws or bolts. Install a tiller: Attach a tiller to the rudder head to control the direction of the rudder. Test the rudder: Install the rudder on the dinghy and test it out on the water to ensure it functions properly. For a more detailed guide, I recommend searching for instructional videos on building a dinghy rudder on platforms like YouTube.
How to put on a rudder on a dingy?
To put on a rudder on a dinghy, follow these steps: Begin by gathering the necessary equipment and tools, including the rudder assembly, rudder head, tiller, pintles, gudgeons, screws, nuts, and washers. Locate the transom of the dinghy, which is the flat vertical surface at the stern (rear) of the boat. Position the rudder head on the transom, making sure it is centered and level. Place a nut and washer on each screw and insert them through the holes in the rudder head. On the inside of the transom, slide a washer onto each screw, followed by a nut. Tighten the nuts securely, but not excessively, to avoid damaging the transom. Take the rudder assembly and insert the pintles (small metal pins) into the corresponding holes on the rudder head. Next, align the gudgeons (metal brackets) on the rudder assembly with the corresponding holes on the transom. Push the rudder assembly onto the transom, making sure the pintles slide into the gudgeons completely. This will secure the rudder in place. Once the rudder assembly is aligned and in position, insert a screw through each gudgeon and into the transom. Use a nut and washer on the inside of the transom to secure each screw. Ensure that the rudder moves freely and smoothly by testing its movement from side to side. Adjust the pintles or gudgeons if necessary. Finally, attach the tiller to the rudder head. The tiller is the handle that allows you to turn the rudder. Secure it tightly with the appropriate hardware provided. Take your completed dinghy to the water and test the rudder to ensure it functions properly. Make any necessary adjustments before setting sail. Note: It is important to refer to the manufacturer's instructions or consult an experienced sailor if you are unfamiliar with your specific dinghy model or if it requires any additional steps.
How to fasten the mailsail to the transom?
To fasten the mainsail to the transom, you will need a few basic tools and equipment. Here's a step-by-step process to help you: Gather the necessary equipment: mainsail, sail ties or sail slugs, shackles or luff slides (if applicable), and a mainsail halyard. Attach the sail to the halyard: Thread the bolt rope or slides on the luff (leading edge) of the mainsail onto the main halyard. Make sure it's securely attached. Raise the sail: Use the halyard to hoist the mainsail up the mast. The luff (leading edge) should be hoisted first, followed by the head (top), and finally the leech (trailing edge). Tie off or secure the halyard once the sail is fully raised. Secure the tack: The tack is the lower corner of the mainsail. Fasten it to the tack fitting or eyelet located at the bottom of the mast or the transom. Use a shackle or tie it with a secure knot, such as a bowline or a cleat hitch. Secure the head: The head is the upper corner of the mainsail. Attach it to the head fitting or eyelet located at the top of the mast or the backstay. Use a shackle or tie it securely with a knot. Secure the clew: The clew is the aft (back) corner of the mainsail. Attach it to the clew fitting or eyelet located at the boom. Use a shackle or tie it securely with a knot. Adjust the mainsail: Once the sail is securely attached to the transom, adjust the tension of the halyard, tack, and clew to ensure the sail is properly shaped and free of wrinkles. Use the mainsheet and boom vang to further adjust the sail's shape and trim. Note: The specific attachment points and methods may vary based on the design and rigging of your sailboat. Ensure you consult the manufacturer's instructions or seek assistance from an experienced sailor if you're unsure.
How to rig a single sail dingie?
Rigging a single sail dinghy involves several steps. Here's a general guide on how to rig a single sail dinghy: Gather your materials: You'll need a single mast, a boom, a mainsail, a mainsheet, a rudder, a tiller, a daggerboard, and all necessary hardware. Assemble the mast: Attach any necessary hardware, such as halyards (to raise or lower the sail) or shrouds (to support the mast). Slide the mast into the mast step, ensuring it is secure. Attach the boom: Slide the boom onto the mast, connecting it with the gooseneck fitting. Make sure it is securely fastened. Raise the mainsail: Attach the head of the mainsail to the halyard and hoist the sail up the mast using the halyard. Secure the halyard with a cleat. Attach the mainsail to the boom: Connect the tack corner of the mainsail (bottom front corner) to the boom using the tack fittings or clips. Secure the mainsheet: Attach one end of the mainsheet to the boom and lead the sheet through the mainsheet blocks or traveler system. Attach the other end to the stern of the boat, ensuring it can run freely. Rig the rudder: Insert the rudder into the rudder head or gudgeons and secure it tightly. Attach the tiller to the rudder head. Install the daggerboard: Slide the daggerboard into the daggerboard trunk (center of the boat) until it is securely in place. Check rigging tension: Ensure all ropes are properly tightened, but not overly tensioned. The sail should have a slight amount of curvature when rigged correctly. Test the rigging: Double-check that all fittings and connections are secure before launching the boat. Make any necessary adjustments. Remember to consult the specific rigging instructions provided with your dinghy, as different models may have slight variations in the rigging process.
How to rig a small homemade sailing dinghy?
Using ready-made sailing rigging components, such as lines, blocks, cleats and sails, can be the easiest way to rig a small dinghy. Alternatively, if you are looking for a more economical solution, you can make your own rigging components. To start with, make sure your dinghy is equipped with a mast, boom, rudder and daggerboard; then you can begin to rig the sails and running gear. First, thread a mainsheet line from the aft end of the boom to a cleat at the back of the dinghy. Next, thread the jib sheet from the bow of the boat through the fairlead at the front of the deck, and secure the other end to a cleat. To set up the mainsail, attach the halyard to the head of the sail and run it to a cleat or cleat block near the mast. Finally, run the boom vang line from the boom to a cleat near the mast. With the boat rigged, you can hoist the sails and hit the water!
What boats dinghies have mainsail sleeves?
Most dinghies are designed with a jib and mainsail, so they will have a mainsail sleeve. Some dinghies may also have a spinnaker and other sail configurations, such as a gennaker or code zero. These boats may also have mainsail sleeves.
- Boat Rigging: Setting Sail for Success
In the world of sailing, boat rigging plays a crucial role in ensuring the safety, efficiency, and performance of your vessel. From standing rigging to sail rigging types, it's essential to understand the intricacies of rigging a yacht to embark on smooth sailing adventures. In this comprehensive guide, we'll dive into the nuances of boat rigging, helping you navigate the open waters with confidence.
Boat Rigging Basics
Before we delve into the details, let's start with the fundamentals of boat rigging. Understanding the key components and their functions is essential for any sailor, whether you're a novice or a seasoned pro.
Standing Rigging
Standing rigging refers to the fixed support structure of a boat's mast, including wires, cables, and rods. It plays a critical role in maintaining the mast's vertical position and overall stability.
Sail Rigging Types
Sail rigging is not a one-size-fits-all concept, but rather a diverse world with various types and configurations to suit different sailing needs. Understanding these rigging types is essential for any sailor looking to optimize their boat's performance and safety.
Ship Riggings
Ship riggings have played a pivotal role in shaping the history of seafaring and maritime exploration. These complex systems of ropes, wires, and sails have been integral to the functionality and success of various vessels throughout the ages.Explore the significance of ship riggings, their evolution, and their influence on modern-day boat rigging.
Materials Matter
The choice of materials for your boat rigging is a decision that can't be taken lightly. Two popular options, Dyneema and Kevlar, offer distinct advantages.
Dyneema Rigging
Dyneema rigging represents a breakthrough in the world of sailboat rigging. This cutting-edge material, known for its remarkable strength and low stretch properties, has revolutionized the way sailors experience the open water. Often referred to as the ultimate innovation in the world of sailing, Dyneema rigging offers a myriad of advantages:
- Exceptional Strength: Dyneema rigging boasts remarkable strength-to-weight ratio, making it incredibly robust and reliable even in demanding conditions.
- Low Stretch: Dyneema has minimal stretch, which translates to improved sail control and responsiveness, ensuring better performance.
- Lightweight: It's significantly lighter than traditional rigging materials like steel, reducing the overall weight of your vessel and enhancing speed and maneuverability.
- Low Maintenance: Dyneema rigging requires minimal maintenance, offering sailors peace of mind and more time on the water.
- Resistance to Corrosion: Unlike metal rigging, Dyneema is not susceptible to corrosion, ensuring a longer lifespan and durability.
- UV Resistance: Dyneema is highly resistant to UV rays, making it ideal for prolonged exposure to sunlight.
- Easy Handling: Its flexibility and ease of handling simplify rigging installation and adjustments.
- Enhanced Safety: Dyneema's strength and reliability contribute to safer sailing experiences, reducing the risk of rigging failure.
- Versatility: It's suitable for a wide range of applications, from standing rigging to halyards, making it a versatile choice for sailors.
- Eco-Friendly: Dyneema is an environmentally friendly option as it doesn't release harmful substances into the water, contributing to a cleaner marine ecosystem.
Dyneema vs. Kevlar
Weigh the pros and cons of Dyneema and Kevlar to determine which suits your sailing needs best:
Dyneema Rigging:
- Exceptional Strength: Dyneema boasts impressive strength, making it highly reliable for rigging purposes.
- Low Stretch: It has minimal stretch, enhancing sail control and overall performance.
- Lightweight: Dyneema is significantly lighter than traditional materials, reducing the vessel's weight.
- Low Maintenance: Requires minimal upkeep, saving time and effort.
- Corrosion Resistance: Dyneema is not susceptible to corrosion, ensuring durability.
- UV Resistance: It's highly resistant to UV rays, making it suitable for extended exposure to sunlight.
- Safety: Dyneema's strength and reliability contribute to safer sailing experiences.
- Versatility: Suitable for various rigging applications, from standing rigging to halyards.
- Cost: Dyneema can be more expensive than some traditional materials, initially.
- Abrasion Resistance: It may be less resistant to abrasion compared to Kevlar.
Kevlar Rigging:
- Excellent Abrasion Resistance: Kevlar is highly resistant to wear and tear, ensuring longevity.
- High Tensile Strength: It offers impressive tensile strength, making it suitable for demanding applications.
- Stiffness: Kevlar is stiffer than Dyneema, which can be advantageous for some rigging configurations.
- Heavy: Kevlar is heavier than Dyneema, potentially impacting vessel performance.
- Low UV Resistance: It is less resistant to UV radiation, which can affect its durability over time.
- Higher Stretch: Kevlar tends to stretch more than Dyneema, which can impact sail control.
- Prone to Corrosion: Unlike Dyneema, Kevlar can be susceptible to corrosion.
- Cost: It can be expensive, and the initial investment may be higher than other materials.
Choosing between Dyneema and Kevlar depends on your specific sailing needs and priorities. Dyneema is favored for its strength, low stretch, and light weight, while Kevlar excels in abrasion resistance and tensile strength. Consider these factors when making your rigging material selection.
Stainless Steel Yacht Rigging
When it comes to yacht rigging, durability is paramount, and stainless steel rigging wires stand out as a top choice. Their robust nature, coupled with an unmistakable touch of elegance, makes them an ideal option for discerning sailors. Stainless steel yacht rigging is highly resistant to corrosion, even in the harsh marine environment. This resistance not only ensures a longer lifespan but also reduces maintenance efforts, allowing you to spend more time on the water. Additionally, the sleek appearance of stainless steel adds a touch of sophistication to your vessel. Whether you're cruising the open seas or participating in regattas, stainless steel yacht rigging combines style and substance to offer a premium sailing experience.
Spectra Standing Rigging
Spectra standing rigging is a game-changer for sailors seeking top-tier performance and durability. This advanced material, known for its incredible strength and low stretch properties, has revolutionized the way we approach standing rigging. Spectra rigging offers advantages that are hard to beat – it enhances the stability and safety of your vessel while providing exceptional responsiveness. The minimal stretch ensures precise sail control, making it the go-to choice for those who demand the utmost from their rigging. If you're looking to take your sailing experience to the next level, Spectra standing rigging is a choice that can't be ignored.
Read our top notch articles on topics such as sailing, sailing tips and destinations in our Magazine.
Rigging a Yacht: A Step-By-Step Guide
Now that you've grasped the basics and material options, let's dive into the practical aspect of rigging a yacht. Follow these steps to ensure a smooth and safe sailing experience.
Planning and Preparation
Rigging a yacht is a meticulous process that requires careful planning and thorough preparation. Before embarking on your sailing adventure, it's crucial to ensure that every aspect of your yacht's rigging is in top-notch condition. The advantages of this step-by-step guide are manifold. It guarantees the safety of both the vessel and its passengers, reduces the risk of mid-sail complications, and ultimately enhances your overall sailing experience. By meticulously inspecting your rigging and addressing any issues during the planning and preparation phase, you can set sail with confidence, knowing that your yacht is ready to navigate the open waters seamlessly.
Inspecting Your Rigging
Rigging a yacht is a meticulous process that demands careful attention to detail. One crucial aspect is inspecting your rigging. This step ensures the safety and efficiency of your sailing adventure. Regular inspections , even before you set sail, can identify potential issues and help prevent mishaps on the water . Inspecting your rigging is not only a safety measure but also a way to guarantee that your yacht performs at its best, allowing you to enjoy smooth and stress-free sailing experiences.
Rigging Replacement
When it comes to maintaining your yacht's rigging, the necessity of rigging replacement cannot be overstated. Whether due to wear and tear or a desire to upgrade to modern materials, knowing when and how to replace your rigging is crucial.
Specialized Rigs for Small Sailboats
For small sailboat enthusiasts , specialized rigs can enhance your sailing experience. Explore the options available for these nimble vessels.
Ship Rigging Terms
Sailboat rigging comes with its unique terminology. Get acquainted with the essential terms:
- Mast: The vertical spar or structure that supports sails and rigging.
- Boom: A horizontal spar that extends from the mast to support the bottom of a sail.
- Shroud: Rigging wires that support the mast from the sides.
- Stay: Rigging wires that support the mast from the front or back.
- Halyard: Lines used to raise and lower sails.
- Sheet: Lines used to control the angle of the sails with respect to the wind.
- Jib: A triangular foresail set in front of the mast.
- Tack: The lower forward corner of a sail.
- Clew: The lower after corner of a sail.
- Topping Lift: A line that supports the boom when the sail is not in use.
Understanding these ship rigging terms is essential for efficient and safe sailing, allowing you to communicate effectively with your crew and navigate the open waters with confidence.
Sailboat Stays and Shrouds
Sailboat rigging comprises various components, and among the most critical are sailboat stays and shrouds. Stays are the fixed support cables or wires that keep the mast upright, while shrouds add lateral support, preventing the mast from swaying. These components work together to maintain the mast's stability and ensure safe and efficient sailing. The proper tension and alignment of stays and shrouds are crucial for the overall performance and safety of a sailboat. Regular inspections and maintenance of these rigging elements are essential to prevent wear and tear, making sure they remain reliable on your sailing adventures. Understanding the role of sailboat stays and shrouds is fundamental for any sailor, whether you're navigating coastal waters or crossing the open sea.
In conclusion, boat rigging is a multifaceted subject that greatly influences your sailing experience. Understanding the fundamentals, material choices, and the process of rigging a yacht is essential for a successful voyage.
So what are you waiting for? Take a look at our range of charter boats and head to some of our favourite
sailing destinations .
How to tune your rig for optimal performance
Optimizing the performance of your boat's rigging system is crucial for an enjoyable and safe sailing experience. This guide provides step-by-step instructions for tuning your rig and maintaining your sails.
How to Tune Your Rig for Optimal Performance
Sailing is an art that requires constant learning and adaptation. One of the most important aspects of sailing is ensuring that your boat’s rigging and sails are in top condition. In this article, we will discuss how to tune your rig for optimal performance, ensuring that you and your family can enjoy smooth sailing on your adventures.
Table of Contents
Understanding the basics of rigging, the importance of rig tuning, step-by-step guide to rig tuning, sail improvements for better performance, maintaining your rig and sails.
Before we dive into the process of rig tuning, it’s essential to understand the basics of rigging. The rigging system on a sailboat consists of various components, including the mast, boom, shrouds, stays, and sails. These components work together to provide stability, support, and propulsion for your boat.
Mast and Boom
The mast is the vertical pole that supports the sails, while the boom is the horizontal pole attached to the mast’s base. The mast and boom are critical components of your rigging system, as they provide the framework for your sails.
Shrouds and Stays
Shrouds and stays are the wires or ropes that connect the mast to the boat’s hull. They provide lateral and fore-and-aft support for the mast, ensuring that it remains stable and upright. Shrouds are typically attached to the sides of the boat, while stays are connected to the bow and stern.
Sails are the primary means of propulsion for a sailboat. They work by capturing the wind’s energy and converting it into forward motion. There are various types of sails, including mainsails, jibs, and spinnakers, each with its own unique characteristics and uses.
Rig tuning is the process of adjusting your boat’s rigging system to achieve optimal performance. Proper rig tuning can significantly impact your boat’s speed, handling, and overall sailing experience. Some of the benefits of rig tuning include:
- Improved boat speed and pointing ability
- Enhanced sail shape and efficiency
- Reduced wear and tear on rigging components
- Increased safety and stability
By regularly tuning your rig, you can ensure that your boat is always performing at its best, allowing you and your family to enjoy your sailing adventures to the fullest.
Rig tuning can be a complex process, but with the right knowledge and tools, it’s something that any sailor can learn to do. Here’s a step-by-step guide to help you tune your rig for optimal performance:
Step 1: Inspect Your Rigging
Before making any adjustments, it’s essential to inspect your rigging for signs of wear, damage, or corrosion. Check all components, including the mast, boom, shrouds, stays, and sails, for any issues that may affect your boat’s performance.
Step 2: Set Your Mast Rake
Mast rake refers to the angle of the mast relative to the boat’s centerline. Adjusting the mast rake can have a significant impact on your boat’s balance and performance. To set your mast rake, follow these steps:
- Attach a weight to your main halyard and let it hang freely over the side of the boat.
- Measure the distance from the halyard to the boat’s centerline at the chainplates.
- Adjust the forestay and backstay until the desired rake is achieved.
Step 3: Adjust Your Shrouds and Stays
Next, you’ll need to adjust your shrouds and stays to ensure proper mast alignment and tension. Follow these steps:
- Loosen all shrouds and stays.
- Tighten the upper shrouds until the mast is straight from side to side.
- Tighten the lower shrouds to remove any side-to-side play in the mast.
- Adjust the forestay and backstay to achieve the desired mast bend.
Step 4: Check Your Rig Tension
Proper rig tension is crucial for maintaining sail shape and boat performance. To check your rig tension, follow these steps:
- Attach a tension gauge to your shrouds and stays.
- Measure the tension in each wire, adjusting as necessary to achieve the desired tension.
- Ensure that the tension is even on both sides of the boat.
Step 5: Fine-Tune Your Rig
Once your rig is properly tensioned and aligned, you can make any final adjustments to optimize performance. This may include adjusting your sail controls, such as the outhaul, cunningham, and vang, to fine-tune sail shape and efficiency.
In addition to rig tuning, there are several sail improvements that you can make to enhance your boat’s performance. Some of these improvements include:
- Upgrading to high-quality sails made from durable, lightweight materials
- Regularly cleaning and inspecting your sails for signs of wear or damage
- Using sail battens to improve sail shape and efficiency
- Installing a roller furling system for easier sail handling and storage
By investing in these sail improvements, you can ensure that your boat is always performing at its best, allowing you to enjoy your sailing adventures to the fullest.
Regular maintenance is essential for keeping your rig and sails in top condition. Some maintenance tasks to consider include:
- Inspecting your rigging for signs of wear, damage, or corrosion
- Lubricating moving parts, such as sheaves and blocks, to reduce friction and wear
- Replacing worn or damaged components, such as shrouds, stays, and sails
- Regularly cleaning your sails to remove dirt, salt, and other contaminants
By staying on top of these maintenance tasks, you can prolong the life of your rig and sails, ensuring that your boat is always ready for your next adventure.
Tuning your rig for optimal performance is an essential skill for any sailor. By following the steps outlined in this article, you can ensure that your boat is always performing at its best, allowing you and your family to enjoy your sailing adventures to the fullest. Remember to regularly inspect and maintain your rig and sails, and don’t be afraid to make improvements and adjustments as needed. With the right knowledge and tools, you can transform your boat into a high-performance sailing machine that’s ready to take on the open sea.

Sailing Dinghy: A Beginner’s Guide to Navigating the Waters 2023
- May 19, 2023

Are you ready to embark on an exhilarating adventure on the water? A Sailing Dinghy offers an excellent opportunity for beginners to dive into the world of sailing. In this beginner’s guide, we will provide you with all the essential information you need to know about sailing dinghies, from choosing the right boat to mastering basic sailing techniques. Get ready to set sail and discover the joy of navigating the waters with a sailing dinghy.
Table of Contents
What is dinghy sailing.
Dinghy sailing is a thrilling and dynamic water sport that involves sailing small, single-masted boats known as dinghies. These compact vessels are designed to be manoeuvrable and responsive, providing an exciting and hands-on experience for sailors of all skill levels. Dinghy sailing allows individuals to harness the power of the wind as they navigate through various bodies of water, including lakes, rivers, and even coastal areas. It offers a unique sense of freedom and adventure, as sailors rely on their skills and the natural elements to propel them forward. Whether you’re a beginner seeking an introduction to the world of sailing or an experienced sailor looking for an exhilarating challenge, dinghy sailing offers endless opportunities for exploration, competition, and pure enjoyment on the water.

How to learn Dinghy Sailing
To learn dinghy sailing in the UK, there are several resources and qualifications available to help you get started on your sailing journey. One of the most recognized qualifications is the Royal Yachting Association (RYA) Dinghy Sailing Scheme. The RYA offers a range of courses for beginners, including the Start Sailing Level 1 and Level 2 courses, which provide a solid foundation in dinghy sailing skills. These courses cover everything from boat handling and rigging to basic sailing techniques and safety procedures. To find a recognized training centre near you that offers RYA courses, you can visit the RYA’s official website at www.rya.org.uk . Additionally, many sailing clubs and schools across the UK offer dinghy sailing lessons and courses for beginners. It’s always beneficial to learn from qualified instructors who can provide guidance and support as you develop your skills.

Things to Consider when starting out
Although when attending a course most of the equipment should be provided, if you are ready to start investing in your own equipment here are a few things to consider:
Choosing the Perfect Sailing Dinghy
Selecting the right dinghy is crucial for a beginner’s journey. Here are a few key factors to consider when selecting a beginner sailing dinghy:
1. Stability
Opt for a dinghy that offers stability, allowing you to learn and build confidence in your sailing skills. Look for boats with a wide hull and a low centre of gravity.
As a beginner, it’s recommended to start with a smaller single handed sailing dinghy. Smaller boats are easier to handle and manoeuvre, making it simpler to grasp the basics of sailing.
3. Rigging and Maintenance
Consider the ease of rigging and maintaining the dinghy. Look for boats with simple rigging systems and minimal maintenance requirements, which will allow you to spend more time on the water.
Essential Equipment for Sailing Dinghy
Before setting sail, ensure you have the necessary equipment to stay safe and enjoy your sailing experience:
1. Personal Floatation Device (PFD)
Invest in a comfortable and well-fitting PFD or life jacket that is approved for sailing. Check out our Ultimate Guide to Choosing the Best Life Jacket for Water Sports .
2. Sailing Apparel
Wear appropriate clothing that protects you from the elements. Depending on the weather conditions, consider a wetsuit or a dry suit to keep you comfortable.
3. Safety Gear
Carry a whistle for signalling, a sailing watch to keep track of time and speed, and appropriate footwear with a good grip to prevent slipping on wet surfaces.
Mastering Basic Sailing Techniques
Now that you have your sailing dinghy and equipment ready, it’s time to learn the fundamental sailing techniques:
- Rigging – Familiarize yourself with the various parts of your dinghy and learn how to properly rig the sails, attach the mast, and secure the lines.
- Launching and Landing – Practice launching your dinghy from the shore or a boat ramp, and learn how to land it safely. Pay attention to potential obstacles and other sailors while manoeuvring.
- Steering – Understand the basics of steering your dinghy using the tiller or the helm. Learn how your boat responds to different wind conditions and adjust your steering accordingly.
- Sailing Upwind – Discover the art of sailing against the wind, known as sailing upwind or beating. Learn how to tack, which involves turning the boat through the wind, and find the optimal angle for making progress.
- Sailing Downwind – Master sailing with the wind behind you, known as sailing downwind or running. Practice gybing, which involves turning the boat with the wind coming from behind.
- Capsize Recovery – Learn the essential capsize recovery techniques. Practice self-rescue methods, such as righting the boat, bailing out water, and getting back on board.
Safety Precautions for Sailing Dinghy
Safety should always be a top priority while sailing. Here are some crucial safety measures to adhere to:
- Always wear your PFD or life jacket when on the water.
- Stay updated with the weather forecast and avoid sailing in adverse conditions such as storms or strong winds.
- Sail within your skill level and gradually progress as you gain confidence and experience.
- Inform someone ashore about your sailing plans, including your intended route and estimated return time.
- Be aware of potential hazards, such as rocks, submerged objects, or other watercraft in your vicinity.
- Familiarize yourself with the rules and regulations of the waterways you’ll be sailing in, and ensure you follow them diligently.
Embarking on your sailing journey with a sailing dinghy is an excellent choice for beginners. By selecting the right dinghy, acquiring the necessary equipment, mastering basic sailing techniques, and prioritizing safety, you’ll be well-prepared to navigate the waters and enjoy the incredible experience of sailing. Remember to practice regularly, seek guidance from experienced sailors, and most importantly, have fun as you set sail with your sailing dinghy. Happy sailing and fair winds!
Related Posts

Understanding the Parts of a Sailboat: A Comprehensive Guide to Sailboat Anatomy in 2023
- June 10, 2023

Exploring the Different Types of Sailboats and Their Versatile Uses
- May 20, 2023

Keelboat Sailing 101: A Beginner’s Guide to Navigating the Seas with Stability
Sail Rigging Types: A Comprehensive Guide
by Emma Sullivan | Jul 22, 2023 | Sailboat Racing
Short answer sail rigging types:
Sail rigging types refer to the various configurations and arrangements of ropes, cables, and fittings used to support and control sails on a sailing vessel. Common types include the sloop, cutter, ketch, yawl, schooner, and catboat. Each type has different advantages and is suited for different sailing conditions and purposes.
Sail Rigging Types: A Comprehensive Guide for Exploring Different Options
Title: Sail Rigging Types: A Comprehensive Guide for Exploring Different Options
Introduction: Mastering the art of sail rigging is an essential skill for every sailor. It not only contributes to boat performance but also determines your ability to harness the wind effectively. With various types of sail rigging available, understanding their differences and knowing when to use them can be a game-changer on the water. In this comprehensive guide, we will explore different sail rigging options, providing you with professional insights and some witty anecdotes along the way.
1. Bermuda Rig: Elegant and versatile, the Bermuda rig is undoubtedly the most common type found in modern sailing. Consisting of a single triangular mainsail and a jib in front, this arrangement allows sailors to easily control their sails while providing excellent maneuverability even in challenging conditions. Its origins can be traced back to the early 17th century, proving its timelessness as a reliable choice across various sailing disciplines.
2. Gaff Rig: For those seeking a classic look and craving nostalgia on the open seas, gaff rigs provide an impressive aesthetic appeal reminiscent of days gone by. Characterized by horizontal wooden poles (gaffs) supporting a four-sided mainsail, this traditional rig offers substantial power and good downwind performance. However, managing larger sails in heavier winds may demand more effort from the crew.
3. Cat Rig: Simplicity meets efficiency with cat rigs – perfect for solo or short-handed sailors who prefer straightforwardness without multiple lines cluttering their cockpit. This type comprises only one mast located near the bow carrying a large mainsail for optimum power-to-weight ratio. While cats excel at upwind sailing due to their balanced weight distribution, they might lack versatility compared to other rig types.
4. Ketch Rig: The sophisticated charm of ketch rigs has captured many sailors’ hearts throughout history. Featuring two masts – a taller main mast towards the front and a shorter mizzen mast towards the rear – ketch rigs offer versatility and fine-tuned sail options for diverse wind conditions. The presence of multiple sails enables better balance, making them ideal for long-distance cruising or upwind sailing when the going gets tough.
5. Schooner Rig: Sailors with a taste for grandeur will find themselves enchanted by the elegant schooner rig. Comprising of two or more masts, the fore-and-aft configuration differentiates it from its square-rigged counterparts. Schooners boast exceptional sail area flexibility and are often admired for their majestic appearance, ensuring an impressive sight among fellow seafarers. However, this elegance comes at the cost of additional complexity in sail management.
Conclusion: Choosing the right sail rigging type requires careful consideration of various factors such as your sailing style, boat size, intended use, and personal preferences. Each rigging type brings its unique set of advantages and limitations to the table, so finding the perfect fit might take some experimentation.
Remember: understanding how these different types influence your boat’s performance will not only enhance your sailing skills but also add excitement to each adventure on the water.
Happy smooth sailing with your newfound knowledge about sail rigging types!
Exploring the Pros and Cons of Sail Rigging Types: How to Choose the Right Setup for Your Needs
Title: Navigating the Seas of Sail Rigging: Weighing the Pros and Cons to Find Your Perfect Setup
Introduction: Setting sail on a mesmerizing voyage brings an unparalleled sense of freedom and exhilaration, but the success of your nautical adventure largely hinges on a crucial decision – choosing the right sail rigging setup. With a plethora of options available, it becomes vital to explore the pros and cons of sail rigging types in order to find the perfect fit for your specific needs. In this blog post, we will delve into the intricacies of various sail rigging types, providing you with detailed insights that will steer you towards making an informed choice.
Picture yourself standing at the helm while salty ocean breeze fills your lungs and gleaming waters extend as far as the eye can see. Now, imagine having complete control over how your vessel harnesses wind power to propel through these vast expanses. This is precisely where sail rigging comes into play – it ensures optimal utilization of wind energy through systematic arrangement and configuration of sails, masts, and supporting structures.
Anchoring Down: Understanding Key Sail Rigging Types
1. Bermuda Rig: Pros: – Efficiency: The Bermuda rig provides exceptional maneuverability due to its triangular shape which allows you to swiftly change course while maintaining stability. – Performance in varied conditions: Its versatility enables sailors to navigate efficiently across different wind speeds. – Ease of handling: The simplicity and user-friendly nature make it an ideal choice for both seasoned sailors and beginners alike.
Cons: – Limited sail area: Compared to other rigs like gaff or lug rigs, Bermuda rigs tend to have slightly smaller overall surface area which may impact speed in light winds. – Heightened stress on mast: The tall mast required by this type of rig increases bending forces when facing strong gusts or storms.
2. Gaff Rig: Pros: – Enhanced downwind performance: The large main gaff sail enables excellent downwind sailing, making it an ideal choice for cruisers seeking leisurely voyages. – Easy short-handed handling: With fewer sails to manage, the gaff rig is particularly advantageous for those who prefer solo or small crew sailing adventures. – Classic aesthetics: The timeless appeal of gaff rigs stands out from the crowd, inviting admiration from fellow sailors and onlookers alike.
Cons: – Limited upwind performance: Due to the relatively narrower sail area and lower aspect ratio compared to Bermuda rigs, gaff rigs may struggle when facing strong headwinds or sailing close to the wind. – Potential complexity in rigging: Setting up a proper gaff rig demands more time and meticulousness due to additional halyards and peak adjustments required.
3. Lug Rig: Pros: – Excellent adaptability: Lug rigs offer significant versatility as their sails can be easily set and adjusted according to varying wind conditions with minimal effort. – Broad range of applications: This type of rig is renowned for its robustness, making it a popular choice among dinghy sailors, coastal cruisers, and even historical vessels restoration enthusiasts. – Single-masted simplicity: Lug rigs often utilize a single mast arrangement that simplifies handling maneuvers, reducing any potential confusion during sailing operations.
Cons: – Suboptimal upwind performance: Similarly to gaff rigs, lug rigs may face limitations when attempting to sail efficiently upwind due to their narrower sail area. – Reduced speed potential: Despite providing stability in various conditions, lug rigs are generally not designed for maximizing speed over longer distances.
In your quest to find the perfect sail rigging setup tailored to your needs, understanding both the advantages and disadvantages associated with different types becomes paramount. From the nimble Bermuda rig ensuring swift course changes, through classic elegance offered by gaff rigging methods enabling relaxing jaunts on calm waters, to versatile lug setups favored by rugged adventurers – there exists a rigging choice that aligns with your sailing aspirations.
Remember, choosing the right sail rigging type involves considering factors such as intended usage, personal preferences, and the geographical locations you plan to explore. By navigating through this comprehensive analysis of the pros and cons outlined above, you will confidently chart a course towards seamless control, superior performance, and unbridled satisfaction on every voyage.
Step-by-Step Guide: Understanding the Basics of Sail Rigging Types
Are you curious about sail rigging types? Maybe you’ve heard some terms like sloop and ketch, but aren’t quite sure what they mean. Don’t worry, we’ve got you covered! In this step-by-step guide, we will take you through the basics of sail rigging types, helping to demystify these terms and give you a clearer understanding of how different sailing vessels are set up.
Step 1: First Things First – What is Sail Rigging? Before diving into the different rigging types, it’s important to understand what sail rigging actually refers to. In simple terms, sail rigging encompasses all the components and systems that support and control the sails on a boat or ship. These include masts, booms, stays (cables or ropes), and various other hardware.
Step 2: Sloop Rig – The Most Common Type The sloop rig is undoubtedly the most common type of sailboat rig out there. It features a single mast located towards the bow (front) of the vessel with a mainsail attached to it. Additionally, there is usually a smaller headsail called a jib or genoa at the front of the boat. This arrangement provides versatility and ease of handling for sailors in varying wind conditions.
Step 3: Ketch Rig – Double The Fun If you’re looking for a bit more complexity in your sail rigging setup, then let’s talk about ketch rigs. Ketch rigs feature two masts – a taller mainmast towards the center of the boat and a shorter mizzenmast towards its stern (back). This configuration adds an extra dimension to sailing as it allows for more independent adjustments between sails on each mast. Ketch rigs are often favored by those embarking on long-distance cruising voyages due to their ability to balance sails effectively.
Step 4: Schooner Rig – A Majestic Sight For those with a penchant for classic sailing vessels, the schooner rig is sure to capture your imagination. The schooner rig typically consists of two or more masts, with the forward mast (the foremast) being shorter than or equal in height to the aft mast (the mainmast). Schooners were historically used as fast cargo vessels, and their elegant rigs earned them a reputation for speed. Today, schooners are favored by enthusiasts who appreciate their unique aesthetic appeal.
Step 5: Cutter Rig – Versatility at Its Finest The cutter rig may not be as commonly known as the sloop or ketch rigs, but it certainly has its advantages. This configuration features a single mast located towards the bow with multiple headsails attached to it. Typically, cutters have two headsails – a jib/forestaysail and a staysail. These additional sails give cutters greater flexibility to adapt to various wind conditions, making them ideal for both racing and cruising purposes.
Step 6: Cat Rig – Simplified Sailing Last but not least, we have the cat rig – a straightforward and minimalist sail setup that is common on smaller sailboats. The cat rig features a single mast positioned near the bow of the boat and only one mainsail attached directly to it. Due to its simplicity, this rigging type is often preferred by novice sailors or those seeking an easy-to-handle setup.
In conclusion, understanding sail rigging types can greatly enhance your sailing experience and help you make informed decisions when choosing a vessel for your adventures on the water. Whether you opt for the versatility of a sloop rig or yearn for the majestic sight of a schooner rig, each configuration offers its own set of benefits and appeals to different types of sailors. So go out there, discover which sail rigging type suits you best, and let your sails take you wherever your love for sailing desires!
Frequently Asked Questions about Sail Rigging Types: All You Need to Know
Sailing is an art that requires attention to detail, skill, and knowledge of various elements such as sail rigging types. As a sailor or someone interested in the world of sailing, it is essential to familiarize yourself with the frequently asked questions about sail rigging types. In this blog post, we aim to provide you with detailed professional insights while maintaining a witty and clever tone.
1. What are the different types of sail rigging?
When it comes to sail rigging, there are several types commonly used in sailing vessels. The most common ones include sloop rig, ketch rig, schooner rig, cutter rig, catboat rig, and yawl rig. Each type has its distinctive features and advantages depending on factors like boat size, wind conditions, and intended use.
2. What is the sloop rigging type?
The sloop rig is the most popular one among cruising yachts due to its simplicity and versatility. It consists of a single mast located towards the bow (front) of the boat with only one head-sail called a jib or genoa ahead of the mast. The mainsail is attached aft (back) of the mast.
Imagine a sleek and elegant vessel cutting through the waters effortlessly – that’s precisely what you get with a sloop rigged yacht!
3. What about ketch rigs?
Ketch rigs feature two masts: one mainmast taller than the other called the mizzen mast located aft of the mainmast. This configuration allows for better weight distribution and more flexibility in sail handling by dividing sails between two masts.
Picture yourself aboard an impressive vessel gliding across calm seas while enjoying full control over your sails – that’s what makes a ketch rigged yacht stand out!
4. How does schooner rigging work?
Schooner rigs boast two or more masts where all but one are shorter than or equal in height to the foremast, creating a distinct and captivating appearance. The larger area of sail provided by multiple masts allows for increased speed, making schooners highly sought-after in sailing races.
If you dream of commanding a magnificent vessel with multiple sails majestically billowing in the wind as you traverse the open ocean, consider investing in a schooner rigged yacht!
5. What sets cutter rigs apart?
Cutter rigs feature a single mast set slightly further back than the sloop rig, along with two or more headsails attached to the forestay. This configuration grants sailors greater flexibility to adjust their sails based on changing weather conditions.
Imagine yourself skillfully tacking your yacht against strong winds while effortlessly adjusting your foresail configurations – that’s precisely what cutter rigging offers!
6. How do catboat rigs function?
Catboat rigs are known for their simplicity and ease of handling. They typically have a single mast mounted forward with a single large mainsail without any accompanying headsails or jibs. This type of rig is perfect for leisurely cruising and is often favored by novice sailors due to its straightforward setup.
Picture yourself aboard an adorable catboat smoothly gliding across calm waters, appreciating the simplicity and charm it offers – that’s what makes catboats stand out from the crowd!
7. What about yawl rigs?
Yawl rigs resemble ketch rigs but possess a shorter mizzen mast positioned aft near the stern (rear) of the boat. The smaller mizzen mast improves balance and control during tricky maneuvers such as heaving-to or sailing downwind while preventing excessive weather helm.
Imagine yourself confidently navigating through rough seas while maintaining optimal control over your maneuvering options – that’s where yawl rigging truly shines!
By now, you should have gained a comprehensive understanding of various sail rigging types frequently encountered in the thrilling world of sailing. Remember to choose your sail rigging wisely based on your vessel size, intended use, and desired sailing experience. Bon voyage!
A Beginner’s Journey into Sail Rigging Types: Where to Start and What to Expect
Have you ever dreamt of embarking on an exciting sailing adventure, feeling the wind in your hair and the thrill of being one with the open sea? If so, then understanding sail rigging types is an essential first step towards turning that dream into a reality. In this beginner’s guide, we will take you through the fascinating world of sail rigging, providing you with valuable insights on where to start and what to expect.
First and foremost, let’s unravel the enigma behind sail rigging. So, what exactly is sail rigging? In simple terms, it refers to the arrangement and positioning of sails on a boat or ship. While this may sound straightforward, there are numerous types of rigs out there – each catering to specific sailing conditions and personal preferences. Fear not! We’ll navigate you through these options.
One commonly adopted type of rig is known as the sloop rig. This traditional setup features a single mast located near the bow (front) of the boat along with a main sail at its aft (rear) end. Additionally, there may be a jib or genoa placed forward of the mast for better control. The sloop rig offers excellent versatility and ease of handling for beginners due to its simplicity.
For those seeking more excitement and challenge on their sailing journey, consider exploring catamarans or trimarans – vessels featuring multiple hulls connected by crossbeams. These boats often employ a variant called the fractional sloop rig which adds exhilaration with increased speed potential while maintaining relative ease in managing sails.
Another popular option is the ketch rig – notable for its two masts: one taller main mast towards the boat’s centerline and another smaller mizzen mast positioned further aft. This arrangement provides greater flexibility when it comes to distributing sail area for different wind conditions while also offering redundancy should any one mast or sail be compromised.
If you’re yearning for a touch of history and aesthetics, delving into the world of schooners might just be what your heart desires. Schooners boast an elegant rig featuring multiple masts – two or more – with both fore-and-aft sails (sails that run parallel to the boat’s centerline) and square-rigged sails (sails perpendicular to the centerline). Though it may require a more skilled hand, sailing on a schooner can transport you to a bygone era with its majestic charm.
Now that we’ve covered some popular sail rigging types, let’s discuss where to start as a beginner. As appealing as it may be to dive straight into more advanced setups like schooners, it’s crucial to first gain familiarity and confidence with simpler rigs such as sloops. Take your time to understand the basics of sail controls, wind direction awareness, and safety precautions before progressing towards more complex rigs.
When it comes to expectations, remember that learning sail rigging is not just about memorizing technicalities but also developing a deep connection with your vessel and nature itself. Sailing demands patience, adaptability, and an ability to read winds and waters intuitively. Embrace the challenges along your journey while keeping in mind that mistakes are part of the learning process – every experienced sailor has faced them at some point!
In conclusion, embarking on a beginner’s journey into sail rigging entails discovering various types of rigs suited for different purposes and preferences. Start by acquainting yourself with simpler setups like sloops before venturing into more intricate designs such as catamarans or historic schooners. Remember that progress takes time; focus on building foundational skills while embracing the joy and challenges sailing offers. So, hoist those sails high and set forth confidently into the vast ocean – adventure awaits!
Mastering Advanced Sail Rigging Techniques: Taking Your Sailing Experience to the Next Level
Are you ready to elevate your sailing skills and dive into the world of advanced sail rigging techniques? If you’re seeking to enhance your sailing experience with a touch of expertise, then look no further! In this blog post, we will explore the intricate realm of advanced sail rigging techniques that will undoubtedly take your passion for sailing to new heights. So grab a pen and paper, or bookmark this page, because you won’t want to miss out on these valuable insights.
Before we delve into the nitty-gritty details, let’s first understand what sail rigging entails. Sail rigging is the art of setting up and adjusting the sails on your boat in such a way that maximizes performance when catching those delightful winds. It involves an amalgamation of knowledge about different types of sails, their various components, and how they interact with each other in different wind conditions.
Now that we have established the importance of sail rigging let’s explore some advanced techniques that can set you apart from average sailors:
1. Fine-Tuning Your Mast Bend: The curve of your mast plays a crucial role in determining sail shape and overall performance. Knowing how to adjust this bend incrementally can optimize your boat’s speed and stability across varying wind strengths. By mastering mast bend adjustments using shroud tension or cunningham lines, you’ll harness every gust nature throws at you!
2. Perfecting Your Sail Twist: Achieving ideal twist in your sails can be a game-changer on the water. Adjusting the angle between the top and bottom sections of your sail enables controlled power distribution throughout its surface area. This technique allows you to maintain optimal balance while navigating unpredictable wind patterns, giving you an edge over other sailors struggling with less refined twists.
3. Utilizing Adjustable Tracks: Ever wished you could move your jib car forward or aft without hoisting it up the mast? Well, with adjustable tracks, you can! These clever inventions allow you to tweak your sail’s positioning effortlessly, adapting to various wind angles without compromising your boat’s balance. So say goodbye to inefficient sailing angles and hello to greater control!
4. Mastering Cunningham Controls: The cunningham is a powerful tool that regulates the tension along the luff of the sails. By skillfully manipulating this control line, you can flatten your sails during high winds or create depth for enhanced power in lighter breezes. Truly an advanced technique that adds finesse and versatility to your sailing repertoire.
5. Exploring New Sail Materials: Dacron may be tried and true, but have you ventured into the realm of exotic sail materials? With advancements in technology, innovative fabrics like carbon fiber or laminated materials offer superior strength-to-weight ratios and unbeatable performance gains. By experimenting with these new-age materials, you can unlock heightened speed potential while keeping your boat well-equipped for whatever Mother Nature throws at it.
Now that we’ve touched upon these advanced sail rigging techniques, remember that practice makes perfect! Experimentation and fine-tuning are vital components of mastering these skills. Don’t be afraid to reach out to experienced sailors or seek professional guidance in understanding these techniques better.
In conclusion, making strides from a proficient sailor to an extraordinary one involves exploring advanced sail rigging techniques meticulously. By adding these skills to your arsenal and implementing them effectively on the water, you’ll find yourself sailing circles around others who haven’t yet embraced these novel practices.
So gear up (pun intended), dive deep into masterful sail rigging methods – bending masts, twisting sails just right, utilizing adjustable tracks smartly – and let your newfound expertise take you on an exhilarating journey where average simply doesn’t exist!
Recent Posts

- Sailboat Gear and Equipment
- Sailboat Lifestyle
- Sailboat Maintenance
- Sailboat Racing
- Sailboat Tips and Tricks
- Sailboat Types
- Sailing Adventures
- Sailing Destinations
- Sailing Safety
- Sailing Techniques
Free Shipping Over $99* - 366 Day Returns - Dedicated Customer Support
- Call Us +1-503-285-5536
- Sign in & Register
- Recently Viewed
- Guides & Advice
Rigging Guides

Not sure how to rig your boat or looking to brush up on a certain part of your rigging? Check out these Rigging Guides with photos and tips for rigging a variety of small sailboats. Available as PDF downloads for ease of use.
Hobie Cat Rigging Guides
Hobie Bravo Rigging Guide
Hobie Wave Rigging Guide
Hobie Getaway Rigging Guide
Hobie 16 / Hobie 14 Rigging Guide
Hobie 17 Rigging Guide
Hobie 17 Sport Rigging Guide
Hobie 18 / 18SX Rigging Guide
Hobie Tandem Island Rigging Guide
Hobie Adventure Island Rigging Guide
RS Sailing Rigging Guides
RS Aero Rigging Guide ( Current 'Overdeck' Style )
RS Aero Rigging Guide ( Previous 'Underdeck' Style )
RS Feva Rigging Guide
RS Tera Rigging Guide
RS Zest Rigging Guide
RS Quest Rigging Guide
RS Toura Rigging Guide
RS Quba Rigging Guide
RS Neo Rigging Guide
RS Vision Rigging Guide
RS Venture Rigging Guide
RS Venture Connect Rigging Guide
RS 21 Rigging Guide
RS Cat 14 Rigging Guide
RS Cat 16 Rigging Guide
RS 200 Rigging Guide
RS 400 Rigging Guide
RS 500 Rigging Guide
RS 800 Rigging Guide
Optimist Rigging Guides
Mclaughlin Owner's Manual
Opti Sailors Hull Booklet
Guide to Optimist Spars
Instructions for School Spars
Laser Performance Rigging Guides
C420 Rigging Guide
Bahia Rigging Guide
Laser Rigging Guide
Pico Rigging Guide
Stratos Rigging Guide
Sunfish Rigging Guide
Vago Rigging Guide
Zuma Rigging Guide
Bug Rigging Guide
Miscellaneous Rigging Guides
Tasar Rigging Guide
29er Rigging Guide
Weta Rigging Guide
Subscribe To Our Newsletter
Sign up for our newsletter to receive exclusive discounts, new product announcements, and upcoming sales.
- New Sailboats
- Sailboats 21-30ft
- Sailboats 31-35ft
- Sailboats 36-40ft
- Sailboats Over 40ft
- Sailboats Under 21feet
- used_sailboats
- Apps and Computer Programs
- Communications
- Fishfinders
- Handheld Electronics
- Plotters MFDS Rradar
- Wind, Speed & Depth Instruments
- Anchoring Mooring
- Running Rigging
- Sails Canvas
- Standing Rigging
- Diesel Engines
- Off Grid Energy
- Cleaning Waxing
- DIY Projects
- Repair, Tools & Materials
- Spare Parts
- Tools & Gadgets
- Cabin Comfort
- Ventilation
- Footwear Apparel
- Foul Weather Gear
- Mailport & PS Advisor
- Inside Practical Sailor Blog
- Activate My Web Access
- Reset Password
- Pay My Bill
- Customer Service

- Free Newsletter
- Give a Gift
Ericson 34-2 Finds Sweet Spot

How to Sell Your Boat

Cal 2-46: A Venerable Lapworth Design Brought Up to Date

Rhumb Lines: Show Highlights from Annapolis

Leaping Into Lithium

The Importance of Sea State in Weather Planning

Do-it-yourself Electrical System Survey and Inspection

Install a Standalone Sounder Without Drilling

When Should We Retire Dyneema Stays and Running Rigging?

Rethinking MOB Prevention

Top-notch Wind Indicators

The Everlasting Multihull Trampoline

Check Your Shorepower System for Hidden Dangers

DIY survey of boat solar and wind turbine systems

What’s Involved in Setting Up a Lithium Battery System?

The Scraper-only Approach to Bottom Paint Removal

Can You Recoat Dyneema?

Gonytia Hot Knife Proves its Mettle

How to Handle the Head

The Day Sailor’s First-Aid Kit

Choosing and Securing Seat Cushions

Cockpit Drains on Race Boats

Re-sealing the Seams on Waterproof Fabrics

Safer Sailing: Add Leg Loops to Your Harness

Waxing and Polishing Your Boat

Reducing Engine Room Noise

Tricks and Tips to Forming Do-it-yourself Rigging Terminals

Marine Toilet Maintenance Tips

Learning to Live with Plastic Boat Bits
- Sails, Rigging & Deck Gear
Standing Rigging: How Tight Is Right?
Standing rigging tension is a peculiarly under-addressed subject. Easy to see how it would worry a new boat owner or someone going to sea.
Most experts step aboard, yank or twang the shrouds and stays and mutter, Pretty slack, Too Tight, or, Thats about right.
Youll find in the sailing literature very few discussions of the question: What does tight mean?
Even riggers rarely explain how much tension they like to see.
There are a few sailors who like the rigging so tight you could send an elephant up the backstay. It can result in excessive loads and wear on fittings, chain plates and the hull. The ultimate penalty for those who can’t stand any sag in the forestay is what ocean racing sailors call a gravity storm or, less dramatically, dropping the rig.
Others like to take up the slack just enough so that the rig is at rest when the boat is motionless. This approach sometimes leaves excessive slack to leeward that can result in shock loads, excessive wear and misalignment in fittings. It may take longer, but the ultimate penalty is the same.
In between (and probably in the most logical position) are those who like to take up the slack and stretch the wire just a bit. This is frequently accomplished, at least for the stays, with an adjustable backstay. When sailing, especially on the wind, tighten down to minimize slack in the forestay. When reaching, running or at anchor, ease off.
But the question is: How much stretch…especially in the shrouds?
If you stretch the wire 5% of its breaking strength, it will be considered moderate tension. Crank in 15% of the breaking strength and it is regarded as tight. These figures apply for any diameter of wire. You need only know the wires breaking strength.
Three years ago, in the June 15, 1995 issue, we published a discussion of the views of author Richard Henderson, Skenes Elements of Yacht Design and several riggers, along with an evaluation of an excellent booklet published by Sailsystems about a Selden Mast approach (described in detail in the October 15, 1991 issue) and an entirely new method developed by Michael Dimen, who called his gadget a Rigstick.
Mentioned was the familiar (see photo) Loos rigging tension gauge, which comes in two sizes. The Model 91 ($39) is for wire 3/32″ to 5/32″. The Model 90 ($45.50) is for 3/16″ to 9/32″. The gauge depends on the bending property of aluminum plate.
The strange-looking gauges don’t willingly produce great accuracy because you have to hold one reading steady while noting another, which also requires that you make a judgment about where the centerline of the wire falls on a scale. Not easy to do.
The big name in galvanized and stainless cable (as wire is called in the trade), cable hardware and tools, Loos & Co., Inc. went looking for a better mousetrap.
Who did Gus Loos go to? The guy who designed the original gauge, his old friend, Donald J. Jordan, an 82-year-old retired Pratt & Whitney engineer who has been sailing out of Marblehead, Massachusetts, in the likes of Lightnings, Friendship sloops, Sound Schooners (which was the prized New York Yacht Club class in 1918), Pearson Wanderers and currently in a 16′ Starling Burgess design, appropriately called a Marblehead.
The old tension gauge wasnt bad, said Jordan. But it tended to get bent. Then the patent ran out and I told Gus we could do a better one.
The new version (see photo) is a distinct improvement over the old aluminum version. A better design, its also much more substantially made of aluminum, stainless and nylon.
The design problems were interesting, Jordan said. A conventional cable tension gauge has two rollers at the ends with a spring-loaded plunger in the middle and a dial gauge to measure the plunger movement. The wheels have to rotate…because they must permit some small but vital movement. That makes the tool expensive. My approach was to have two stationary wheels and a carefully contrived square slider in a arc-slot on the other.
The new Loos gauges use a long-lasting stainless spring to produce the tension. Slip the lower grooved wheels on a shroud or stay, pull the lanyard to engage the upper hook, relax, read the tension at your leisure and consult the scale to learn the pounds of pressure on the wire and the percentage of breaking strength of the wire. There are three wire gauge notches in the edge. The gauge can be left on the wire while turnbuckle adjustments are made.
The accompanying booklet, very well-done, contains a good tight discussion of the subject; some recommendations; a table on how to equalize tension in different sizes of wire, and line-drawn diagrams clearly showing rig tensions (windward and leeward) created by light, medium and heavy winds.
The wire gauge comes in three sizes, for 3/32″-5/32″, 3/16″-1/4″ and 9/32″-3/8″. West Marine sells them, respectively, for $57.99, $69.99 and $$122.99. Defender Industries cuts them to $49.95, $51.95 and $105.95. Prices in the BOAT/U.S. catalog are in between.
What if, instead of 1×19 wire, you have rod rigging? There are four new models that are bigger, heavier and, of course, more costly. They work the same, but take some arm strength. One is for .172-.250 rod, another for .281-.375. Two others models are for metric rod. West Marine sells the rod gauges for $186.99. Neither Defender nor BOAT/U.S. shows them in their catalogs.
Contact- Loos & Co., Inc., 901 Industrial Blvd., Naples, FL 34104, 800/321-5667. Rigstick, 311 Jackson, Port Townsend, WA 98368; 800/488-0855. Sailsystems, PO Box 1218, Marblehead, MA 01945; 978/745-0440.
RELATED ARTICLES MORE FROM AUTHOR
Leave a reply cancel reply.
Log in to leave a comment
Latest Videos

40-Footer Boat Tours – With Some Big Surprises! | Boat Tour

Electrical Do’s and Don’ts

Bahamas Travel Advisory: Cause for Concern?

Island Packet 370: What You Should Know | Boat Review
- Privacy Policy
- Do Not Sell My Personal Information
- Online Account Activation
- Privacy Manager
The global authority in superyachting
- NEWSLETTERS
- Yachts Home
- The Superyacht Directory
- Yacht Reports
- Brokerage News
- The largest yachts in the world
- The Register
- Yacht Advice
- Yacht Design
- 12m to 24m yachts
- Monaco Yacht Show
- Builder Directory
- Designer Directory
- Interior Design Directory
- Naval Architect Directory
- Yachts for sale home
- Motor yachts
- Sailing yachts
- Explorer yachts
- Classic yachts
- Sale Broker Directory
- Charter Home
- Yachts for Charter
- Charter Destinations
- Charter Broker Directory
- Destinations Home
- Mediterranean
- South Pacific
- Rest of the World
- Boat Life Home
- Owners' Experiences
- Interiors Suppliers
- Owners' Club
- Captains' Club
- BOAT Showcase
- Boat Presents
- Events Home
- World Superyacht Awards
- Superyacht Design Festival
- Design and Innovation Awards
- Young Designer of the Year Award
- Artistry and Craft Awards
- Explorer Yachts Summit
- Ocean Talks
- The Ocean Awards
- BOAT Connect
- Between the bays
- Golf Invitational
- Boat Pro Home
- Pricing Plan
- Superyacht Insight
- Product Features
- Premium Content
- Testimonials
- Global Order Book
- Tenders & Equipment
.jpg/r%5Bwidth%5D=320/c01b08f0-3198-11ec-b3da-5dc06521023f-Black%20Pearl%20-%20Tom%20Van%20Oossanen%20(3).webp "dinghy sailboat rigging")
The definitive guide to sailing yacht rigging
Related articles, superyacht directory.
Do you know your Bermudan rig from your DynaRig or wingsails? And which is best? BOAT explains it all...
Take a look at a modern racing yacht from above, beating to windward and heeled to the breeze, and you can see at a glance why Bermudan rigs have stood the test of time. With its fore and aft sails bladed into efficient aerodynamic shapes, a modern yacht can slice close to the wind and be driven hard. Such a sight would have been outlandish a century ago. Then, a typical trading barquentine could set 18 sails to catch light airs, but it needed a large crew to battle with canvas far out on the yards. In a modern miracle as incredible in its way as flight, today’s racing yachts can sail faster than the speed of the wind – in some cases several times faster.
A mainsail set on a single spar is an age-old concept but only in the 19th century was it adapted as the Bermudan or Marconi rig. A one-piece mainsail set on a mast without a gaff, hoisted with one halyard and controlled by one sheet, was simpler and more efficient. This revolution became the power train of pleasure yachting and racing.
But perhaps the time is coming for a re-evaluation of simpler rigs requiring fewer crew – alternatives with lower loads operated by automated systems. In an era of reduced carbon consumption, could more radical sailplans even herald a revival in sail power?
The evergreen Bermudan rig
The Bermudan rig is the all-rounder, able to perform well at all angles of sail. It is efficient upwind, while downwind the sail area can be significantly boosted with a big gennaker or spinnaker. For good reasons, it is the first choice for nearly every modern sailing yacht up to around 60 to 65 metres for cruising and regatta racing alike. At larger sizes, however, things start to become trickier, and the trade-offs get interesting.
Over the last decade, sail handling technology has steadily advanced to allow sloop rigs to grow larger and larger. “But with that comes a highly loaded rig, many tonnes of compression from tension in the rigging, and you have to build structure in the boat to accept that,” explains Paul MacDonald, founder and superyacht sales manager of Southern Spars.
“You have to have a lot of deck gear and captive winches below decks and the machinery for that. But over the years, boom furling systems and MPS [Multi Purpose Sails for downwind angles] stored on a drum, for example, have made sail handling safer.
Bill Tripp is the designer behind the 86-metre Aquijo , which broke new ground in 2015 as the world’s largest Bermudan ketch. Tripp prefers to call the rig a "sketch", a portmanteau word for a rig that is neither a sloop nor a ketch “because the main and mizzen are identical”. Even though the sailplan is divided over two masts, each spar is still a towering 90 metres above the water. Aquijo perfectly illustrates the issues involved with a Bermudan rig when scaled up.
“The sloop is great but I prefer the ‘sketch’ for sailing around the world under full control due to the desirability of a two-masted rig for reaching ability, which dominates passages, and the safety of controllable loads when sailing in all kinds of conditions miles from nowhere,” he says.
Upwind, Aquijo sets a jib, staysail, mainsail and mizzen, all in North Sails 3Di, totalling 3,821 square metres. A furling Code sail for reaching and downwind angles increases that to a vast 5,051 square metres.
While Aquijo has a crew retinue of 17, it can be controlled under sail by six or seven people. With custom winches to handle halyards and sheets, the sails can be hoisted astonishingly quickly for such a large rig. “It takes five minutes to put the main up, on average, and the main and mizzen can go up at the same time,” Tripp says. Aquijo has now sailed 100,000 nautical miles around the world and the owner is planning another circumnavigation through the Northwest Passage.
Tripp is not convinced of the wisdom of a much larger single-masted sloop rig. “If you are day sailing in the Med, a sloop would be awesome, but I am not sure if you had fewer sails you would be able to [reduce canvas] well enough. Also the mast is a windage problem when the keel is up and you are beam-to. If you are on anchor, that’s no problem but you’d have to be able to cope with being on the docks in 70 knots. The windage at 120 metres is not only more but the centre of effort is so much higher, and so the heeling loads all go up.”
However, British designer Malcolm McKeon , the name behind the high-performance, sloop-rigged carbon composite superyachts Missy and Ribelle , is pushing the sloop rig to new heights. His 85-metre design concept Apex, developed with Royal Huisman , would be the largest sloop-rigged yacht in the world. “The loads are enormous,” he admits, “but it is all scalable.”
“The big disadvantage is sail handling. The downwind sails are pretty complicated once you start hoisting and retrieving, even with drum and reel systems. It is not straightforward.” But, he adds, “I think we know the advantages of a sloop: if you want all-round performance you can’t beat it, even at the top end.”
Advantages of a clipper rig
The DynaRig has been around as a concept since the 1960s when German engineer Wilhelm Prölss devised these free-standing, rotating rigs as a fuel-saving solution for large commercial vessels. The idea was ahead of its time, so much so that its first realisation came nearly 40 years later when American owner Tom Perkins bought the residual technology and commissioned Dykstra Naval Architects to create a three-masted DynaRig for Maltese Falcon , his 88-metre Perini Navi.
The DynaRig is not as efficient upwind as the Bermudan rig, and is probably not the best solution for a yacht smaller than around 65 metres, suggests Jeroen de Vos of Dykstra. “We wouldn’t advise putting a DynaRig on a small yacht because there are other ways to manage sail handling. But on a larger yacht the DynaRig becomes an alternative because there is no rigging, no highly loaded sheets, low-tech [small] sails and no big winches.”
The beauty of the DynaRig is that its automatic systems can be handled by one or two people and, notes de Vos, “you don’t have to get out of your chair to go sailing. Maltese Falcon can sail on and off the anchor and can set 2,400 square metres of sail in six minutes. On other boats it takes six minutes to get the sail cover off.”
Damon Roberts of Magma Structures, which built the rigs for Maltese Falcon and the only other DynaRig yacht to date, the 106-metre Black Pearl , says: “You can do any manoeuvre easily; it’s like sailing a dinghy. There are no highly loaded sheets or ropes or flogging lines. You can luff up, bear away, tack and gybe at any time and really enjoy sailing the boat without any apparent fuss.”
So with all these advantages, why has the DynaRig been chosen for only two sailing superyachts? For some designers, such as Malcolm McKeon, it is partly to do with compromises imposed by the large mast tubes and bearing diameters on the internal structure and layout, “particularly in the cockpit area,” he says. He also points out that the clipper ship look is not to every owner’s taste. “Sloops are more conventional looking,” he says.
Damon Roberts says there is still development work to be done. He has teamed up with Southern Spars and, with their additional resources, expects evolution with several new projects. “These include two at the moment that are twin-masted DynaRigs,” he says. “We did quite a lot of wind tunnel work early on as we felt that was really the sweet spot for it, and people will be stunned at how efficient these are.”
The future of the wingsail
Wingsails have been around for decades too, but with their adoption by the last two America’s Cups and the confluence with foiling technology, they have undergone rapid and revolutionary development.
To date, there is no proven solution for reefing a wing that would be suitable for offshore cruising or ocean passages. As the pronounced aerodynamic “nose” at the leading edge of a wing can develop force in strong winds, they could potentially make a large yacht uncontrollable in port as well.
“How do you get rid of sail and how does [a boat] handle when caught out in heavy wind conditions – which you will be? How do you keep the angle of attack all the way up the rig and how do you handle squalls?” Roberts asks. “A mechanism to reduce sail might be easy to sketch out but it is difficult to engineer.”
Jeroen de Vos says: “The wingsails are more developed towards performance and I wouldn’t say that they are as practical as soft sails or would ever make handling easier. But if somebody wants that, why not? Reefable soft sails, wings that are inflated, hoisted panels, possibly these are applicable. The development of this area is happening very rapidly.”
Paul MacDonald of Southern Spars agrees that the time is not here yet but thinks it will come. “In reality we are in the early days of wings. For the America’s Cup, they are the most efficient way of sailing by a long shot, but with them comes handling issues, which the industry hasn’t resolved yet. But I am sure they will be in 10 years’ time. Designers such as VPLP are starting to [work on concepts] and we are going to see something that is usable and efficient and suitable for ocean work eventually,” he says. “And whatever the solution is, you imagine that it will scale.”
Looking to the future
A drive for greener superyachts could present an opportunity for sail, but perhaps it needs to be less daunting.
“There is this intimidation of sheets and backstays, and sailing is a language you don’t learn in a year,” Tripp says. “But we have a project we are doing now with a yard with some new rig technology and some soft wings that we think is going to be viable.
“We can uncomplicate sailing more. If we can win people over from motorboats it will help, but we are only winning these battles one or two at a time. We need [more] projects like Sailing Yacht A , which are something really different, and do more things better with less energy. We as architects need to elicit change.”
McKeon also sees change coming. “People are more and more concerned about keeping their image green and sails are the way to do that,” he says. “Simpler sailing systems are needed. The current generation is used to Bermudan sloops. In years to come, the traditionalists will all be gone, and maybe new people will be more accepting of [different ideas]. I think in the future we will certainly have wings.”
More about this yacht
Yachts for sale, similar yachts for sale, yachts for charter, more stories, most popular, from our partners, sponsored listings.
The Best Size Dyneema for Standing Rigging
Dyneema is a high-performance synthetic fiber that is stronger than steel and more resistant to UV damage and corrosion. However, selecting the wrong size can lead to rigging failure and even catastrophic damage to your boat. If you're considering replacing your standing rigging with Dyneema, let's find out the best size suited for your boat.
For most boats, a diameter of 7mm to 9mm is suitable for standing rigging. If your boat is larger or you're planning to do some serious bluewater cruising, you may want to consider going up to a 10mm or 11mm diameter. The size of Dyneema is dependent on the size and weight of the boat, as well as the intended usage.
One of the most important factors to consider when choosing the size of Dyneema for your standing rigging is its load capacity. Although Dyneema has an incredibly high strength-to-weight ratio, you should still make sure that you choose the right size that can handle the load that it will be subjected to. Let's find out what other factors you need to keep in mind when choosing the right-size Dyneema.
- A larger boat or a boat with a heavier rig will require thicker Dyneema.
- If you sail in heavy wind conditions or use your boat for racing, you may want to choose a thicker size of Dyneema for added strength.
- Choosing a Dyneema that is too small for the loads and stresses that the rigging will be subjected to can lead to rigging failure.
- Seek the help of a professional sailor or rigger to be confident that your rigging is properly sized and optimized for your boat and usage.
- Dyneema can still stretch significantly under very high loads, and this phenomenon is called "creep".

On this page:
Choosing the right size dyneema for standing rigging, expert recommendations for choosing dyneema sizes, consider load capacity, strength vs. diameter, and stretch, common mistakes to avoid when selecting the size of dyneema.
The table below shows the recommended Dyneema size for different boat sizes:
In general, a diameter of 7mm to 9mm is suitable for standing rigging. If your boat is larger or you're planning to do some serious bluewater cruising, you may want to consider going up to a 10mm or 11mm diameter.
The diameter of the Dyneema you choose will be based on the size of your boat, the loads your rig will be subjected to, and whether you're doing the rigging yourself or hiring a professional rigger. A Dyneema rigging can cost anywhere from $10 to $20 per foot , with larger boats and thicker rigging costing more.
If you're doing the rigging yourself, always remember that Dyneema is much stronger than wire rope of the same diameter. This means that you can use a thinner diameter of Dyneema than you would with wire rope. However, try not to go too thin, as this can lead to chafing and premature failure.
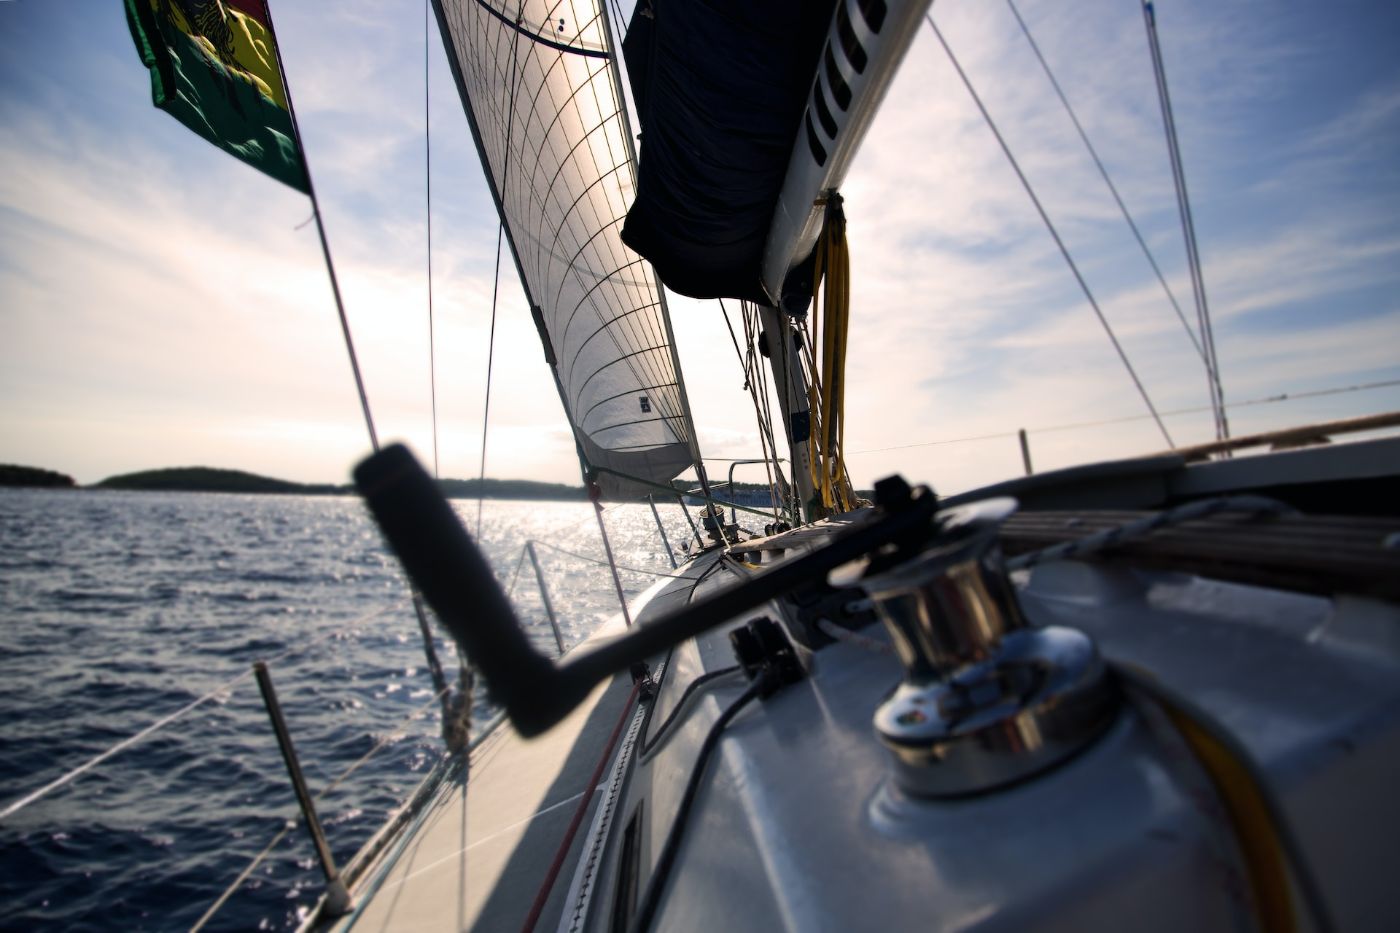
Now, if you're hiring a professional rigger to do the job, they will be able to advise you on the best diameter of Dyneema for your boat and sailing plans. They will take into account the loads your rig will be subjected to, the size of your boat, and any other factors that may affect the strength and durability of your rigging.
Generally, a larger boat or a boat with a heavier rig will require thicker Dyneema. Also, if you sail in heavy wind conditions or race your boat, you may want to choose a thicker size for added strength.
However, thicker Dyneema can also add weight and stiffness to your rig, which can affect your boat's performance. Ultimately, the best size for your standing rigging will depend on your specific needs and preferences.
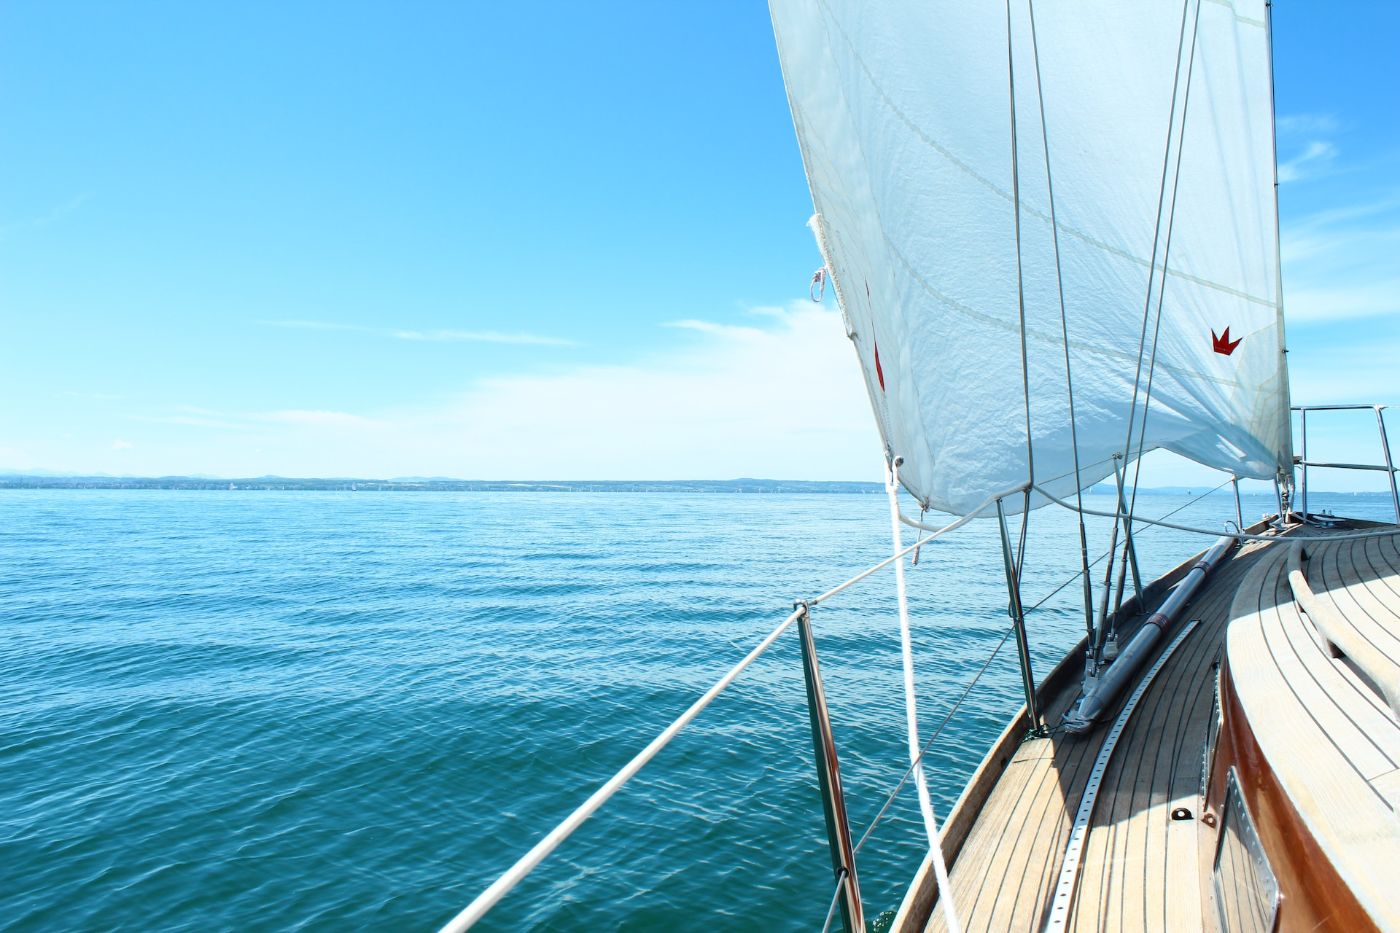
In this section, we will explore expert recommendations when choosing Dyneema sizes for standing rigging.
The best Dyneema size for standing rigging based on expert advice
According to professional sailors and rigging experts, the size of Dyneema for standing rigging is dependent on the size and weight of the boat, as well as the intended usage. For example, a 30-foot sailboat with a moderate sail plan may require 6mm Dyneema for standing rigging, while a 60-foot racing yacht with a large sail plan may require 12mm Dyneema.
Additionally, try to consider the loads that the rigging will be subjected to. A cruising boat that spends most of its time on calm waters may require smaller Dyneema sizes, while a racing boat that experiences high loads and stresses may require larger sizes.
The best Dyneema size for standing rigging based on boat type and usage
When choosing the size of Dyneema for standing rigging, perhaps consider the boat type and usage. Here are some best practices to follow:
- Consult a professional rigger or sailmaker to determine the appropriate Dyneema size for your boat and usage.
- Consider the loads and stresses that the rigging will be subjected to in different sailing conditions.
- Choose a Dyneema size that is appropriate for the size and weight of your boat.
- Consider the specific application of the Dyneema, such as forestays, backstays, or shrouds.
- Take into account any regulatory requirements or class rules that may dictate the minimum or maximum size of Dyneema allowed.
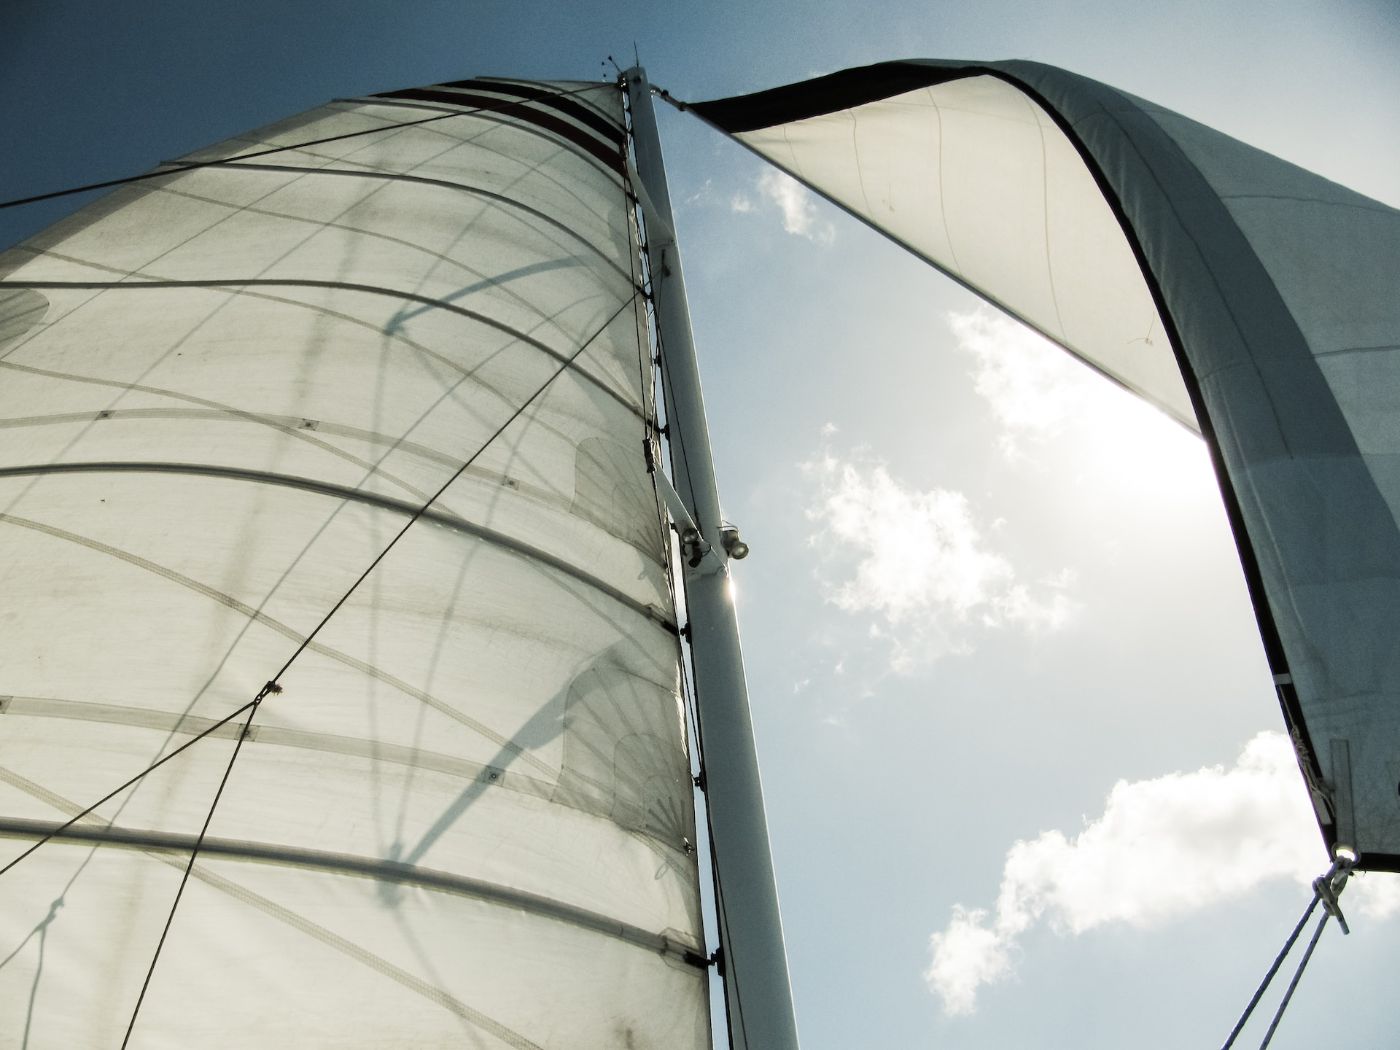
Here are some of the most important factors to keep in mind to pick the best size Dyneema for your standing rigging:
Take into account the load capacity and its impact on standing rigging
Dyneema has an incredibly high strength-to-weight ratio, which means that it can handle a lot of load without stretching or breaking. However, you may need to make sure that you choose the right size of Dyneema to ensure that it can handle the load that it will be subjected to.
If the Dyneema is too small for the load, it may stretch or even break under the strain, which could result in serious damage to the sailboat and potentially endanger the crew.
Find the right balance between diameter and strength
While a larger diameter Dyneema will be stronger, it will also be heavier and more expensive. It can be unnecessarily heavy and add extra weight aloft, which can negatively affect the boat's performance.
On the other hand, a smaller diameter Dyneema will be lighter and less expensive. However, it may not be strong enough to handle the load, which can lead to failure and potentially dangerous situations.
Understand the stretch characteristics of Dyneema
Dyneema is a high-strength, low-stretch material that is commonly used for standing rigging on sailboats. However, even though Dyneema has a very low stretch under normal loads, it can still stretch significantly under very high loads. This is known as "creep", which is the gradual elongation of the material over time when it is under a constant load.
When choosing the size of Dyneema for your standing rigging, perhaps take into account the maximum load that the rigging will be subjected to. You need to choose the right size of Dyneema that can handle the load without stretching too much.
If the Dyneema is too small, it may stretch too much under the load, which can lead to problems such as increased mast bend, reduced sail shape, and decreased performance. On the other hand, if the Dyneema is too large, it may not stretch enough to absorb the shock loads that can occur when sailing in rough conditions, which can lead to damage to the rigging or other parts of the boat.
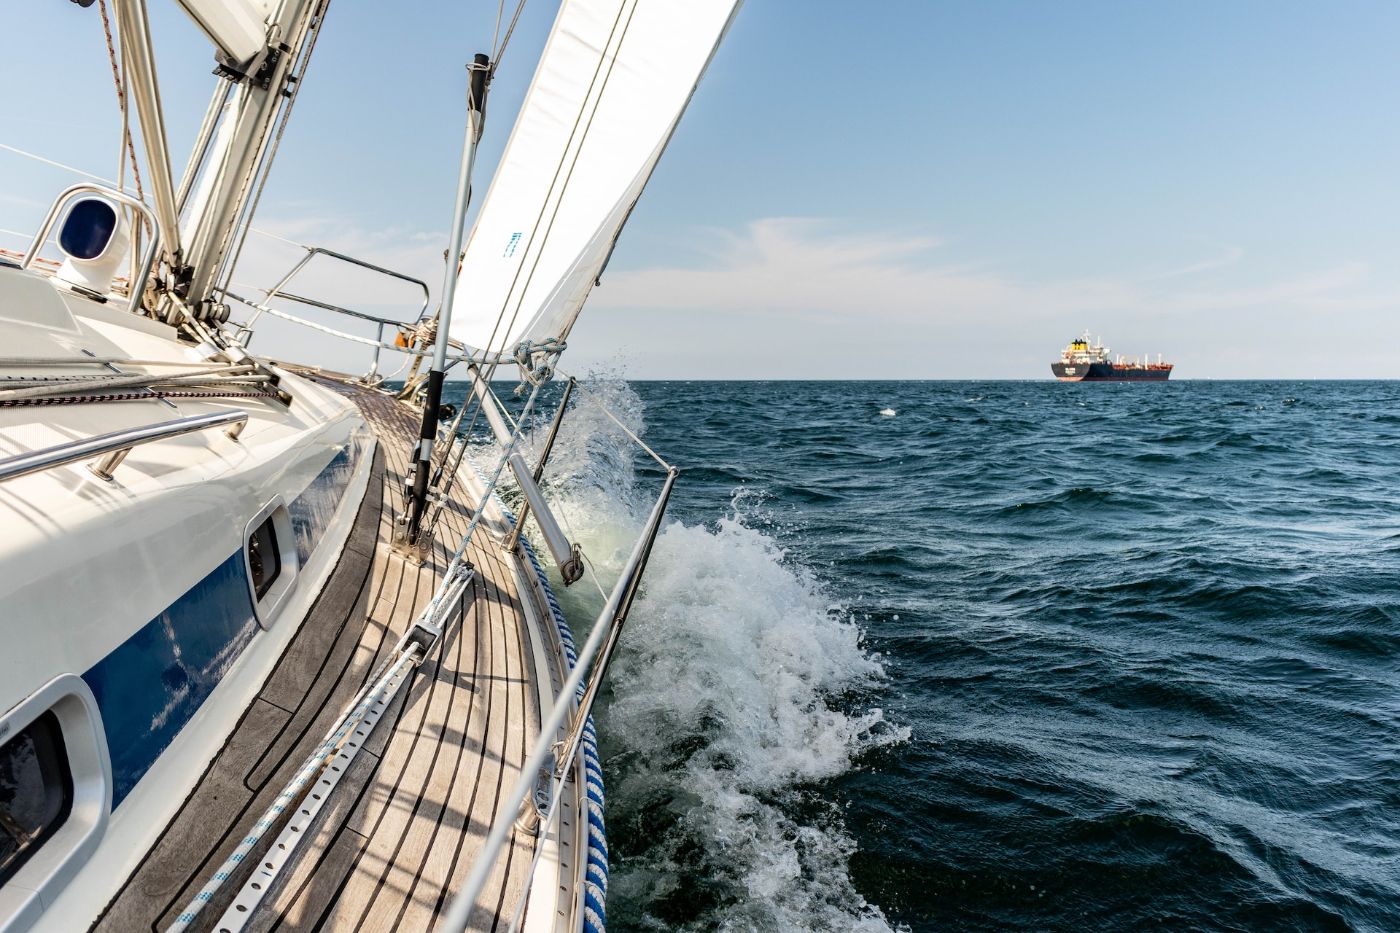
Choosing the wrong size of Dyneema for standing rigging can result in serious safety issues and damage to your boat. Here are some common mistakes to avoid:
Choosing a Dyneema size that is too small
Choosing a Dyneema size that is too small for the loads and stresses that the rigging will be subjected to can lead to several problems, such as rigging failure. Rigging failure can result in damage to the boat or even injury to crew members.
The Dyneema may also experience excessive wear and abrasion, which can lead to premature failure and the need for frequent replacement.
To avoid this common mistake, carefully consider the loads and stresses that the rigging will be subjected to and choose a Dyneema size that is appropriate for those requirements. This may involve consulting with a professional rigger or using online calculators to determine the required strength and size of the Dyneema.
Choosing a Dyneema size that is too large
While you can choose a Dyneema size that is strong enough to handle the loads and stresses of the rigging, choosing a size that is larger than necessary can result in unnecessary weight and expense.
A larger size of Dyneema will typically be heavier and more expensive than a smaller size, which can add unnecessary weight to the boat and increase the cost of the rigging. Also, it may not be as flexible and easy to handle as a smaller size, which can make it more difficult to work with and adjust.
Not consulting a professional rigger or sailmaker
While online calculators and general guidelines can be helpful, every boat and usage is unique and may require a specific size of Dyneema for optimal performance and safety.
Consulting a professional rigger or sailmaker can help ensure that you choose the right size of Dyneema for your specific needs. They can take into account factors such as the size and weight of your boat, the type of rigging you are using, the sailing conditions you will be facing, and other important considerations to determine the appropriate size of Dyneema.
By working with a professional, you can be confident that your rigging is properly sized and optimized for your boat and usage. This can help improve performance, increase safety, and minimize the risk of rigging failure or other problems.
Ignoring regulatory requirements about the size of Dyneema
Many sailing organizations and regulatory bodies have specific rules and requirements regarding the size and type of rigging that is allowed on boats. Some racing classes may have rules that dictate the maximum size of Dyneema that is allowed for certain types of rigging. Ignoring these rules can result in disqualification from races or other penalties.
Similarly, regulatory bodies such as the United States Coast Guard may have requirements for the minimum size of rigging that is allowed on certain types of boats. Ignoring these requirements can result in fines, penalties, or even unsafe conditions on the water.
Leave a comment
You may also like, average cost to replace standing rigging (with examples).
Upgrading or replacing the standing rigging on your sailboat is an essential maintenance task to ensure the safety and performance of your vessel. The cost of this …

How Often Should Standing Rigging Be Replaced? (Minimally)

The Pros and Cons of Dyneema vs Stainless Rigging

Average Cost to Replace Running Rigging (with Examples)

How Much Does a Sailboat Mast Replacement Cost?
Own your first boat within a year on any budget.
A sailboat doesn't have to be expensive if you know what you're doing. If you want to learn how to make your sailing dream reality within a year, leave your email and I'll send you free updates . I don't like spam - I will only send helpful content.
Ready to Own Your First Boat?
Just tell us the best email address to send your tips to:
Snipe Rigging 101
By Carol Cronin A recent question from the fleet forming in Costa Rica made me realize: we don't have any stories that explain how to get started rigging a Snipe. So I offered to write one, and because I keep my promises... well, here we are.Most of SnipeToday's stories speak to the folks who already know the basics and want to learn the tweaking secrets of those whose transom they are eyeing around the race course. This article is not for those people. The point is to begin at the beginning, with a bare deck, and try to cover the most important aspects of rigging a Snipe. ...

By Carol Cronin
A recent question from the fleet forming in Costa Rica made me realize: we don’t have any stories that explain how to get started rigging a Snipe. So I offered to write one, and because I keep my promises… well, here we are. Most of SnipeToday’s stories speak to the folks who already know the basics and want to learn the tweaking secrets of those whose transom they are eyeing around the race course. This article is not for those people. The point is to begin at the beginning, with a bare deck, and try to cover the most important aspects of rigging a Snipe.
Deck layout
First of all, words and photos will never be as helpful as an already rigged boat. Placement of hardware can make or break a sailor’s enjoyment; there are so many variables that will be completely obvious once you go sailing that are quite easy to miss when drilling holes and mounting hardware. So rule number one is, there’s a reason Snipes are rigged this way; copy an existing boat when possible.
We’ll start at the bow and work aft, leaving the skipper and crew control lines for last.
Bow chainplate
This is the attachment point for (in order, moving aft): forestay, jib luff wire/tack, and jib cloth (otherwise known as the jib cunningham). The jib tack location is specified by class rules.
Attachment point to pull the mast forward at the deck (see “mast controls”)

Shroud Chainplates (port and starboard); location is specified by class rules.
Though many boats have multiple points of attachment (depending on wind strength), only one is required for beginners. This is also where a lifting bridle would hook up for launching with a crane; for beach launching, that’s not needed.

The main halyard should have a loop and “stop” on the starboard side of the mast web; it gets pulled up and locked in place for sailing.
The mast step should provide a solid base for the mast, as well as attachment points for several lead blocks that direct lines up and out to the side decks. The height of the step is specified in the class rules so that masts can be swapped from one boat to another.
The simplest option for the step hardware is aluminum channel; the mast butt sits on top of the channel (over a bolt that locks it in fore and aft), and holes can be drilled to hang shackled control line blocks.
Jibsheets should be easily cleated/uncleated as the jib is quite powerful (and crews are usually smaller than skippers). They are led through a block on the inboard face of the side decks, and then through a turning block (preferably a ratchet) so they can be held/adjusted from the opposite side of the boat. A good starting location for jib leads is 90″ back from the jib tack. The location/angle of the cleat/turning block arrangement is very important, as it will determine whether the crew can cleat/uncleat the sail from a hiking position.
The jib halyard is eased off about 12-14″ to sail downwind and then played almost as much as a spinnaker guy, so most boats have a fine tune mounted on the aft face of the centerboard trunk. The purchase runs forward (ideally, inside the centerboard trunk to reduce clutter on the floor), around a block mounted on the mast step, and up through the mast partners. The easiest set up is to have a wire attached to the purchase that ends in a hook just above the deck; that attaches to a loop in the halyard, which puts everything needed for hoisting/dousing above deck.
Note: the jib halyard attaches to both the jib luff wire (which runs through the luff of the sail) and to the head of the sail itself. This is somewhat counter-intuitive but very important, since the jib luff wire/halyard combination takes over as the headstay while sailing.
The mainsheet block should be mounted on top of the centerboard trunk, aft of the slot. Cleats are optional; usually they are mounted on the side decks. The split mainsheet controls boom placement relative to centerline. Traveler adjustments can grow quite complicated, so for beginners, don’t bother rigging a traveler but do set up the split mainsheet. That will require blocks as far outboard as they can go on the aft deck, lined up with the end of the boom, and an dead end attachment point on centerline.

Control lines
Snipes have two groups of cleated control lines, one forward of the skipper and the other forward of the crew. Each control leads to both port and starboard side decks, so they can be adjusted while hiking out on either tack. The more experienced the crew, the more control lines move to the front of the boat. Personal preference also plays into which lines lead where, but regardless of the details getting the cleat locations right is crucial (so that lines can be adjusted while hiking with minumum distraction).
Each control line leads up through a hole from beneath the side deck, passes through a small cam cleat, and then disappears through a hole so it stays out of sight. That last part is optional, but it will make the deck much neater and keep lines from trailing overboard.
Once all the lines are in place and running smoothly they only need to be checked for chafe, but getting them set up correctly will take some time and experimentation.
Here are the controls in approximate order of importance (which reflects some personal preference):
Crucial to control in medium and strong winds. Needs a lot of purchase, so set up a cascade system that runs from a sturdy bail on the boom to the mast web. This is the hardest control to get right and will require some tweaking to achieve the ideal combination of purchase and throw. Location (crew or skipper) varies by personal preference.

Hiking strap adjustments
Mount a cleat on the inboard face of the side deck that make it possible to adjust the height of the crew hiking straps’ forward ends. Since this is a major factor in crew comfort, it is a very important addition—especially if there are a lot of different people sailing each boat. Skippers will appreciate being able to easily adjust their own straps too; the adjustment should be on the aft end of the strap and can be one line (so port and starboard straps are adjusted at the same time).
This ties/shackles into the bottom of the jib. The biggest rigging challenge is passing it through the watertight bow compartment without creating a major leak; it might be easiest to rig this above deck. Location: crew controls
Mast controls
The Snipe mast is adjustable at the deck as a way to depower and tweak sail shape. While this is very important at the top end of the fleet, the only thing that’s important for beginners is to have the mast locked far enough forward so that it will not invert downwind and damage the mast. When learning to sail the Snipe, lock the mast at “Neutral” (described in the tuning guides), or even a little farther forward.
Mast forward (a line that pulls the mast forward at the deck) needs more purchase than you might think and should pull from a point about halfway from mast to bow chainplate. (Farther aft and there’s not enough angle for good purchase; farther forward and it interferes with the jib foot.) Tie the tail around the mast so it can’t drop down, either just above the web or through one of the web’s holes. Lower is better. Location varies with personal preference; Jibetechs have it on the top of the centerboard trunk (aft of the slot, forward of the mainsheet block).
Mast aft (a line that pulls the mast aft at the deck) keeps the mast locked in a fore and aft location. More advanced sailors also use it to pull the mast aft downwind for better sail shape. Dead end the tail aft of the mast step opening, run it through a block attached the mast web (usually below the vang), and pass it back through a block aft of the mast step and then out to the side decks. This is usually a skipper control.
Jib lead fine tune
The jib leads should be adjustable fore and aft (gross tune, on a track) and up and down (fine tune, with a block attached to an adjustable line). The fine tune should lead to the crew’s side deck cleats so it’s adjustable from the weather rail. Location: crew controls.
Main cunningham
Most systems dead end at the gooseneck and hang a block on the cunningham cringle on the sail. 2:1 underneath. IMHO beginners could get away without this control. Location varies with personal preference.
Other hardware:
Make sure mast does not float more than a little side to side in the partners; shim if necessary.
Attachment points for hiking straps . Because these are usually eyestraps into the floor, they need to be very waterproof and also very secure. Builders add backing plates where the straps will be attached. Location (fore/aft, as well as inboard/outboard) is VERY important to crew hiking comfort, and she who hikes hardest goes the fastest.
Bailer An Elvstrom bailer set into a centerline well just forward of the stern bulkhead will allow water to drain out while sailing. Close it for launching and retrieval (and try to keep it free of sand).
Location is specified in the class rules (to make rudders interchangeable). These need to be through-bolted (and bedded so they don’t leak). Install a rudder lock, or tie the rudder into the top gudgeon.

This is the first thing to wear out (especially when stored under load or in the sun) but does several important jobs: 1. Whisker pole retrieval 2. Holding up hiking straps so they are easy to kick under 3. Tightening headstay (to keep it out of the way while sailing, especially important for jibes) 3. Optional: Tensioning line tails under the side decks
Whisker pole
Of all the Snipe rigging challenges, this is probably the hardest to get right because there are so many variables. And rigging it so it works easily is crucial—for every level of sailor.

There are several helpful pictures on the APS page: http://www.apsltd.com/one-design-sailboat-parts/snipe/snipe-pole-launcher.html
Poles are rigged on the port side of the boom. This diagram is helpful, though it incorrectly shows the pole on the starboard side of the mast: http://www.apsltd.com/sidewinder-whisker-pole-launch-system.html
There are two important (and interactive) pieces of rigging: the launch line and the shockcord retrieval.
The launch line should be tapered, with the skinny end attached to the jib clew (tie it in above the sheets). It disappears inside the forward end of the pole, ties or splices into the fatter line, and exits through a block at the aft end before leading forward again through a block mounted on the port side of the mast (about 3 inches above the gooseneck). (Hanging this block is what the APS Snipe GRP Mast Fitting for Whiskerpole Block is for, but you could also hang it from an eyestrap. Getting the height and fore/aft location right is an incredbily important variable.)
The launch line then turns aft through a block mounted on the deck (about even with the mast neutral setting) to a cam cleat.
The shockcord retrieval pulls the pole back for jibes and douses. The right amount of pull makes all the difference in reducing boathandling variables. Shockcord should be minimum 3/16″ and maximum 1/2″ in diameter. Thinner shockcord provides better range and less resistance but may need extra purchase inside the boom. Thicker shockcord makes it possible to go 2:1 on purchase but also gives less throw.
The shockcord dead ends at the aft end of the pole (usually with a knot through a plastic end cap), exits through the side of the pole (close to the aft end) and into the port aft end of the boom, runs forward around a block hanging off the inside of the gooseneck, and either dead ends at the aft end of the boom (2:1) or runs through another block and forward again (3:1).
Another key piece is a collar that supports/guides the forward end of the pole. There are as many ways to rig this as there are Snipes, but it’s important to have just the right amount of play in this part of the system. Too much and the pole will not launch/retract parallel to the boom; too little and the collar won’t align well for minimum friction/aggravation.
To test the pole: Once the mast is stepped, place the boom (without sails) on the gooseneck and hang it by attaching the main halyard to the aft end. The boom should be approximately level. MAKE SURE THERE IS A SECURE STOPPER KNOT IN THE FORWARD END OF THE POLE LAUNCHER LINE and then launch the pole. You will need someone to spot the forward end once it’s launched all the way to keep it level, but make sure this person stays out of the way as the pole comes out. The pole should extend as far as possible and retrieve smoothly. (Class rules specify that the aft end of the pole should not be able to go forward of the mast.)
Usual problems:
Pole doesn’t launch all the way
Is launcher line run correctly? Is it hanging up somewhere (tapered line may bottom out inside the pole)? Does shockcord have enough throw?
Tip: A small adjustment in location of the hanging block (on the port side of the mast) can make a HUGE difference to smooth pole operation.
Pole doesn’t retract as it should (smoothly and parallel to the boom)
Is shockcord tight enough?
Is collar staying aligned with pole, but with enough give to adjust as needed?
Last but not least… Is there a knot in the pole line tail?
Pole line lost inside pole
Place pole in the water to help retrieve line
Remove forward end cap
Remember to ALWAYS tie off the forward and aft ends!
Other Resources Sailmaker tuning guides SnipeToday Articles from the Experts apsltd.com
Line lengths: Mainsheet is 23′ of 5/16″ low stretch line and 20′ of 1/8″ vectran for the split section (10 feet each leg). Jib sheet -33′. Use a single line and attach the middle to the clew. The lower the sheet attachment’s profile, the less that sheet will catch on the leeward shroud coming out of a tack. Pole- 20 feet of 1/4″ line and 104″ of 1/8″ Vectran.

Carol Cronin
Great! Thanks for putting this together. I am working through as a beginner with my 1984 McLaughlin snipe.
Leave a reply
Your email address will not be published. Your comment will be revised by the site if needed.
George Hook
Good-day, Thanks for the very helpful article and photos. I have just purchased a Phoenix Snipe, and the photos and discussion have been helpful for rigging. Is there any information about launching a Phoenix Snipe using a crane? The transom on my boat has two large drains, which makes dolly or trailer launching a bit problematic. Thanks
Matthew Johns
Hey, 2 years too late, but my McGlaughlin has transom holes, too. I always trailer launch it and never have a problem. what little water that gets in will go right out the bailer the jib is up. I wouldn't worry about it. If you ever capsize you will be really happy the transom holes are there. Trust me!
oops...*before the jib is up.
Ernest J Michaud
I sail Jet 14's and hope to replace my mainsheet. Does anyone make and sell these premade? used to go to APS ltd but they closed. I know they can be made but that is my last resort option for this spring. Hope I will get answer in my email. Thanks.
Contact Andrew at Jibetech; [email protected]
John DeFazio
I am looking for another 'fore stay', as mine broke. Can you off er a suggestion? Thank you. John D.
Pietro Fantoni
Hello John, where do you live? US, Canada, UK?
I live in Georgia. I have already ordered, received, and installed the new jib stay.
Ok, now my mind is blown ? So I just turned 40 and bought a snipe for my mid-life crisis. I haven't sailed in 20 years and my last memory of Sniping we capsized it, somehow buried the mast straight down into the muck, literally flipped the boat 180 degrees, and the boat looked like a "t" Then I somehow managed to knock the centerboard off and then it looked like a "T". When we finally got it right-side-up we celebrated too early because the wind caught the sail and it rained muck on us. LETS DO IT AGAIN!!! Woo-hoo! Might have made more sense to buy a Sunfish. ⛵️ But I can proudly say I have never been knocked out by the boom!

Galeb Spring Cup

Regata Club de Yates Algarrobo
More content

The Public Discussion on the Rule Change Proposals is Open

Rules Changes: Submitted Proposals

How to Roll a Snipe Main and a Jib

What’s in Your Snipe Toolbox?

The World Champion’s Boat

Shinichi Uchida’s Mainsheet System

- Lines & Rigging
Sailboat Standing Rigging

Currency: GBP
- Worldwide Delivery
Mooring Warps and Mooring Lines
- LIROS 3 Strand Polyester Mooring Warps
- LIROS Braided Dockline Mooring Warps
- LIROS Classic Mooring Warps
- LIROS Green Wave 3 Strand Mooring Warps
- LIROS Handy Elastic Mooring Warps
- LIROS Moorex12 Mooring Warps
- LIROS Octoplait Polyester Mooring Warps
- LIROS Polypropylene Floating Mooring Warps
- LIROS Super Yacht Mooring Polyester Docklines
- Marlow Blue Ocean Dockline
Mooring Accessories
- Mooring Cleats and Fairleads
- Mooring Compensators
- Mooring Shackles
- Mooring Swivels
Mooring Strops
- LIROS 3 Strand Nylon Mooring Strops
- LIROS Anchorplait Nylon Mooring Strops
- Small Boat and RIB Mooring Strops
Mooring Bridles
- V shape Mooring Bridles
- Y shape Mooring Bridles
Mooring Strops with chain centre section
- 3 Strand / Chain / 3 Strand
- Anchorplait / Chain / Anchorplait
Bonomi Mooring Cleats
- Majoni Fenders
- Polyform Norway Fenders
- Dock Fenders
- Fender Ropes and Accessories
- Ocean Inflatable Fenders
Mooring Buoys
Max power bow thrusters.
- Coastline Bow Thruster Accessories
50 metre / 100 metre Rates - Mooring
Mooring information.
- Mooring Warps Size Guide
- Mooring Lines - LIROS Recommended Diameters
- Mooring Rope Selection Guide
- Mooring Warp Length and Configuration Guide
- How to estimate the length of a single line Mooring Strop
- Mooring Ropes - Break Load Chart
- Mooring Compensator Advisory
- Rope Cockling Information
- Fender Size Guide
- Majoni Fender Guide
- Polyform Norway Fender Inflation Guide
Custom Build Instructions
- More Article and Guides >
Anchor Warps Spliced to Chain
- LIROS 3 Strand Nylon Spliced to Chain
- LIROS 3 Strand Polyester Spliced to Chain
- LIROS Anchorplait Nylon Spliced to Chain
- LIROS Octoplait Polyester Spliced to Chain
Anchor Warps
- Leaded Anchor Warp
- LIROS 3 Strand Nylon Anchor Warps
- LIROS 3 Strand Polyester Anchor Warps
- LIROS Anchorplait Nylon Anchor Warps
- LIROS Octoplait Polyester Anchor Warps
- Aluminium Anchors
- Galvanised Anchors
- Stainless Steel Anchors
Calibrated Anchor Chain
- Cromox G6 Stainless Steel Chain
- G4 Calibrated Stainless Steel Anchor Chain
- Lofrans Grade 40
- MF DAMS Grade 70
- MF Grade 40
- Titan Grade 43
Clearance Chain
Anchoring accessories.
- Anchor Connectors
- Anchor Trip Hooks and Rings
- Anchoring Shackles
- Bow Rollers and Fittings
- Chain and Anchor Stoppers
- Chain Links and Markers
50 / 100 metre Rates - Anchoring
Chain snubbers.
- Chain Hooks, Grabs and Grippers
- Chain Snubbing Bridles
- Chain Snubbing Strops
Drogue Warps and Bridles
- Lewmar Windlasses
- Lofrans Windlasses
- Maxwell Windlasses
- Quick Windlasses
Windlass Accessories
- Coastline Windlass Accessories
- Lewmar Windlass Accessories
- Lofrans Windlass Accessories
- Lofrans Windlass Replacement Parts
- Maxwell Windlass Accessories
- Quick Windlass Accessories
Anchoring Information
- How To Choose A Main Anchor
- Anchoring System Assessment
- Anchor Chain and Rope Size Guide
- The Jimmy Green Guide to the Best Anchor Ropes
- What Size Anchor Do I Need?
- Anchor Size Guides
- Anchor Rope Break Load and Chain Compatibility Chart
- How to Choose Your Anchor Chain
- How to Establish the Correct Anchor Chain Calibration?
- Calibrated Anchor Chain - General Information
- Calibrated Anchor Chain Quality Control
- Calibrated Chain - Break Load and Weight Guide
- Galvanising - Managing Performance and Endurance expectation
- Can Galvanised Steel be used with Stainless Steel?
- Windlass Selection Guide
- More Articles and Guides
Stainless Steel Wire Rigging and Wire Rope
- 1x19 Wire Rigging
- 7x19 Flexible Wire Rigging
- Compacted Strand Wire Rigging
- Insulated 1x19 Wire Backstays
Wire Rigging Fittings
- Swaged Terminals
- Swageless Terminals
- Turnbuckles / Rigging screws
- Turnbuckle Components
- Backstay Insulators
- Wire Terminals
Rigging Accessories
- Backing Plates
- Backstay Adjuster and Fittings
- Backstay Blocks
- Pins, Rings and Nuts
- Rigging Chafe Protection
Fibre Rigging
- DynIce Dux Fibre Rigging
- LIROS D-Pro Static Rigging
- LIROS D-Pro-XTR Fibre Rigging
- Marlow Excel D12 MAX 78 Rigging
- Marlow M-Rig Max Rigging
Fibre Rigging Fittings
- Bluewave Rope Terminals
- Colligo Marine Terminals
Dinghy Rigging
- Dinghy Rigging Fittings
- Fibre Dinghy Rigging
- Stainless Steel Dinghy Rigging
Wind Indicators
Guard wires, guardrails and guardrail webbing.
- Guard Rail Fittings
- Guard Rails in Fibre and Webbing
- Guard Wire Accessories
- Guard Wires
Furling Systems
- Anti-torsion Stays
- Headsail Reefing Furlers
- Straight Luff Furlers
- Top Down Furlers
Furling Accessories
- Continuous Furling Line Accessories
- Furling Line Accessories
50 / 100 metre Rates - Wire and Fibre
Standing rigging assistance.
- More Articles and Guides >
- Cruising Halyards
- Performance Halyards
- Dinghy Halyards
Rigging Shackles
- Bronze Snap Shackles
- Captive and Key Pin Shackles
- hamma™ Snap Shackles
- Selden Snap Shackles
- Soft Shackles
- Standard Snap Shackles
- Tylaska End Fittings
- Wichard Snap Shackles
Lashing, Lacing and Lanyards
- LIROS 3 Strand Lashing, Lacing and Lanyards
- LIROS Braided Lashing, Lacing and Lanyards
- Cruising Sheets
- Performance Sheets
- Dinghy Sheets
- Continuous Sheets
- Tapered Sheets
Running Rigging Accessories
- Anti-Chafe Rope Protection
- Barton Sail Handling
- Lazy Jack Sail Handling
- Rodkickers, Boomstruts
- Sail Handling Accessories
- Slab Reefing
Shock Cord and Fittings
Control lines.
- Cruising Control Lines
- Performance Control Lines
- Dinghy Control Lines
- Continuous Control Lines
Classic Ropes
- 50 / 100 metres - Classic
- Classic Control Lines
- Classic Docklines
- Classic Halyards
- Classic Sheets
- LIROS Classic 3 Strand Polyester
50 / 100 metre Rates - Running Rigging
- 50 / 100 metres - Cruising Ropes
- 50 / 100 metres - Dinghy Ropes
- 50 / 100 metres - Lashing and Lanyards
- 50 / 100 metres - Performance Ropes
- LIROS Ropes
- Marlow Ropes
Running Rigging Resources
- Running Rigging Rope Fibres and Construction Explained
- How to Select a Suitable Halyard Rope
- How to select Sheets and Guys
- Dyneema Rope - Cruising and Racing Comparison
- Dinghy Rope Selection Guide
- Rope Measurement Information
- Running Rigging - LIROS Recommended Line Diameters
- Running Rigging Break Load Comparison Chart
- Colour Coding for Running Rigging
- Selecting the right type of block, plain, roller or ball bearing
- Replacing your Furling Line
- Recycling Rope
- Running Rigging Glossary
Custom Build Instructions for Sheets, Halyards, Control Lines
Low friction rings, plain bearing blocks.
- Barton Blocks
- Harken Element Blocks
- Seasure 25mm Blocks
- Selden Yacht Blocks
Wooden Blocks
Ball bearing blocks.
- Barton Ball Bearing Blocks
- Harken Ball Bearing Blocks
- Holt Dynamic Blocks
- Selden Ball Bearing Blocks
Ratchet Blocks
- Harken Ratchet Blocks
- Selden Ratchet Blocks
Roller Bearing Blocks
- Harken Black Magic Blocks
- Selden Roller Bearing Blocks
Clutches and Organisers
- Barton Clutches and Organisers
- Lewmar Clutches
- Spinlock Clutches and Organisers
Genoa Car Systems
- Barton Genoa Sheeting
- Harken Genoa Systems
- Lewmar HTX Genoa Systems
Traveller Systems
- Barton Traveller Systems
- Harken Traveller Systems
Deck Fittings
- Bungs and Hatches
- Bushes and Fairleads
- Deck Eyes, Straps and Hooks
- Pad Eyes, U Bolts and Eye Bolts
Rudder and Transom Fittings
- Pintles and Gudgeons
- Tiller Extensions and Joints
Stanchion Blocks and Fairleads
Snatch blocks.
- Barton K Cam Cleats
- Harken Ball Bearing Cam Cleats
- Holt Cam Cleats
- Selden Cam Cleats
- Spinlock PXR Cleats
Block and Tackle Purchase Systems
- Barton Winches, Snubbers and Winchers
- Coastline Electric Winch Accessories
- Harken Winches, Handles and Accessories
- Karver Winches
- Lewmar Winches, Handles and Accessories
- Winch Servicing and Accessories
Deck Hardware Support
- Blocks and Pulleys Selection Guide
- Barton High Load Eyes
- Dyneema Low Friction Rings Comparison
- Seldén Block Selection Guide
- Barton Track Selection Guide
- Barton Traveller Systems Selection Guide
- Harken Winch Selection Guide
- Karver Winch Comparison Chart
- Lewmar Winch Selection Guide - PDF
- Winch Servicing Guide
Sailing Flags
- Courtesy Flags
- Red Ensigns
- Blue Ensigns
- Flag Accessories
- Flag Staffs and Sockets
- Flag Making and Repair
- Signal Code Flags
- Galvanised Shackles
- Stainless Steel Shackles
- Titanium Shackles
- Webbing only
- Webbing Restraint Straps
- Webbing Sail Ties
- Webbing Soft Shackles
Hatches and Portlights
Sail care and repair.
- Sail Sewing
Maintenance
- Antifouling
- Fillers and Sealants
- Primers and Thinners
- PROtect Tape
Fixings and Fastenings
- Monel Rivets
- Screws, Bolts, Nuts and Washers
- U Bolts, Eye Bolts and Pad Eyes
Splicing Accessories
- Fids and Tools
- Knives and Scissors
General Chandlery
- Barrier Ropes
- Canvas Bags and Accessories
- Carabiners and Hooks
- Netting and Accessories
- Rope Ladders
Seago Boats and Tenders
Chandlery information, flag articles.
- Flag Size Guide
- Bending and Hoisting Methods for Sailing Flags
- Courtesy Flags Identification, Labelling and Stowage
- Courtesy Flag Map
- Flag Etiquette and Information
- Glossary of Flag Terms and Parts of a Flag
- Making and Repairing Flags
- Signal Code Message Definitions
Other Chandlery Articles
- Anchorplait Splicing Instructions
- Antifoul Coverage Information
- Hawk Wind Indicator Selection Guide
- Petersen Stainless - Upset Forging Information
- Speedy Stitcher Sewing Instructions
- Thimble Dimensions and Compatible Shackles
Jackstays and Jacklines
- Webbing Jackstays
- Stainless Steel Wire Jackstay Lifelines
- Fibre Jackstay Lifelines
- Jackstay and Lifeline Accessories
Safety Lines
Lifejackets.
- Children's Life Jackets
- Crewsaver Lifejackets
- Seago Lifejackets
- Spinlock Lifejackets
Buoyancy Aids
Life jackets accessories.
- Lifejacket Lights
- Lifejacket Rearming Kits
- Lifejacket Spray Hoods
Overboard Recovery
- Lifebuoy Accessories
- Purchase Systems
- Slings and Throwlines
Floating Rope
- LIROS Multifilament White Polypropylene
- LIROS Yellow Floating Safety Rope
- Danbuoy Accessories
- Jimmy Green Danbuoys
- Jonbuoy Danbuoys
- Seago Danbuoys
- Liferaft Accessories
- Seago Liferafts
Safety Accessories
- Fire Safety
- Grab Bag Contents
- Grab Bags and Polybottles
- Handheld VHF Radios
- Sea Anchors and Drogues
Safety Resources
- Guard Wires - Inspection and Replacement Guidance
- Guard Wire Stud Terminal Dimensions
- Webbing Jackstays Guidance
- Webbing Jackstays - Custom Build Instructions
- Danbuoy Selection Guide
- Danbuoy Instructions - 3 piece Telescopic - Offshore
- Liferaft Selection Guide
- Liferaft Servicing
- Man Overboard Equipment - World Sailing Compliance
- Marine Safety Information Links
- Safety Marine Equipment List for UK Pleasure Vessels
Sailing Clothing
- Sailing Jackets
- Sailing Trousers
- Thermal Layers
Leisure Wear
- Accessories
- Rain Jackets
- Sweatshirts
Sailing Footwear
- Dinghy Boots and Shoes
- Sailing Wellies
Leisure Footwear
- Walking Shoes
Sailing Accessories
- Sailing Bags and Holdalls
- Sailing Gloves
- Sailing Kneepads
Clothing Clearance
Clothing guide.
- What to wear Sailing
- Helly Hansen Mens Jacket and Pant Size Guide
- Helly Hansen Womens Sailing Jacket and Pant Size Guide
- Lazy Jacks Mens and Womens Size Charts
- Musto Men's and Women's Size Charts
- Old Guys Rule Size Guide
- Sailing Gloves Size Guides
- Weird Fish Clothing Size Charts
The Jimmy Green Clothing Store
Lower Fore St, Beer, East Devon, EX12 3EG
- Adria Bandiere
- Anchor Marine
- Anchor Right
- August Race
- Barton Marine
- Blue Performance
- Brierley Lifting
- Brook International
- Brookes & Adams
- Captain Currey
- Chaineries Limousines
- Coastline Technology
- Colligo Marine
- Cyclops Marine
- Douglas Marine
- Ecoworks Marine
- Exposure OLAS
- Fire Safety Stick
- Fortress Marine Anchors
- Hawk Marine Products
- Helly Hansen
- International
- Jimmy Green Marine
- Maillon Rapide
- Mantus Marine
- Marling Leek
- Meridian Zero
- MF Catenificio
- Ocean Fenders
- Ocean Safety
- Old Guys Rule
- Petersen Stainless
- Polyform Norway
- PSP Marine Tape
- Sidermarine
- Stewart Manufacturing Inc
- Team McLube
- Technical Marine Supplies
- Titan Marine (CMP)
- Ultramarine
- Waterline Design
- William Hackett
Clearance August Race Boat Cleaning Kit £26.00
Clearance LIROS Racer Dyneema £55.08
Clearance Folding Stock Anchor £123.25
Clearance LIROS Herkules £0.00
Clearance Barton Size 0 Ball Bearing Blocks - 5mm £10.13
Clearance Marlow Blue Ocean® Doublebraid £18.48
Mooring Clearance
Anchoring clearance, standing rigging clearance, running rigging clearance, deck hardware clearance, chandlery clearance, safety clearance.
Jimmy Green offer a comprehensive range of Standing Rigging Solutions for Dinghies and Dayboats
The Jimmy Green Rigging Team produce top quality Dinghy and Sailboat Rigging produced from stainless steel wire or synthetic fibre.
Stainless Steel Wire Dinghy Rigging
Choose between KOS standard 1x19 and Petersen Compact Strand for Standing Rigging applications.
Select 7x19 flexible wire rope for cascades, purchase systems and leading around turning blocks.
All wire terminations are carried out in house by our Jimmy Green trained Rigging Team using genuine Cabco Talurit Hydraulic Press and WireTechnik Hydraulic Roller Press Technology.
All our wire terminal prices include swaging onto the wire.
Synthetic Fibre Dinghy Rigging
Choose between Marlow Excel D12 MAX 78, LIROS D-Pro Static and LIROS D-Pro-XTR
The Jimmy Green Rigging Team will check, measure, splice and finish your synthetic fibre ropes with meticulous care to the highest standard.
You can get an instant quote and purchase online by selecting your end terminals/splices/finish and length from bearing edge to bearing edge for any diameter of wire or synthetic fibre.
Stay Diameter
- 2.5mm (3) 2mm (1) 3mm (3)
- Barton Marine (1) Blue Wave (1) Hawk Marine Products (5) Holt (6) KOS (5) LIROS Ropes (9) Loos (1) Marlow Ropes (5) Petersen Stainless (2) Seasure (1) Spinlock (1)
Purchase Type
- 100 metre Reel (1) Clearance (1) Custom Build (20)
2mm 1x19 Stainless Steel Wire Standing Rigging
2.5mm 1x19 stainless steel wire standing rigging, 3mm 1x19 stainless steel wire standing rigging, 2.5mm 1x7 compact strand stainless steel wire rigging, 3mm 1x7 compact strand stainless steel wire rigging, 2.5mm flexible 7x19 stainless steel wire rope, 3mm flexible 7x19 stainless steel wire rope, liros 5mm d-pro-xtr, liros 6mm d-pro-xtr, liros 3mm d-pro static, liros 4mm d-pro static, liros 5mm d-pro static.
- standing rigging
- rope and line
- cams, cleats and clutches
- head sail gear
- roller furling
- main sail control
- mast hardware
- eye straps and pad eyes
- fairleads and bulls eyes
- anchor and docking
- miscellaneous hardware
- Alexander Roberts
- My Wishlist
We will be closed Friday, March 29th in observance of Good Friday.
Rigging Only is a full service rigging shop. All running rigging, standing rigging, life lines, wire splicing, and custom hardware are assembled right here in our shop. We know our products, and we deliver that expertise with every job we do.
N ote: Some orders may incur additional shipping costs, particularly those with heavy or long items.
All prices are subject to change without notice.

Location & Hours

- Customer Service
- Order Tracking
- Your Account
- Store Policies & Info
- Privacy Policy
- Helpful Links
- Payment Methods
Shopping Cart: 0 Items
IMAGES
VIDEO
COMMENTS
1 Prepare the dinghy for rigging on its trailer or dolly, with clearworking space all around. When possible, choose a day with light wind. Two people are needed to rig the boat. One person lifts the mast vertically and locates it in the mast step, while the other person is ready to attach the two shrouds that support it.
This video will take you through all the steps of how to rig and reef a sailing dinghy. Reefing is the term to reduce the amount of sail area to allow you to...
A Step-by-Step Guide to Rigging and Launching a Sailing Dinghy. Rigging and launching a sailing dinghy can be an exciting adventure for those who love the open water. Whether you're a seasoned sailor or just starting out, properly rigging and launching your dinghy is crucial for a safe and successful outing. In this step-by-step guide, we ...
PLEASE NOTE: THIS VIDEO HAS BEEN UPDATED WITH ENHANCED GRAPHICS AND IMPROVED SOUND. CHECK IT OUT HERE https://youtu.be/tRgWtPaCQQcA beginners guide to sailbo...
The rigging and sails on a dinghy are crucial for supporting and controlling the sails. The mast, boom, and standing rigging all play a part in this process. ... and emergency protocols relevant to dinghy sailing. Preparedness and knowledge are crucial before venturing onto the water. Collision Avoidance.
The rig or rigging on a sailboat is a common term for two parts: The standing rigging consists of wires supporting the mast on a sailboat and reinforcing the spars from the force of the sails when sailing. The running rigging consists of the halyards, sheets, and lines we use to hoist, lower, operate, and control the sails on a sailboat.
Ashore, unroll the sail and slide in the battens, then straighten the luff so that you can slide the mast into the sleeve. Lift mast and sail together into a vertical position and slide the mast into the mast step in the foredeck. Face the boat h ead to wind before rigging the sails. 1 Assemble the two parts of the mast.
A beginners guide to sailboat rigging, including standing rigging and running rigging. This animated tutorial is the first in a series and covers sails, line...
The two-masted rigs are: Lugger - two masts (mizzen), with lugsail (a cross between gaff rig and lateen rig) on both masts. Yawl - two masts (mizzen), fore-and-aft rigged on both masts. Main mast is much taller than mizzen. Mizzen without a mainsail. Ketch - two masts (mizzen), fore-and-aft rigged on both masts.
10. 2023. In the world of sailing, boat rigging plays a crucial role in ensuring the safety, efficiency, and performance of your vessel. From standing rigging to sail rigging types, it's essential to understand the intricacies of rigging a yacht to embark on smooth sailing adventures. In this comprehensive guide, we'll dive into the nuances of ...
Rig tuning is the process of adjusting your boat's rigging system to achieve optimal performance. Proper rig tuning can significantly impact your boat's speed, handling, and overall sailing experience. Some of the benefits of rig tuning include: Improved boat speed and pointing ability; Enhanced sail shape and efficiency
1. Stability. Opt for a dinghy that offers stability, allowing you to learn and build confidence in your sailing skills. Look for boats with a wide hull and a low centre of gravity. 2. Size. As a beginner, it's recommended to start with a smaller single handed sailing dinghy. Smaller boats are easier to handle and manoeuvre, making it simpler ...
When it comes to sail rigging, there are several types commonly used in sailing vessels. The most common ones include sloop rig, ketch rig, schooner rig, cutter rig, catboat rig, and yawl rig. Each type has its distinctive features and advantages depending on factors like boat size, wind conditions, and intended use. 2.
Pull up on the bow loop so that the square knot is snugly secured beneath the rail of the bow. Wrap the painter line around the mast step, underneath the adjustor bolt, and secure it with a bowline (Figure 36). Lead the line up through the bow loop (Figure 37). Place the remainder of the painter in the bow of the boat.
Rigging guides and helpful info for rigging and turning your sailboat from the experts at West Coast Sailing. Free Shipping Over $99* - 366 Day Returns - Dedicated Customer Support. Menu. Search. ... Not sure how to rig your boat or looking to brush up on a certain part of your rigging? Check out these Rigging Guides with photos and tips for ...
Standing rigging tension is a peculiarly under-addressed subject. Easy to see how it would worry a new boat owner or someone going to sea. Most experts step aboard, yank or twang the shrouds and stays and mutter, Pretty slack, Too Tight, or, Thats about right. Youll find in the sailing literature very few discussions of the question: What does ...
Credit: Bill Tripp Design. The Bermudan rig is the all-rounder, able to perform well at all angles of sail. It is efficient upwind, while downwind the sail area can be significantly boosted with a big gennaker or spinnaker. For good reasons, it is the first choice for nearly every modern sailing yacht up to around 60 to 65 metres for cruising ...
According to professional sailors and rigging experts, the size of Dyneema for standing rigging is dependent on the size and weight of the boat, as well as the intended usage. For example, a 30-foot sailboat with a moderate sail plan may require 6mm Dyneema for standing rigging, while a 60-foot racing yacht with a large sail plan may require ...
Line lengths: Mainsheet is 23′ of 5/16″ low stretch line and 20′ of 1/8″ vectran for the split section (10 feet each leg). Jib sheet -33′. Use a single line and attach the middle to the clew. The lower the sheet attachment's profile, the less that sheet will catch on the leeward shroud coming out of a tack.
Standing rigging for your sailboat. Anything from shrouds and stays to lifelines: get it a Vela Sailing. Swaging, Cable, Dyform and much more.
The Jimmy Green Rigging Team produce top quality Dinghy and Sailboat Rigging produced from stainless steel wire or synthetic fibre. Stainless Steel Wire Dinghy Rigging. Choose between KOS standard 1x19 and Petersen Compact Strand for Standing Rigging applications.
Rigging Only is dedicated to providing quality sailboat hardware and sailboat rigging at affordable prices to sailors through out the world. Checkout View Cart (0) (508) 992-0434 ... we cannot provide estimates or build a replacement rig based solely on the model of your boat. Please call or see our Measurement Guides section for help on ...
Since 1961, RIG-RITE has engineered, manufactured and distributed Spars, Rigging and Hardware Systems for Sailboats. RIG-RITE stocks the largest variety of related Systems and Hardware available anywhere, Specializing in original replacement parts for Systems on yachts built the world over. Spars - Masts, Booms, Spreaders, Spinnaker Poles ...