No products in the cart.
Sailing Ellidah is supported by our readers. Buying through our links may earn us an affiliate commission at no extra cost to you.

The Running Rigging On A Sailboat Explained
The running rigging on a sailboat consists of all the lines used to hoist, lower, and control the sails and sailing equipment. These lines usually have different colors and patterns to easily identify their function and location on the vessel.
Looking at the spaghetti of lines with different colors and patterns might get your head spinning. But don’t worry, it is actually pretty simple. Each line on a sailboat has a function, and you’ll often find labels describing them in the cockpit and on the mast.
In this guide, I’ll walk you through the functions of every component of the running rigging. We’ll also look at the hardware we use to operate it and get up to speed on some of the terminology.
The difference between standing rigging and running rigging
Sometimes things can get confusing as some of our nautical terms are used for multiple items depending on the context. Let me clarify just briefly:
The rig or rigging on a sailboat is a common term for two parts, the standing , and the running rigging.
- The standing rigging consists of wires supporting the mast on a sailboat and reinforcing the spars from the force of the sails when sailing. Check out my guide on standing rigging here!
- The running rigging consists of the halyards, sheets, and lines we use to hoist, lower, operate and control the sails on a sailboat which we will explore in this guide.
The components of the running rigging
Knowing the running rigging is an essential part of sailing, whether you are sailing a cruising boat or crewing on a large yacht. Different types of sailing vessels have different amounts of running rigging.
For example, a sloop rig has fewer lines than a ketch, which has multiple masts and requires a separate halyard, outhaul, and sheet for its mizzen sail. Similarly, a cutter rig needs another halyard and extra sheets for its additional headsail.
You can dive deeper and read more about Sloop rigs, Ketch Rigs, Cutter rigs, and many others here .
Take a look at this sailboat rigging diagram:
Lines are a type of rope with a smooth surface that works well on winches found on sailboats. They come in various styles and sizes and have different stretch capabilities.
Dyneema and other synthetic fibers have ultra-high tensile strength and low stretch. These high-performance lines last a long time, and I highly recommend them as a cruiser using them for my halyards.
A halyard is a line used to raise and lower the sail. It runs from the head of the sail to the masthead through a block and continues down to the deck. Running the halyard back to the cockpit is common, but many prefer to leave it on the mast.
Fun fact: Old traditional sailboats sometimes used a stainless steel wire attached to the head of the sail instead of a line!
Jib, Genoa, and Staysail Halyards
The halyard for the headsail is run through a block in front of the masthead. If your boat has a staysail, it needs a separate halyard. These lines are primarily untouched on vessels with a furling system except when you pack the sail away or back up. Commonly referred to as the jib halyard.
Spinnaker Halyard
A spinnaker halyard is basically the same as the main halyard but used to hoist and lower the spinnaker, gennaker, or parasailor.
The spinnaker halyard is also excellent for climbing up the front of the mast, hoisting the dinghy on deck, lifting the outboard, and many other things.
A sheet is a line you use to control and trim a sail to the angle of the wind . The mainsheet controls the angle of the mainsail and is attached between the boom and the mainsheet traveler . The two headsail sheets are connected to the sail’s clew (lower aft corner) and run back to each side of the cockpit.
These are control lines used to adjust the angle and tension of the sail. It is also the line used to unfurl a headsail on a furling system. Depending on what sail you are referring to, this can be the Genoa sheet , the Jib sheet , the Gennaker sheet , etc.
The outhaul is a line attached to the clew of the mainsail and used to adjust the foot tension. It works runs from the mainsail clew to the end of the boom and back to the mast. In many cases, back to the cockpit. On a boat with in-mast furling , this is the line you use to pull the sail out of the mast.
Topping lift
The topping lift is a line attached to the boom’s end and runs through the masthead and down to the deck or cockpit. It lifts and holds the boom and functions well as a spare main halyard. Some types of sailboat rigging don’t use a topping lift for their boom but a boom vang instead. Others have both!
Topping lifts can also be used to lift other spars.
A downhaul is a line used to lower with and typically used to haul the mainsail down when reefing and lowering the spinnaker and whisker poles. The downhaul can also control the tack of an asymmetrical spinnaker, gennaker, or parasailor.
Tweaker and Barber Haul
A tweaker is a line, often elastic, attached to the sheet of a headsail and used to fine-tune the tension on the sheet.
Barber haul
A barber haul is a line attached to a headsail’s sheet to adjust the sheeting angle to the wind. It is often used to pull the clew further toward the center or outboard than the cars allow.
Boom Preventer
A boom preventer is a line attached to the boom’s end when sailing off the wind. Its function is to hold the spar in place and prevent it from swinging wildly.
If the boat were to get an accidental gybe, it could cause serious damage to the rigging or even harm people on board. It is important for the rigger to be cautious when setting up the boom preventer.
Running Backstay
Running backstays is similar to a normal backstay but uses a line instead of a hydraulic tensioner. Some rigs have additional check stays or runners as well.
Bonus tip: Reefing
The term reefing is used when reducing the effective sailing area exposed to the wind of a given sail. Headsails are usually reefed by partially furling them in, and they often have marks for what we refer to as 1st, 2nd, and 3rd reefs.
The mainsail is reefed similarly with an in-mast furling or in-boom furling system.
On a traditional mast, we use a system called slab reefing. The system has reefing lines running through the boom to reinforced points on the luff and leech, allowing you to pull the sail down to the boom and effectively reduce the sail area.
Having at least two reefing points in the mainsail is normal, but most cruising sailboats have 3. The 3rd is used for the heaviest conditions, giving you only a tiny bit of sail area exposed to the wind.
You want to reef your sails before the wind increases to a point where your boat gets overpowered.
It is essential to practice your reefing technique . You will find yourself in situations with rapidly increasing winds where you need to reduce your sails quickly.
Rule of thumb: If you think setting a reef might be a good idea, do it.
Shaking a reef is the term used when we sail with a reefed sail and want to increase the sail area back to full.
Hardware used for sail handling and the running rigging
Furling system.
Most sailboats have their headsail on a furling system. A furling system is a tube that runs along the forestay from the bottom furler drum to the masthead swivel.
This system allows you to roll the headsail around the forestay, making furling the sail in and out accessible. It is also convenient when reefing the sail when the wind picks up, as you can easily do this from the safety of the cockpit. These furling systems come in manual versions and electric versions.
In-mast furling
In-mast furling is a system that rolls the mainsail in and out of the mast. To unfurl the mainsail, we use the outhaul .
In-boom furling
In-boom furling is a system that rolls the mainsail in and out of the boom. This system has been costly and has mostly been seen on big yachts earlier. They are becoming more affordable and common on smaller boats, though. To unfurl this setup, we use the main halyard.
A Stack pack is also called a Lazy Bag or Lazy Pack. It is a bag with a zip attached to the boom where the mainsail is stored when unused. It protects the mainsail from UV rays from the sun and weather elements. It is a very nice and tidy way to store the mainsail and reefing lines if you don’t have in-mast or in-boom furling.
Lazy Jacks is a system of lines running from the stack pack to the mast. The Lazy Jacks guide the mainsail up and down from the Stack Pack and prevent it from falling down on the deck. It is also possible to rig Lazy Jacks without a Stack Pack.
A block is a pulley with a sheave wheel. Blocks are used to change the direction of a pull on a line or rope and give a mechanical advantage. They have many uses, especially onboard sailboats.
A winch is a metal drum that gives you a mechanical advantage to control and tighten lines. These can be operated by turning a rope around it and pulling manually or by a winch handle to get more force. Most modern winches are self-tailing, which means they lock the line on so you can winch the line without holding on to it. Some boats even have electrical winches operated by a button.
Mainsheet Traveler
The mainsheet traveler is a horizontal track that the mainsheet is attached to through a series of blocks. The traveler enables you to adjust and lock the boom at an angle and also plays a critical part in trimming the mainsail.
Most cruising sailboats have their traveler attached to the top of the coachroof in front of the spray hood. A racing boat typically has the traveler in the cockpit near the helm to give the helmsman better control over the mainsheet.
The cars are basically a pulley or block attached to a track on the port and starboard deck that your headsail sheets run through. Cars are used to control the angle of the sheet between the clew and the deck. The cars are handy when you trim the sail to set the right balance of tension between the foot and leech, depending on your point of sail.
The jammer is used to lock a line in place. Most sailboats use these for locking the halyards, mainsheet, outhaul, reef lines, traveler lines, boom vang lines, etc. You can pull or winch a line through a closed jammer, but it won’t run away if you let go of it unless you open the lock.
As I explained earlier, it is normal to have most or all of the lines led back to the cockpit, and they are usually run through a series of jammers.
The jammers are often labeled with the name of the line it locks, which makes it easier to remember which line goes where.
Spinnaker Pole
A spinnaker pole is a spar used to wing out a headsail when sailing off the wind, particularly the spinnaker. The spinnaker pole should have the same length as the distance between the mast and the forestay measured along the deck. We use a fore and aft guy and the pole’s topping lift to rig a pole correctly.
The rigging varies depending on the layout of the boat, but it usually looks like this:
- One line runs from the bow to the end of the pole.
- An aft line runs from near the stern to the end of the pole.
- A topping lift is used to raise and lower the pole.
Whisker Pole
A whisker pole is similar to the spinnaker pole and is rigged similarly. It is typically built lighter and attached to a track on the mast. These can be found in fixed lengths or adjustable lengths. Ideally, the length should be the same as the foot of the headsail you intend to pole out.
Boom Vang/Rod Kicker
The Boom Vang has a few different names. Rod-kicker, kicking strap, or kicker. It is used to tension the boom downwards. When you are sailing downwind and have the boom far out, the mainsheet won’t pull the boom down as much as inboard, and you can then use the vang to adjust the twist and shape of the mainsail.
Mooring line
A mooring line is a traditional rope lead through a fairlead to the vessel’s cleat and a mooring buoy, key, or pontoon.
Final words
Congratulations! By now, you should have a much better understanding of how the running rig on a sailboat functions. We’ve covered the different lines, their purpose, and the hardware used to operate them. I hope you’ve enjoyed this guide and learned something new.
Now it’s time to take what you’ve learned and put it into practice by getting out on the water, setting sail, and getting hands-on experience with the lines.
Or you can continue to my following guide and learn more about the different types of sails .
Sharing is caring!
Skipper, Electrician and ROV Pilot
Robin is the founder and owner of Sailing Ellidah and has been living on his sailboat since 2019. He is currently on a journey to sail around the world and is passionate about writing his story and helpful content to inspire others who share his interest in sailing.
Leave a Reply Cancel reply
Your email address will not be published. Required fields are marked *

Beginner’s Guide: How To Rig A Sailboat – Step By Step Tutorial
Alex Morgan
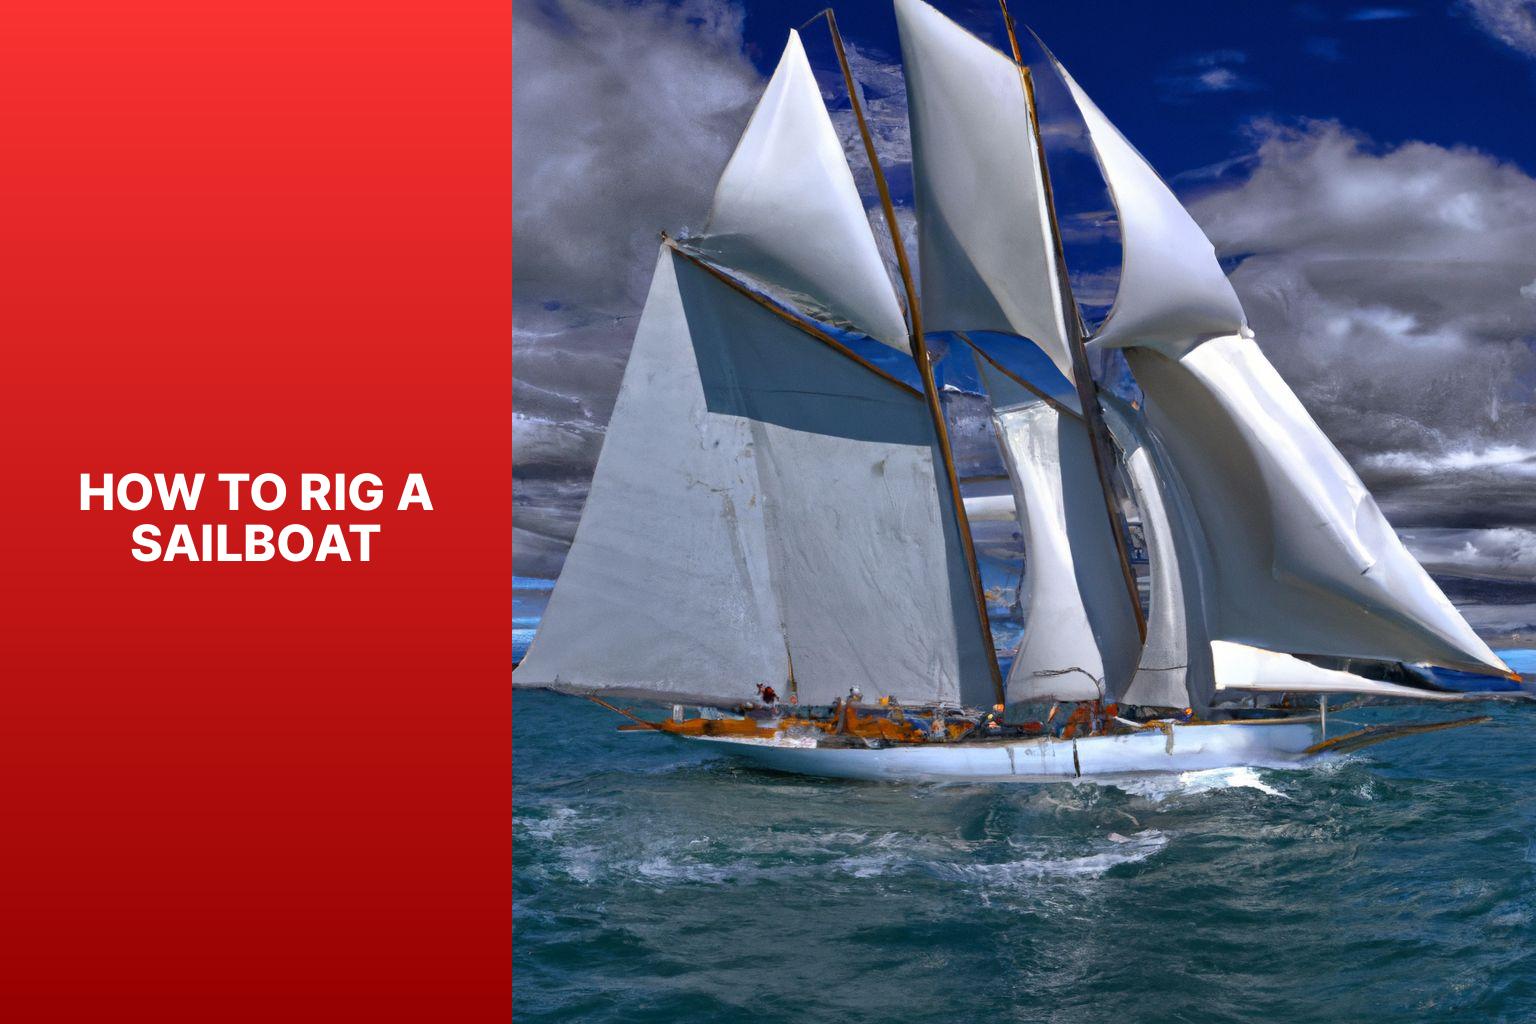
Rigging a sailboat is a crucial process that ensures the proper setup and functioning of a sailboat’s various components. Understanding the process and components involved in rigging is essential for any sailor or boat enthusiast. In this article, we will provide a comprehensive guide on how to rig a sailboat.
Introduction to Rigging a Sailboat
Rigging a sailboat refers to the process of setting up the components that enable the sailboat to navigate through the water using wind power. This includes assembling and positioning various parts such as the mast, boom, standing rigging, running rigging, and sails.
Understanding the Components of a Sailboat Rigging
Before diving into the rigging process, it is important to have a good understanding of the key components involved. These components include:
The mast is the tall vertical spar that provides vertical support to the sails and holds them in place.
The boom is the horizontal spar that runs along the bottom edge of the sail and helps control the shape and position of the sail.
- Standing Rigging:
Standing rigging consists of the wires and cables that support and stabilize the mast, keeping it upright.
- Running Rigging:
Running rigging refers to the lines and ropes used to control the sails, such as halyards, sheets, and control lines.
Preparing to Rig a Sailboat
Before rigging a sailboat, there are a few important steps to take. These include:
- Checking the Weather Conditions:
It is crucial to assess the weather conditions before rigging a sailboat. Unfavorable weather, such as high winds or storms, can make rigging unsafe.
- Gathering the Necessary Tools and Equipment:
Make sure to have all the necessary tools and equipment readily available before starting the rigging process. This may include wrenches, hammers, tape, and other common tools.
- Inspecting the Rigging Components:
In the upcoming sections of this article, we will provide a step-by-step guide on how to rig a sailboat, as well as important safety considerations and tips to keep in mind. By following these guidelines, you will be able to rig your sailboat correctly and safely, allowing for a smooth and enjoyable sailing experience.
Key takeaway:
- Rigging a sailboat maximizes efficiency: Proper rigging allows for optimized sailing performance, ensuring the boat moves smoothly through the water.
- Understanding sailboat rigging components: Familiarity with the various parts of a sailboat rigging, such as the mast, boom, and standing and running riggings, is essential for effective rigging setup.
- Importance of safety in sailboat rigging: Ensuring safety is crucial during the rigging process, including wearing a personal flotation device, securing loose ends and lines, and being mindful of overhead power lines.
Get ready to set sail and dive into the fascinating world of sailboat rigging! We’ll embark on a journey to understand the various components that make up a sailboat’s rigging. From the majestic mast to the nimble boom , and the intricate standing rigging to the dynamic running rigging , we’ll explore the crucial elements that ensure smooth sailing. Not forgetting the magnificent sail, which catches the wind and propels us forward. So grab your sea legs and let’s uncover the secrets of sailboat rigging together.
Understanding the mast is crucial when rigging a sailboat. Here are the key components and steps to consider:
1. The mast supports the sails and rigging of the sailboat. It is made of aluminum or carbon fiber .
2. Before stepping the mast , ensure that the area is clear and the boat is stable. Have all necessary tools and equipment ready.
3. Inspect the mast for damage or wear. Check for corrosion , loose fittings , and cracks . Address any issues before proceeding.
4. To step the mast , carefully lift it into an upright position and insert the base into the mast step on the deck of the sailboat.
5. Secure the mast using the appropriate rigging and fasteners . Attach the standing rigging , such as shrouds and stays , to the mast and the boat’s hull .
Fact: The mast of a sailboat is designed to withstand wind resistance and the tension of the rigging for stability and safe sailing.
The boom is an essential part of sailboat rigging. It is a horizontal spar that stretches from the mast to the aft of the boat. Constructed with durable yet lightweight materials like aluminum or carbon fiber, the boom provides crucial support and has control over the shape and position of the sail. It is connected to the mast through a boom gooseneck , allowing it to pivot. One end of the boom is attached to the mainsail, while the other end is equipped with a boom vang or kicker, which manages the tension and angle of the boom. When the sail is raised, the boom is also lifted and positioned horizontally by using the topping lift or lazy jacks.
An incident serves as a warning that emphasizes the significance of properly securing the boom. In strong winds, an improperly fastened boom swung across the deck, resulting in damage to the boat and creating a safety hazard. This incident highlights the importance of correctly installing and securely fastening all rigging components, including the boom, to prevent accidents and damage.
3. Standing Rigging
When rigging a sailboat, the standing rigging plays a vital role in providing stability and support to the mast . It consists of several key components, including the mast itself, along with the shrouds , forestay , backstay , and intermediate shrouds .
The mast, a vertical pole , acts as the primary support structure for the sails and the standing rigging. Connected to the top of the mast are the shrouds , which are cables or wires that extend to the sides of the boat, providing essential lateral support .
The forestay is another vital piece of the standing rigging. It is a cable or wire that runs from the top of the mast to the bow of the boat, ensuring forward support . Similarly, the backstay , also a cable or wire, runs from the mast’s top to the stern of the boat, providing important backward support .
To further enhance the rig’s stability , intermediate shrouds are installed. These additional cables or wires are positioned between the main shrouds, as well as the forestay or backstay. They offer extra support , strengthening the standing rigging system.
Regular inspections of the standing rigging are essential to detect any signs of wear, such as fraying or corrosion . It is crucial to ensure that all connections within the rig are tight and secure, to uphold its integrity. Should any issues be identified, immediate attention must be given to prevent accidents or damage to the boat. Prioritizing safety is of utmost importance when rigging a sailboat, thereby necessitating proper maintenance of the standing rigging. This ensures a safe and enjoyable sailing experience.
Note: <p> tags have been kept intact.
4. Running Rigging
Running Rigging
When rigging a sailboat, the running rigging is essential for controlling the sails and adjusting their position. It is important to consider several aspects when dealing with the running rigging.
1. Choose the right rope: The running rigging typically consists of ropes with varying properties such as strength, stretch, and durability. Weather conditions and sailboat size should be considered when selecting the appropriate rope.
2. Inspect and maintain the running rigging: Regularly check for signs of wear, fraying, or damage. To ensure safety and efficiency, replace worn-out ropes.
3. Learn essential knot tying techniques: Having knowledge of knots like the bowline, cleat hitch, and reef knot is crucial for securing the running rigging and adjusting sails.
4. Understand different controls: The running rigging includes controls such as halyards, sheets, and control lines. Familiarize yourself with their functions and proper usage to effectively control sail position and tension.
5. Practice proper sail trimming: Adjusting the tension of the running rigging significantly affects sailboat performance. Mastering sail trimming techniques will help optimize sail shape and maximize speed.
By considering these factors and mastering running rigging techniques, you can enhance your sailing experience and ensure the safe operation of your sailboat.
The sail is the central component of sailboat rigging as it effectively harnesses the power of the wind to propel the boat.
When considering the sail, there are several key aspects to keep in mind:
– Material: Sails are typically constructed from durable and lightweight materials such as Dacron or polyester. These materials provide strength and resistance to various weather conditions.
– Shape: The shape of the sail plays a critical role in its overall performance. A well-shaped sail should have a smooth and aerodynamic profile, which allows for maximum efficiency in capturing wind power.
– Size: The size of the sail is determined by its sail area, which is measured in square feet or square meters. Larger sails have the ability to generate more power, but they require greater skill and experience to handle effectively.
– Reefing: Reefing is the process of reducing the sail’s size to adapt to strong winds. Sails equipped with reefing points allow sailors to decrease the sail area, providing better control in challenging weather conditions.
– Types: There are various types of sails, each specifically designed for different purposes. Common sail types include mainsails, jibs, genoas, spinnakers, and storm sails. Each type possesses its own unique characteristics and is utilized under specific wind conditions.
Understanding the sail and its characteristics is vital for sailors, as it directly influences the boat’s speed, maneuverability, and overall safety on the water.
Getting ready to rig a sailboat requires careful preparation and attention to detail. In this section, we’ll dive into the essential steps you need to take before setting sail. From checking the weather conditions to gathering the necessary tools and equipment, and inspecting the rigging components, we’ll ensure that you’re fully equipped to navigate the open waters with confidence. So, let’s get started on our journey to successfully rigging a sailboat!
1. Checking the Weather Conditions
Checking the weather conditions is crucial before rigging a sailboat for a safe and enjoyable sailing experience. Monitoring the wind speed is important in order to assess the ideal sailing conditions . By checking the wind speed forecast , you can determine if the wind is strong or light . Strong winds can make sailboat control difficult, while very light winds can result in slow progress.
Another important factor to consider is the wind direction . Assessing the wind direction is crucial for route planning and sail adjustment. Favorable wind direction helps propel the sailboat efficiently, making your sailing experience more enjoyable.
In addition to wind speed and direction, it is also important to consider weather patterns . Keep an eye out for impending storms or heavy rain. It is best to avoid sailing in severe weather conditions that may pose a safety risk. Safety should always be a top priority when venturing out on a sailboat.
Another aspect to consider is visibility . Ensure good visibility by checking for fog, haze, or any other conditions that may hinder navigation. Clear visibility is important for being aware of other boats and potential obstacles that may come your way.
Be aware of the local conditions . Take into account factors such as sea breezes, coastal influences, or tidal currents. These local factors greatly affect sailboat performance and safety. By considering all of these elements, you can have a successful and enjoyable sailing experience.
Here’s a true story to emphasize the importance of checking the weather conditions. One sunny afternoon, a group of friends decided to go sailing. Before heading out, they took the time to check the weather conditions. They noticed that the wind speed was expected to be around 10 knots, which was perfect for their sailboat. The wind direction was coming from the northwest, allowing for a pleasant upwind journey. With clear visibility and no approaching storms, they set out confidently, enjoying a smooth and exhilarating sail. This positive experience was made possible by their careful attention to checking the weather conditions beforehand.
2. Gathering the Necessary Tools and Equipment
To efficiently gather all of the necessary tools and equipment for rigging a sailboat, follow these simple steps:
- First and foremost, carefully inspect your toolbox to ensure that you have all of the basic tools such as wrenches, screwdrivers, and pliers.
- Make sure to check if you have a tape measure or ruler available as they are essential for precise measurements of ropes or cables.
- Don’t forget to include a sharp knife or rope cutter in your arsenal as they will come in handy for cutting ropes or cables to the desired lengths.
- Gather all the required rigging hardware including shackles, pulleys, cleats, and turnbuckles.
- It is always prudent to check for spare ropes or cables in case replacements are needed during the rigging process.
- If needed, consider having a sailing knife or marlinspike tool for splicing ropes or cables.
- For rigging a larger sailboat, it is crucial to have a mast crane or hoist to assist with stepping the mast.
- Ensure that you have a ladder or some other means of reaching higher parts of the sailboat, such as the top of the mast.
Once, during the preparation of rigging my sailboat, I had a moment of realization when I discovered that I had forgotten to bring a screwdriver . This unfortunate predicament occurred while I was in a remote location with no nearby stores. Being resourceful, I improvised by utilizing a multipurpose tool with a small knife blade, which served as a makeshift screwdriver. Although it was not the ideal solution, it allowed me to accomplish the task. Since that incident, I have learned the importance of double-checking my toolbox before commencing any rigging endeavor. This practice ensures that I have all of the necessary tools and equipment, preventing any unexpected surprises along the way.
3. Inspecting the Rigging Components
Inspecting the rigging components is essential for rigging a sailboat safely. Here is a step-by-step guide on inspecting the rigging components:
1. Visually inspect the mast, boom, and standing rigging for damage, such as corrosion, cracks, or loose fittings.
2. Check the tension of the standing rigging using a tension gauge. It should be within the recommended range from the manufacturer.
3. Examine the turnbuckles, clevis pins, and shackles for wear or deformation. Replace any damaged or worn-out hardware.
4. Inspect the running rigging, including halyards and sheets, for fraying, signs of wear, or weak spots. Replace any worn-out lines.
5. Check the sail for tears, wear, or missing hardware such as grommets or luff tape.
6. Pay attention to the connections between the standing rigging and the mast. Ensure secure connections without any loose or missing cotter pins or rigging screws.
7. Inspect all fittings, such as mast steps, spreader brackets, and tangs, to ensure they are securely fastened and in good condition.
8. Conduct a sea trial to assess the rigging’s performance and make necessary adjustments.
Regularly inspecting the rigging components is crucial for maintaining the sailboat’s rigging system’s integrity, ensuring safe sailing conditions, and preventing accidents or failures at sea.
Once, I went sailing on a friend’s boat without inspecting the rigging components beforehand. While at sea, a sudden gust of wind caused one of the shrouds to snap. Fortunately, no one was hurt, but we had to cut the sail loose and carefully return to the marina. This incident taught me the importance of inspecting the rigging components before sailing to avoid unforeseen dangers.
Step-by-Step Guide on How to Rig a Sailboat
Get ready to set sail with our step-by-step guide on rigging a sailboat ! We’ll take you through the process from start to finish, covering everything from stepping the mast to setting up the running rigging . Learn the essential techniques and tips for each sub-section, including attaching the standing rigging and installing the boom and sails . Whether you’re a seasoned sailor or a beginner, this guide will have you ready to navigate the open waters with confidence .
1. Stepping the Mast
To step the mast of a sailboat, follow these steps:
1. Prepare the mast: Position the mast near the base of the boat.
2. Attach the base plate: Securely fasten the base plate to the designated area on the boat.
3. Insert the mast step: Lower the mast step into the base plate and align it with the holes or slots.
4. Secure the mast step: Use fastening screws or bolts to fix the mast step in place.
5. Raise the mast: Lift the mast upright with the help of one or more crew members.
6. Align the mast: Adjust the mast so that it is straight and aligned with the boat’s centerline.
7. Attach the shrouds: Connect the shrouds to the upper section of the mast, ensuring proper tension.
8. Secure the forestay: Attach the forestay to the bow of the boat, ensuring it is securely fastened.
9. Final adjustments: Check the tension of the shrouds and forestay, making any necessary rigging adjustments.
Following these steps ensures that the mast is properly stepped and securely in place, allowing for a safe and efficient rigging process. Always prioritize safety precautions and follow manufacturer guidelines for your specific sailboat model.
2. Attaching the Standing Rigging
To attach the standing rigging on a sailboat, commence by preparing the essential tools and equipment, including wire cutters, crimping tools, and turnbuckles.
Next, carefully inspect the standing rigging components for any indications of wear or damage.
After inspection, fasten the bottom ends of the shrouds and stays to the chainplates on the deck.
Then, securely affix the top ends of the shrouds and stays to the mast using adjustable turnbuckles .
To ensure proper tension, adjust the turnbuckles accordingly until the mast is upright and centered.
Utilize a tension gauge to measure the tension in the standing rigging, aiming for around 15-20% of the breaking strength of the rigging wire.
Double-check all connections and fittings to verify their security and proper tightness.
It is crucial to regularly inspect the standing rigging for any signs of wear or fatigue and make any necessary adjustments or replacements.
By diligently following these steps, you can effectively attach the standing rigging on your sailboat, ensuring its stability and safety while on the water.
3. Installing the Boom and Sails
To successfully complete the installation of the boom and sails on a sailboat, follow these steps:
1. Begin by securely attaching the boom to the mast. Slide it into the gooseneck fitting and ensure it is firmly fastened using a boom vang or another appropriate mechanism.
2. Next, attach the main sail to the boom. Slide the luff of the sail into the mast track and securely fix it in place using sail slides or cars.
3. Connect the mainsheet to the boom. One end should be attached to the boom while the other end is connected to a block or cleat on the boat.
4. Proceed to attach the jib or genoa. Make sure to securely attach the hanks or furler line to the forestay to ensure stability.
5. Connect the jib sheets. One end of each jib sheet should be attached to the clew of the jib or genoa, while the other end is connected to a block or winch on the boat.
6. Before setting sail, it is essential to thoroughly inspect all lines and connections. Ensure that they are properly tensioned and that all connections are securely fastened.
During my own experience of installing the boom and sails on my sailboat, I unexpectedly encountered a strong gust of wind. As a result, the boom began swinging uncontrollably, requiring me to quickly secure it to prevent any damage. This particular incident served as a vital reminder of the significance of properly attaching and securing the boom, as well as the importance of being prepared for unforeseen weather conditions while rigging a sailboat.
4. Setting Up the Running Rigging
Setting up the running rigging on a sailboat involves several important steps. First, attach the halyard securely to the head of the sail. Then, connect the sheets to the clew of the sail. If necessary, make sure to secure the reefing lines . Attach the outhaul line to the clew of the sail and connect the downhaul line to the tack of the sail. It is crucial to ensure that all lines are properly cleated and organized. Take a moment to double-check the tension and alignment of each line. If you are using a roller furling system, carefully wrap the line around the furling drum and securely fasten it. Perform a thorough visual inspection of the running rigging to check for any signs of wear or damage. Properly setting up the running rigging is essential for safe and efficient sailing. It allows for precise control of the sail’s position and shape, ultimately optimizing the boat’s performance on the water.
Safety Considerations and Tips
When it comes to rigging a sailboat, safety should always be our top priority. In this section, we’ll explore essential safety considerations and share some valuable tips to ensure smooth sailing. From the importance of wearing a personal flotation device to securing loose ends and lines, and being cautious around overhead power lines, we’ll equip you with the knowledge and awareness needed for a safe and enjoyable sailing experience. So, let’s set sail and dive into the world of safety on the water!
1. Always Wear a Personal Flotation Device
When rigging a sailboat, it is crucial to prioritize safety and always wear a personal flotation device ( PFD ). Follow these steps to properly use a PFD:
- Select the appropriate Coast Guard-approved PFD that fits your size and weight.
- Put on the PFD correctly by placing your arms through the armholes and securing all the straps for a snug fit .
- Adjust the PFD for comfort , ensuring it is neither too tight nor too loose, allowing freedom of movement and adequate buoyancy .
- Regularly inspect the PFD for any signs of wear or damage, such as tears or broken straps, and replace any damaged PFDs immediately .
- Always wear your PFD when on or near the water, even if you are a strong swimmer .
By always wearing a personal flotation device and following these steps, you will ensure your safety and reduce the risk of accidents while rigging a sailboat. Remember, prioritize safety when enjoying water activities.
2. Secure Loose Ends and Lines
Inspect lines and ropes for frayed or damaged areas. Secure loose ends and lines with knots or appropriate cleats or clamps. Ensure all lines are properly tensioned to prevent loosening during sailing. Double-check all connections and attachments for security. Use additional safety measures like extra knots or stopper knots to prevent line slippage.
To ensure a safe sailing experience , it is crucial to secure loose ends and lines properly . Neglecting this important step can lead to accidents or damage to the sailboat. By inspecting, securing, and tensioning lines , you can have peace of mind knowing that everything is in place. Replace or repair any compromised lines or ropes promptly. Securing loose ends and lines allows for worry-free sailing trips .
3. Be Mindful of Overhead Power Lines
When rigging a sailboat, it is crucial to be mindful of overhead power lines for safety. It is important to survey the area for power lines before rigging the sailboat. Maintain a safe distance of at least 10 feet from power lines. It is crucial to avoid hoisting tall masts or long antenna systems near power lines to prevent contact. Lower the mast and tall structures when passing under a power line to minimize the risk of contact. It is also essential to be cautious in areas where power lines run over the water and steer clear to prevent accidents.
A true story emphasizes the importance of being mindful of overhead power lines. In this case, a group of sailors disregarded safety precautions and their sailboat’s mast made contact with a low-hanging power line, resulting in a dangerous electrical shock. Fortunately, no serious injuries occurred, but it serves as a stark reminder of the need to be aware of power lines while rigging a sailboat.
Some Facts About How To Rig A Sailboat:
- ✅ Small sailboat rigging projects can improve sailing performance and save money. (Source: stingysailor.com)
- ✅ Rigging guides are available for small sailboats, providing instructions and tips for rigging. (Source: westcoastsailing.net)
- ✅ Running rigging includes lines used to control and trim the sails, such as halyards and sheets. (Source: sailingellidah.com)
- ✅ Hardware used in sailboat rigging includes winches, blocks, and furling systems. (Source: sailingellidah.com)
- ✅ A step-by-step guide can help beginners rig a small sailboat for sailing. (Source: tripsavvy.com)
Frequently Asked Questions
1. how do i rig a small sailboat.
To rig a small sailboat, follow these steps: – Install or check the rudder, ensuring it is firmly attached. – Attach or check the tiller, the long steering arm mounted to the rudder. – Attach the jib halyard by connecting the halyard shackle to the head of the sail and the grommet in the tack to the bottom of the forestay. – Hank on the jib by attaching the hanks of the sail to the forestay one at a time. – Run the jib sheets by tying or shackling them to the clew of the sail and running them back to the cockpit. – Attach the mainsail by spreading it out and attaching the halyard shackle to the head of the sail. – Secure the tack, clew, and foot of the mainsail to the boom using various lines and mechanisms. – Insert the mainsail slugs into the mast groove, gradually raising the mainsail as the slugs are inserted. – Cleat the main halyard and lower the centerboard into the water. – Raise the jib by pulling down on the jib halyard and cleating it on the other side of the mast. – Tighten the mainsheet and one jibsheet to adjust the sails and start moving forward.
2. What are the different types of sailboat rigs?
Sailboat rigs can be classified into three main types: – Sloop rig: This rig has a single mast with a mainsail and a headsail, typically a jib or genoa. – Cutter rig: This rig has two headsails, a smaller jib or staysail closer to the mast, and a larger headsail, usually a genoa, forward of it, alongside a mainsail. – Ketch rig: This rig has two masts, with the main mast taller than the mizzen mast. It usually has a mainsail, headsail, and a mizzen sail. Each rig has distinct characteristics and is suitable for different sailing conditions and preferences.
3. What are the essential parts of a sailboat?
The essential parts of a sailboat include: – Mast: The tall vertical spar that supports the sails. – Boom: The horizontal spar connected to the mast, which extends outward and supports the foot of the mainsail. – Rudder: The underwater appendage that steers the boat. – Centerboard or keel: A retractable or fixed fin-like structure that provides stability and prevents sideways drift. – Sails: The fabric structures that capture the wind’s energy to propel the boat. – Running rigging: The lines or ropes used to control the sails and sailing equipment. – Standing rigging: The wires and cables that support the mast and reinforce the spars. These are the basic components necessary for the functioning of a sailboat.
4. What is a spinnaker halyard?
A spinnaker halyard is a line used to hoist and control a spinnaker sail. The spinnaker is a large, lightweight sail that is used for downwind sailing or reaching in moderate to strong winds. The halyard attaches to the head of the spinnaker and is used to raise it to the top of the mast. Once hoisted, the spinnaker halyard can be adjusted to control the tension and shape of the sail.
5. Why is it important to maintain and replace worn running rigging?
It is important to maintain and replace worn running rigging for several reasons: – Safety: Worn or damaged rigging can compromise the integrity and stability of the boat, posing a safety risk to both crew and vessel. – Performance: Worn rigging can affect the efficiency and performance of the sails, diminishing the boat’s speed and maneuverability. – Reliability: Aging or worn rigging is more prone to failure, which can lead to unexpected problems and breakdowns. Regular inspection and replacement of worn running rigging is essential to ensure the safe and efficient operation of a sailboat.
6. Where can I find sailboat rigging books or guides?
There are several sources where you can find sailboat rigging books or guides: – Online: Websites such as West Coast Sailing and Stingy Sailor offer downloadable rigging guides for different sailboat models. – Bookstores: Many bookstores carry a wide selection of boating and sailing books, including those specifically focused on sailboat rigging. – Sailing schools and clubs: Local sailing schools or yacht clubs often have resources available for learning about sailboat rigging. – Manufacturers: Some sailboat manufacturers, like Hobie Cat and RS Sailing, provide rigging guides for their specific sailboat models. Consulting these resources can provide valuable information and instructions for rigging your sailboat properly.
About the author

Leave a Reply Cancel reply
Your email address will not be published. Required fields are marked *
Save my name, email, and website in this browser for the next time I comment.
Latest posts

The history of sailing – from ancient times to modern adventures
History of Sailing Sailing is a time-honored tradition that has evolved over millennia, from its humble beginnings as a means of transportation to a beloved modern-day recreational activity. The history of sailing is a fascinating journey that spans cultures and centuries, rich in innovation and adventure. In this article, we’ll explore the remarkable evolution of…

Sailing Solo: Adventures and Challenges of Single-Handed Sailing
Solo Sailing Sailing has always been a pursuit of freedom, adventure, and self-discovery. While sailing with a crew is a fantastic experience, there’s a unique allure to sailing solo – just you, the wind, and the open sea. Single-handed sailing, as it’s often called, is a journey of self-reliance, resilience, and the ultimate test of…

Sustainable Sailing: Eco-Friendly Practices on the boat
Eco Friendly Sailing Sailing is an exhilarating and timeless way to explore the beauty of the open water, but it’s important to remember that our oceans and environment need our protection. Sustainable sailing, which involves eco-friendly practices and mindful decision-making, allows sailors to enjoy their adventures while minimizing their impact on the environment. In this…

- Outhaul Systems Guide
- Outhaul Systems - Normal
- Outhaul Systems - Quick Release
- Clew Blocks
- Outhaul Elastics
- Block Assemblies at Boom
- Block Assemblies at Gooseneck
- Primary/Secondary Assemblies
- Calibration Strips
- Primary and Secondary Lines
Downhaul Systems Guide
- 6:1 Downhaul Systems
- 8:1 Downhaul Systems
- 10:1 Downhaul Systems
- Primary Line Assemblies
- Lower Strop Assemblies
- Caribiner Attachment
- Kicker Systems Guide
- Kicker Systems
- Kicker Components
- Kicker Primary Line Assemblies
- Ratchet Blocks
- Boom/Traveller Blocks
- Kicker Blocks
- Control Line
- D12 Dyneema
- Wear Protect
- Block Plate and Assemblies
- Cleats and Cleat Assemblies
- Wind Indicators
- Mast Retainer
- Centreboard Strop
- Centreboard Friction Pad
- Centreboard Elastic and Clips
- Self Bailer and Springs
- Transom Bung
- Titanium Mega Bolt
- Silicone Sealant
- Hiking Straps
- Toggles and Dogbones
- Loops and Soft Shackles
- Splicing Kits and Tools
- Universal Joint
- Tillers, Extensions etc
- Gift Vouchers
This section doesn’t currently include any content. Add content to this section using the sidebar.
Add description and links to your promotion
Your headline
Image caption appears here
Your product's name
Add your deal, information or promotional text
The following is designed to help you choose the optimum downhaul (cunningham) system by looking at what is important, the types of system available, and then the blocks, rope, and lower block attachment options.
What’s important
In comparison with the outhaul system, the downhaul is conceptually a lot simpler. However, the downhaul system has to really work well – it’s hard pulling the luff down – and the last thing we need is a poor system that makes it harder than it needs to be. After the kicker this is where money is best spent getting the best system that you can afford, so that you can effectively control your sail shape. Unlike the outhaul where every turning point can have a block, the downhaul system primary must pass through the sail cringle and that means friction. We need to minimise the friction in the system by using the largest sheave blocks we are allowed to use under the Laser class rules (30mm) and by minimising the friction through the sail cringle by using slippery rope for the primary line.
Types of System
There are two types of downhaul system and it is important to select what is right for you. The decision should be based on the rig you are using, and your weight and strength.
- 6:1 Downhaul System – This is what the majority of Laser sailors use for the 4.7, Radial and the old Standard MKI sails. It gives sufficient purchase for those rigs, and minimises excess rope in the cockpit when pulled on hard.
- 8:1 Downhaul System – The 8:1 system is essential if you are using the newer MKII standard sail where the additional purchase is really needed due to the stiffer sail material used. The 8:1 system is also ideal for lighter sailors in 4.7 and Radial rigs who are struggling to pull their downhaul on really tight. For more detail as to why you should use an 8:1 for the MkII sail read this short write up by Southeast Sailboats sponsored GBR Team sailor Michael Beckett from November 2016. “ The new 8:1 downhaul is complete game changer (not a phrase we often hear when talking about Laser kit). Not just for smaller sailors but for any sailor trying to get to grips with the new MkII sail. The new and stiffer Dacron cloth requires greater tension to be applied to achieve the same depowering of the sail in hiking conditions (10+ knots). It is an inevitable conclusion that the old 6:1 systems used on the MkI aren’t going to be sufficient, no matter how hard you think you can pull. The issue one would expect from a greater number of purchases is all the additional rope in the cockpit. However, the MkII the sail stretches over a far smaller range so there is still less rope in the cockpit, making this the ideal system (even after the sail has seen many months of use).

Optimised for Rig Type
Because the tack cringle on the MkII standard sail is positioned higher than all the other rigs, our systems are optimised (4.7/Radial/Standard MkI or Standard MkII) to ensure that the rope lengths/block positions are ideal. If you want to be able to sail either the 4.7/Radial/Standard MkI and the MkII standard rig with the same downhaul system there are ways of rigging the system to compensate that are described later.
Block Types
With the much higher loads involved, and the desire to reduce friction, you should use the largest blocks allowed. We recommend Harken’s T2 Soft-Attach 29mm block for the downhaul (which is what you get with a new Laser), or the more economic Allen 30mm Tii blocks. If you are not racing then you could consider the smaller sheave blocks from Harken or Ronstan. One of the other benefits of the larger 29/30mm sheave blocks is that when the secondary line wear out it is easier to fit a new one through the larger central 'axle' of the block. Two blocks are required to put together a 6:1 purchase system – one at the base of the mast by the kicker attachment and one that is floating just below the sail cringle. For an 8:1 system three blocks are used.

More expensive, high load blocks run better under load, reducing friction in the systems and hence improving system efficiency and effectiveness. We have made (and will if requested) systems using the amazing Harken 29mm FLY block for customers who want the ultimate downhaul irrespective of price, but we don't list these solutions due to the very high price. However, we how listed solutions using the Allen 30mm High Load block which provides 'high load' benefits at a more affordable price - this is now our premium solution available in both 6:1 and 8:1 configurations.
For the primary line a thicker D12 Dyneema line than is normal is best to reduce the chance of it getting trapped between the gooseneck and boom, Standard on our systems is 5mm SK78 D12 Dyneema for Harken 29mm systems, and 4mm SK78 D12 Dyneema for the other block types. For the secondary line (the one that you pull on) we use Robline Dinghy Control as the standard line and Marlow Excel Racing GP78 as the premium line. The Marlow Excel Racing GP78 has Technora in the cover which makes it more durable. Gottifredi Maffioli EVO Race 78, which is similar in performance to Dinghy Control is available as a no-cost option - If you want that line just add a note at checkout. All our secondary line ends are epoxied/heatshrink sleeved to help keep them nice and tidy. We offer a wide range of primary/secondary colour combinations. If you want more information on our secondary lines and how to select which is best for you read our article on selecting secondary lines .
Rope Length (Handle Type)
The secondary control line length can be selected for either a simple loop handle or a braided handle.

Lower Block Attachment
Finally, you need an appropriate method of attaching the free end of the primary line. A good way of doing this is to use the lower block strop around the mast as the anchor point for the end of the primary line. It has a number of advantages – it doesn’t put additional load on the kicker assembly; there are no pins or shackles or knots to mess about with; and the primary line and block are symmetrically positioned.

Lower block strop and primary line termination
The simplicity of rigging depends on the type of system that you are using (6:1 or 8:1), and the handle type (simple or braided chain). For the least simple to rig (8:1 system with a braided chain handle) to avoid having to thread the secondary line and re-do the chain handle, some customers have opted to terminate the primary line at the top of the kicker/vang assembly (either using a pin or caribiner). If you want to rig your primary that way, select ‘Top Of Kicker’ under the Systems Option section, and we will shorten the primary line by 10cm/4 inches.

Using a Caribiner
Using the Same System with Multiple Rigs
As mentioned, as the tack cringle on the MkII standard sail is positioned higher than the other rigs, our systems are optimised to the rig that you are using. If you want to be able to sail either the 4.7/Radial/MkI and the MkII standard rig with the same downhaul system it needs to be adapted in some way as the primary line length for the MkII is 10cm/4 inches longer. We feel that the best way of compensating for the above is to order a Standard MkII optimised system, and add the ‘Top Of Kicker’ under the Systems Option section. When using the system with a Standard MkII sail, terminate the primary at the top of the kicker assembly using a caribiner. When using a 4.7/Radial/Standard MkI sail, terminate the primary via the lower block strop which will effectively shorten the primary line length by approximately 10cm.
Rigging Instructions
All our systems are supplied with detailed rigging instructions which can be seen here: 6:1 downhaul installation instructions
6:1 downhaul 'top of kicker' installation instructions
8:1 downhaul installation instructions
8:1 downhaul 'top of kicker' installation instructions
Building an 8:1 downhaul video
Downhaul FAQ’s
- You sell both 6:1 and 8:1 downhaul systems – which is best for me? The 6:1 system is best for the 4.7, radial and standard Mk1 rigs. The 8:1 is best for the standard Mk2 sail which uses a heavier cloth. If you are a lightweight sailor you may want to use the 8:1 for the radial or 4.7 rigs, accepting the tradeoff of ease of use versus more rope in the cockpit.
- I sail both radial and the new standard Mk2 rigs – is it possible to have a downhaul system that works for both? Yes. The tack cringle/grommet on the new Mk2 sail is about 5-6 cm higher than on all the other sails, and whilst this doesn’t sound much, when it is combined with a 6:1 or 8:1 system this distance is multiplied. Our usual downhaul system fixed the primary line at the level of the kicker tang on the lower mast. One option is to use that fixing position for the radial/Mk1, and to move the fixing position up to the top of the kicker assembly for the Mk2. This reduces the impact of the difference. It can be reduced further by using a snap type caribiner on the kicker assembly such that the primary attachment point for the Mk2 is even higher .
- Why is the downhaul primary line so thick? From a strength perspective Dyneema is so strong that we could probably use a very thin 1.5mm line, but it would probably saw into the tack cringle and would certainly get snagged in the gooseneck. Over the years the line has got thicker, as the type of blocks – such as the Harken 29mm block – can accept larger lines, and reducing the chance of it getting caught in the gooseneck.
- Can I see the instructions as to how the systems are rigged? Yes, follow the following links:
General Questions:
- I am unsure of what is best for me – do you offer free advice? Yes, we offer free advice on what we feel is best for you, based on years of sailing the ILCA/Laser at championship level. Just contact us at [email protected]
- I like to rig my ILCA/Laser differently. Do you offer custom systems? Yes. A quick walk around the boat park at even a world championship will show that there is no ‘right way’ to a rig a Laser – a lot is down to personal preference, and we are happy to build up exactly what you want.
- Do I have to have everything spliced together? The answer is no, but there are a number of reasons why we splice our systems together. For the primary lines, the fixing to the new ‘soft attach’ blocks is important that it is done correctly, as an incorrectly fixed primary line can pull apart the head of the block. For the secondary lines, particularly the smaller Harken 18mm and Allen 20mm blocks, the size of the sheave makes it difficult to thread a 4mm control line through when a 3mm primary line has already been threaded through .
- Having a spliced system is great, but what happens when the ropes inevitably wear out? If you liked the original spliced system that we supplied we can rebuild the system using your original blocks. Just send the blocks back to us and we can replace and re-splice the lines for you.
- I have just bought a new ILCA dinghy and I have the bag of blocks and ropes that comes with it. Can you put it all together for me? Yes, we have done this for a number of customers. The bag of ropes that comes with a new Laser can be daunting. We can turn all those ropes and blocks into a ready to fit system - just email us at [email protected] for more information.
(+44) 07880 500233
southeastsailboats
southeast_sailboats
Southeast Sailboats
We use cookies on our website to give you the best shopping experience. By using this site, you agree to its use of cookies.
By Product Categories
Small Boat Blocks
Big Boat Blocks
Complementary Hardware
Travelers & Genoa Leads
Mainsail Handling
Headsail Handling
Mooring Solutions
Spare Parts
Accessories
Harken Canvas
Fly Soft-Attach Blocks
Carbo Air Blocks
Small Boat Classic
Flip-Flop Small Boat
GP Catamaran Ceramic Mainsheet Systems
Protexit™ Exit Blocks
Through-Deck
Wire High-Strength
Dinghy Vang
Small Boat Deck Organizers
Midrange Classic
Midrange Deck Organizers
Zircon Blocks
Element Blocks
Black Magic Air Blocks
Cruising ESP Blocks
Megayacht Blocks
Stainless Steel Blocks
Black Magic Air Runners
FlatWinder Powered Blocks
Mastbase Blocks
Over-the-Top
Crossover Blocks
Big Boat Deck Organizers
Cam Cleats & Kits
Cam Cleat Accessories
Cam Cleat Bases
Stand-Up Bases
Deck Organizers
Spinnaker Pole Cars
Soft Attachments
Fixed Padeyes
Removable Padeyes
Bolt-Down Fairleads
Grand Prix Jib Leads
Halyard Tensioners
Tiller Extensions
Peter's Desk Drawer
Dinghy Jib Leads
Crossbow Pivoting Self-Tacking Jib Traveler
13 mm Micro
22 mm Small Boat
27 mm Midrange
32 mm Big Boat
Windward Sheeting
42 mm Mini-Maxi
T-Track Genoa Lead
Access Rail System
13 mm AA Battcar System
22 mm A Battcar System
27 mm B Battcar System
32 mm C Battcar System
18 mm Switch Battcar System
26 mm Switch Battcar System
26 mm Trysail Switch
32 mm Switch Battcar System
32 mm Trysail Switch
40 mm Switch Battcar System
40 mm Trysail Switch System
Furling Mainsail Outhaul Systems
Single Line Reefing
Harken Vang-Master
Carbo Racing Foil
Small Boat Furling
Small Boat Underdeck
Reflex Furling
MKIV Jib Reefing & Furling
MKIV Underdeck Jib Reefing & Furling
Furling Accessories
Powered Furling
MKIV Ocean Furling
SnubbAir (Not a Winch)
Grand Prix Winches
Air Winches
Circuit Breakers
Analog Switches
Digital System Switch
Aluminum, Chrome & Bronze Winch Handles
Carbo OneTouch Locking Winch Handle
Service Kits
CLR Mooring Winches
Electric Captive Reel Winches
Hydraulic Captive Reel Winches
UniPower Radial
Single-Acting Integral Backstay Adjuster
Single-Acting Cylinders
Locking Cylinders
Double-Pull Cylinders
Grand Prix Cylinders
Hydraulic Cylinder Rod End Blocks
Hydraulic Cylinder End Fittings
Control Valves
Control Manifolds
Control Panels
Compact Control Panel
Rotary Pumps
Hydraulic Pump Handles
Power Systems
Repair Kits
Ball Bearings
Block Spare Parts
Traveler Cars
Furling Spare Parts
Winch Spare Parts
Winch Service Kits
Blockheads Gear
Promo & Gifts
Marine Grip
Jeep/Truck tops
Garage storage
One-design Covers
Boat accessories
Canvas bags
By Type of Sailing
Dinghy / One-Design
Offshore Racing
Coastal / Day Cruising
Bluewater Cruising
Megayachts / Custom
Service Guide
Tech/Service
deck layouts
Data Sheets (SDS)
How to choose
System diagrams
Calculators
Reeving diagrams
Traveler Purchase Selection Guide
How to Choose
Testimonials
Hoister Videos
Request a Quote
Request Samples
Fabric details
Cover Styles
Canvas Videos
Contract Services
Materials and Components
Our Equipment
Contract Cut-and-Sew Project Spotlight
- Harken at the front
- Safety & Rescue
Support / Selection tools / System diagrams
Cunningham Systems
The cunningham controls the fore and aft position of draft in the mainsail or genoa and works together with the traveler, mainsheet, outhaul and vang to optimize sail shape and increase boatspeed. Cunningham controls lead to the crew to encourage adjustment as wind speed changes.
Typical Boat Length: Small Boat: 22' - 28' (6.7 - 8.5 m) Midrange: 29' - 34' (8.8 - 10.4 m) Big Boat: 35' - 42' (10.7 - 12.8 m)
4:1 Cascaded
This simple 4:1 system leads aft to the cockpit. A favorite on small keelboats and daysailers.

8:1 Cascaded
The most basic cunningham is a self-cleating 4:1 tackle positioned at the mastbase.

4:1 Double-ended Cascaded
This system is easy to adjust from the trapeze. It’s easy to rig and unrig. Popular on smaller beach cats.

12:1 Cascaded
This simple 2:1 purchase is attached to a 6:1 cascade for a 12:1 system. Used on larger racing and cruising boats.

6:1 Double-ended Jib Downhaul
Small boats like J/24s use a double-ended genoa cunningham system to adjust draft from the weather rail.

Product Categories
- United States
- New Zealand
- United Kingdom

The $tingy Sailor
Diy trailerable sailboat restoration and improvement without throwing your budget overboard.

Control Mainsail Draft with a Boom Downhaul
A boom downhaul is one of the three possible control lines for the three sides of the mainsail. The other two are the boom vang (controls leech tension) and the mainsail outhaul (controls foot tension). Catalina 22 and similar sailboats have a short length of line attached to the bottom of the gooseneck car on the boom that ties off to a cleat at the base of the mast as shown below. It simply keeps the boom from sliding up past a certain point on the mast after you hoist the mainsail. It gets the job done but it isn’t easy to adjust, especially while under sail.
Some people call this simple arrangement a boom downhaul, which I suppose is technically correct, but I call it a tie-down since it isn’t as easy to trim as what I’m going to describe and it would be confusing to call them both the same thing.
Most cruising sailboat owners don’t adjust their tie-down often (or ever) because it’s too much trouble to go forward and adjust for the relatively small improvement it makes. Most racers adjust it whenever wind conditions change.

This project is a true boom downhaul that makes it so easy to trim from the cockpit, even while under sail, that it can become a regular part of trimming the mainsail.
A boom downhaul works like a Cunningham by tightening the luff of the mainsail to flatten it and to move the belly of the mainsail forward, which improves its aerodynamics and reduces heeling. It helps most in moderate to heavy winds and can make a significant difference in the mainsail shape.
A Cunningham works by connecting a hook on one end of a block and tackle to a grommet above the tack of the mainsail. Then when you harden the Cunningham, it pulls the luff flat while at the same time creating a wrinkle in the foot the mainsail. The boom stays stationary on top of a stop in the mast slot. A boom downhaul is simpler than a Cunningham
It may help to think of a boom downhaul as simply a boom tie-down line led aft to the cockpit. The advantages of a downhaul over a tie-down is that you can always trim it regardless of how high the mainsail is hoisted and it doesn’t make a wrinkle in the foot of the mainsail that disturbs air flow.
A boom downhaul is easy to set up if you have an empty turning block at your mast step, an open sheave in a deck organizer, and an unused cleat at the bulkhead. Just replace your existing boom tie-down line with enough line to lead it through the turning block and deck organizer to the cockpit like shown below.

I prefer to use 1/4″ New England Ropes Sta Set with a spliced eye in the dead end to receive a halyard shackle. Instead of tying the line to the gooseneck car with a bowline knot, the shackle is faster and easier to detach. This way, you can leave the downhaul line in place and just disconnect it from the gooseneck car if you need to remove the boom, such as to unstep the mast for trailering.
Rigged this way, the boom downhaul doesn’t offer any mechanical advantage over a boom tie-down. In fact, it has the disadvantage of the friction added by the turning block and the deck organizer. But it usually doesn’t take a lot of force to tighten it fully anyway.
To make it even easier to adjust, you can rig it with a block attached to the gooseneck car instead. Start the line at a becket on the turning block at the mast step or attach it to the mast step plate as in the picture at left. Reave the line up through the gooseneck car block, down through the turning block, and then lead it aft to a bulkhead cleat. That gives the downhaul a 2:1 mechanical advantage. If necessary for heavy wind sailing, you could increase the mechanical advantage even more by using double blocks in both positions.
Would you like to be notified when I publish more posts like this? Enter your email address below to subscribe to this blog and receive notifications of new posts by email. You will also receive occasional newsletters with exclusive info and deals only for subscribers and the password to the Downloads page. It’s free and you can unsubscribe at any time but almost nobody does!
Share this:
8 thoughts on “ control mainsail draft with a boom downhaul ”.
I’m looking to rig mine from the halyard plate, to the block attached to the gooseneck car, to the cockpit. Any idea the length of line needed? Also, did you use a simple shackle to attach it to the halyard plate?
I used 12′ of 5/16″ New England Ropes Sta Set. You can find the lengths necessary to lead all of the running rigging lines to the cockpit listed in Lead All Lines to the Cockpit for Safer Sailing .
It’s hard to see in the picture but yes, I use a regular shackle to attach the dead end to one of the holes in the halyard plate. If you have a bail attached to the base of your mast for a boom vang like you can see in this post, another option for attaching the downhaul turning block is to shackle it to the bail also. That frees up a hole in the halyard plate for something else. You can see that in the third picture in Lead All Lines to the Cockpit for Safer Sailing .
This cat has all sorts of really useful sail rigging ideas! I am well pleased and actually impressed.
Thanks for the compliment.
On the last option, could you tie off the line to the freed up cleat, then up to the block and on to the cockpit? I seem to be missing the last image showing the 2:1 setup…
Thanks for the explanation of how the three control lines impact the sail shape…now I just need to try them out (along with all the other great rigging suggestions on your site)!
Yes, you could start it there but it might interfere with a boom stop if you have one in between the cleat and the boom. That’s why I led it over the opposite side of my mast step plate. The 2:1 picture is the main picture of the post on the left. The top and bottom are cut off a bit, sorry.
Hi Stingy, Your boom downhaul is a nice simple way to adjust luff tension. I’m curious if the boom downhaul offers any sail shaping advantages over a fixed boom and using the main halyard tension to adjust luff tension? Perhaps the friction of the sail slides or bolt rope gives an advantage to tensioning the luff separately from the head and tack.
Thanks in advance for your reply. Really enjoy your site!
They both basically achieve the same thing but a downhaul is a lot easier to adjust, especially if you’re single-handed or short-handed. On my boat, to get it any harder than when I originally set it through a cam cleat, I would have to leave the helm and “sweat” the line from the cabin roof or lead the halyard to an unused primary winch and crank it tight. But if I had fully hoisted the mainsail to begin with, there wouldn’t be any more height to be gained anyway and I could easily jam the end of the halyard in the masthead. For that reason, if you stick with a boom tie-down, set it so that it stops your mainsail head board a couple inches below maximum hoist. Then you will at least have the space to harden it if you need to.
With a 2:1 downhaul, I just reach over to the bulkhead and haul the line a couple inches and voila. Likewise, if I then turn downwind and want to ease the luff, I can do it just as easily.
Leave a comment Cancel reply
This site uses Akismet to reduce spam. Learn how your comment data is processed .

- Already have a WordPress.com account? Log in now.
- Subscribe Subscribed
- Copy shortlink
- Report this content
- View post in Reader
- Manage subscriptions
- Collapse this bar
About the Centerboard
Climbing on the Lift
Downwind Sail Trim
The spritsail, spars and rigging that accompany Crawford Boat Building's MELONSEED SKIFF are an example of simplicity and efficiency. It is unlikely that any rig is the equal of the sprit rig in providing performance with a minimum of hardware and fuss.
The following is a illustration followed by a description of the component parts, their assembly and function:
click on the boom or mast for more...
Masthead Rigging
Feed the 1/8” braided Dacron line through the grommet as shown.
Put the two ends through the hole in the top of the mast.
Put your thumb between the two lines, and take the line on the left side of your thumb and pass it through the left side of the grommet. Do the same with the right side line and put it through the right side of the grommet.
Keeping the lines neat “right to left” make more passes through the hole with the lines as seen next.
IMPORTANT: You will tie off the excess with a square knot, but before you do, be sure that the sail is NOT pinched up tight against the mast, and that the luff runs STRAIGHT up the mast. The luff should be stretched fairly tight but not overly tight. Each lace line should allow the luff to be spaced evenly away from the mast.
Cut off the excess line with a heat gun, or if you don’t have one, trim it with a scissors and then VERY carefully burn the ends of the line to seize them and keep them from fraying. I also melt the line (tricky!) in one side of the knot just a tiny bit so that it won’t become undone.
Technically a SPRIT BOOM ... This has a slot in the end that goes forward and a hole with a snap attached to it in the aft end. To get optimum performance on all points of sail the boom will be set on the opposite side of the sail from the sprit - (It doesn't matter which side you put either spar on.) This causes the least average overall interference to the shape of the sail. You may set both spars on one side of the sail if you wish although you will get a better shape sail on one tack than the other. (This can only be useful if you are going to be on mostly one tack over a sustained distance.) Attach the boom to the sail by clipping the snap on the end of the boom to the grommet on the CLEW of the sail. The clew is the corner of the sail that is on the bottom of the sail closest to the transom.
The forward end of the boom is attached to the mast with another small line called a Boom SNOTTER. This short line should be permanently on the mast for sake of convenience. It has either a knot or a loop in one end, and goes down through the eye strap to the jamb cleat. Put the knot or loop into the SLOTTED of the boom, and tension the boom snotter according to the wind strength.
The item from which the rig gets it's name. This is a 10' stick with a spike in the upper end and a line (called a snotter) attached through a hole in its bottom end. Setting this into the rig is extremely simple, but adjusting the upward tension against the sail top (PEAK) is the single most important adjustment you will make. It goes like this: Grab the sail peak and insert the spike into the rope loop that is sewn into the sail. Push the sprit upward. Tie off the snotter to the cleat located on the mast nearby. Now this is where you can get the most out of the rig's performance potential. The more the wind, the stronger the sprit tension! If you ever see sag lines in the sail because the sprit is not tensioned enough, then you are not getting maximum performance. Remember, soft wind, soft sail .... stiff wind, stiff sail. There are some very technical reasons for this, but that's a two beer conversation. A simple rule of thumb is to always OVERTENSION the sprit a bit anyway because the snotter seems to slip a bit naturally. When sailing to windward, you should never see sag lines in the sail in any direction.
A quadrilateral (square) sail of dacron weighing approx. 4-5 oz. per yard. It has numerous holes called grommets set into it, to which line (rigging) is attached. The edge that is set against the mast is called the LUFF. Using the light 15" light lines provided, tie the luff to the mast so that sail stands evenly about "' away from the back edge of the mast. Tie each of these LACE LINES tight with a good firm square knot. Tie the top most grommet to the hole in the top of the mast using a longer (24") lace line, and go through the hole at least twice and tie off very well. At no point should the sail luff appear crimped!
The corner of the sail that is at the bottom of the luff is called the TACK. Hanging down from the tack is a line attached to the sail called the DOWNHAUL. Now refer back to the mast hardware descriptions and this will start to come together. Tie the downhaul line to lowest cleat on the mast, the one just above deck level, the downhaul cleat. Be sure to tension the luff fairly tight. Good luff tension is very important. The sail is on the mast now so let's continue to rig it up.
A 10' length of solid wood which sets into the boat and is held in place by the mast step at its bottom (heel), and the mast partner at deck level. It has four pieces of hardware fastened to it. Starting from bottom to top they are:
1. A small 3" cleat that the sail downhaul is tied to. On the opposite side of the mast are the other three pieces.
2. A second cleat to tie off the boom snotter.
3. An eye strap to turn this snotter.
4. Further up the mast, a cleat for the sprit snotter.
Don't be confused by the unfamiliar nautical terminology at this point. Just notice the four pieces of hardware. The rigging will be described later.
A 25' length of dacron line with a snap on one end. Snap the sheet onto either the grommet in the clew (along with the boom end snap) or to the snap itself. Newer boats have a RING attached to the bottom of the boom. Snap the sheet to this ring. Run the other end of the sheet through the block on the rudder head and IMMEDIATELY tie a figure eight-knot in the end.
One of the wonderous features of the Melonseed Skiff is that with just a little practice, this rigging drill can be accomplished in
ONLY A MINUTE OR TWO!!!
Now that you have accomplished all this, take fifteen knots of wind and two hours of spare time. Mix well. Apply as often as necessary! Caution; continuous use of this rig and boat can lead to addictive sailing behavior.
Operating and understanding the Melonseed Centerboard:
The centerboard is a plate of 1/2" PVC plastic that is held in place in the centerboard trunk by a bolt, rubber washers, metal washers and a lock nut on its forward lower end. Actually, the board does not ride on the bolt as you might imagine from a visual inspection, but there is a piece of PVC plastic tube that acts as a ‘bushing” around the bolt. There is Sika-flex 291 adhesive sealant between the rubber washer and the fiberglass centerboard trunk. It is a very strong and watertight system that should endure well as time goes on because the friction is really minimized by the water lubricated PVC on PVC system.
The board will rise by itself if you run aground or strike an underwater object.
The string that raises and lowers the board is called a centerboard “pennant”. The pennant is attached to the top aft end of the board by a very simple system of holes and a knot. Once a year or so, check the condition of the pennant where it connects with the board to be sure there is no wear on the pennant.
There are two (permanent ??) magic marker marks on the pennant to indicate the depth settings of the centerboard. With the board pulled up all the way there should be one mark on the pennant at 12” back from the cleat, and another one at 22” back.
If you lower the board and cleat the pennant off at the first mark you will have a “half depth board” with a draft of about 16" – 18". If you lower the board down even lower and cleat it at the second mark you will have a “full board” or about 28” of draft.
NEVER let the board down more than the second mark for a full board setting , as it will likely chatter or wobble in the trunk, and it is also not the best angle for the board in terms of performance. Occasionally though the board will still “chatter”. Lots of centerboards do. Usually it is a sign you are going quite fast, which is good, but if the noise or vibration is annoying, just pull the board up a tiny bit and the chatter will usually go away.
So long as you are within the limits of the recommended maximum depth setting, you can sail the Melonseed with the board set at any depth you like or feel necessary based on the depth of water you are sailing in. Note that the boat will not go to windward as quite as well with a half board or less as it will with the full board (set at the 22” mark) down. You need very little board down when running down wind, so if you want to fine tune the performance you can pull the board mostly or even all the way up. Be sure to lower it again before you tack or gybe, because it is very difficult to perform either maneuver without some board down. It you are going down wind in a very strong breeze you should absolutely have some or all of your board down for increased control.
If you set the boat down on a beach with course sand or clamshells you should ALWAYS check to see that something hasn’t become stuck up in the trunk and jammed the centerboard so that it will not fall down. Just before you set sail, give the pennant a little up and down pull to reassure yourself that the board is free to drop.
If you sail in a tidal salt marsh and there is a lot of marsh grass floating around in the water, or there is lots of floating seaweed, your pennant may collect bits of this flotsam and jamb it up inside the trunk. This is unlikely to happen suddenly, but rather over the course of a long period of time. If this happens and the board becomes jammed or does not go all the way back up into the trunk, then you will have to lower it down and dig the grass out with a stick. You will be amazed at how much eel grass can be compacted up there.
Centerboard Installation:
When you remove the bolt that holds the c/b in the boat you will find
that there is really a piece of PVC pipe that is holding the board in
place. It is like a bushing around the bolt so that the threads of the
bolt don’t wear on the c/b and there is a tight watertight seal.
Installation:
Note the orientation of the bushing when you remove it, and when you
install it back in trunk with the new board put it back the same exact
Clean off the old sealer (3m #5200 or Sikaflex #291) from the old
washers and trunk. Lay down a big patch of masking tape over hole in
trunk. Punch hole in the tape big enough to dry fit the pin and
washers, and trace around the rubber washer to locate area that sealer
make contact with the trunk. With a razor knife, cut out circle or tape
that is under washer and sealer, leaving area around it all masked off
so the goop doesn’t GO EVERYWHERE! Apply modest amount of sealer on
trunk and rubber washer.
Tighten up bolt and nut just a little more than “hand tight”, not too
tight. Wipe off excess sealer and clean up bolt and then remove the
tape and things will be really neat.
Small Puffs of Wind Yield Large Gains.
When a boat has a properly balanced helm (called "weather helm"), she will naturally head up closer into the wind as it's strength increases. This behavior is particularly noticeable when a puff of wind hits your Melonseed. It's a safety feature that automatically points you up into the wind, luffing and letting the force of the wind slip by the sail.
Although already very close winded in her behavior, here's a technique you can use to sail your Melonseed even closer, quicker and faster to your upwind destination.
As you sense the wind increase, it's power filling the sail and heeling the boat over (this is called "getting a lift), keep the sheet tight or haul it in even more as you gradually point the boat more upwind. You must be aware of just how far you can turn upwind before you start to luff and stall the boat, but you'll be surprised at your new (temporary) heading. Most puffs of wind only last a few seconds though, after which the wind will lessen and often shift back. As soon as you feel the wind start to decrease, immediately turn the boat back off the wind a bit or you might stall losing momentum and speed. Done in a smooth "carving" motion both up into and back off the wind, it's a pleasant and efficient maneuver.
In spite of the fact that only a few seconds later you are back on the old heading again, you'll find that you have "side stepped" significantly more upwind. All good racers employ this trick. Doing this repeatedly on an upwind course will make a huge difference in time to your destination.
In general and when sailing downwind in most boats (usually they are Marconi rigged) the skipper’s eye is focused on the boom and keeping it far enough out downwind to prevent a gybe. Actually of course it’s not the boom, but the leech of the sail that gets caught by the wind, back winded, and thus causing an unwanted gybe. Folks tend to watch the boom though. Often there’s standing rigging (stays) that prevent the boom from going as far forward as one might like and that adds to the drama.
Things are different though with a sail rig featuring a quadrilateral sail. Sprit rigs, gaff rigs, lug rigs and many others are in this category. You must first understand that when sailing downwind in a sprit rig in strong winds that no matter where the boom is set, the peak of the sail will be much further ahead. There is a lot of wind force up there on the peak of the sail, and so long as THAT part of the sail is not at serious risk of gibing, then what’s going with the boom and the lower part of the sail is of less concern than you might imagine. There is often so much “twist” in the shape of the sail that when going downwind in a strong breeze the peak of the sail can be 18” – 24” ahead of the clew back at the end of the boom! So here’s the deal…it’s neither the peak nor the clew that needs to be at the optimum angle to the centerline of the boat (about 90 degrees), but HALF WAY UP THE LEECH OF THE SAIL. Therefore if you keep your boom BACK about 9 – 12” from perpendicular to the C/L it will set the sail just right. There is a lot of force on the peak which is a foot or so ahead of perpendicular, and that will keep the sail from gybing.
WHAT NOT TO DO: OK, so you are going like hell downwind in a heavy breeze in the Melonseed and it starts to feel a little scary, so you instinctively let the boom and sail out thinking that letting air slip off the sail it will ease things up a bit. Perhaps you are also worried about the “killer gybe” scenario as well so you see this as a preventative measure. The result of this is that you may now you may have the boom perpendicular to, or perhaps even worse, well ahead of the mast.
When the boom is out ahead of the mast the sheet no longer has the ability to “vang” (hold or pull) the boom down and the boom may start to lift upwards. This can turn into a pretty awkward situation in any cat rigged boat, not just the Melonseed. The boom might suddenly rise WAY up in the air and this will turn the sail into a weird crab-clawed shaped spinnaker with the center of effort of the sail now located much higher and further ahead of the mathematical location it needs to be for the boat to behave right. The boat may start to roll side to side and get very strange to handle. Well, if a boat ever does this and it has a free standing swiveling mast like the Melonseed then just simply let the sheet go and the drama will cease. Better yet, if you see that this is starting to happen, then just turn the boat a bit from a dead run to a broad reach (not by gybing of course, but an “upwind” turn) and keep the sail trim the same or even ease it a bit. Your might even go a bit faster trimmed like this, but you will certainly have a lot more control of the boat.
CENTERBOARD ADVICE:
We all know that raising the centerboard on a boat when going downwind will allow the boat to go faster due to having created less “wetted surface” and less drag. That’s fine in most wind conditions, but I feel strongly that in the Melonseed it’s important to have at least some centerboard down when the wind gets strong. It’s OK to have a normal full board down as well. You will have better control of the boat. And too, if you working harder than normal to keep all things going right with the tiller and sheet and you suddenly have to tack or gybe, you will need to have the board down. Lowering the board in a moment of crisis is not what you want to be doing. Plan ahead, be in control and leave yourself more options.
Free Shipping Over $99* - 366 Day Returns - Dedicated Customer Support
- Call Us +1-503-285-5536
- Sign in & Register
- Recently Viewed
Restoring & Upgrading Laser Sailboats - Advice & Common Questions

Over 200,000 Laser sailboats have been built over the last 40 years, more than most other small dinghy sailboats. In this article we are going to answer some of the common questions we receive about the basics of Laser sailboat rigging, how to tell what size rig you have, what you can upgrade, and more. This information is designed for the recreational sailor who is simply looking to replace missing parts or install simple upgrades that make it easier to enjoy their boat.
As a note, we're going to make frequent reference to a rigging manual put together by Vanguard Sailboats about 10 years ago. We still refer to this guide often as it shows two different styles of rigging side by side, which is particularly helpful if you have an older boat you wish to upgrade.
You can view that rigging guide here: Laser Rigging Guide (opens in new tab)
What size rig do I have? Standard vs. Radial vs 4.7 Explained
The Laser sailboat has had a number of different rig sizes, with the intention of making the boat sailable by a wide range of sailors (and different sailor weights) by simply swapping out the lower mast section and sail while keeping all other components the same. There are currently three different rig sizes and they are commonly referred to as 'Standard', 'Radial' and '4.7'. Below you will find an image that shows the three rigs side by side, and in the following section we'll explain each one.

Laser Standard / MK2 / ILCA 7
This is the most common Laser rig size, and the original rig on the boat when it was designed. It features a 7.06 square meter sail (about 76 square feet). In 2018, the Laser Class approved a new 'Standard' sail, which is referred to as the 'MKII' or 'Mark 2' to distinguish it from the first version. The difference, among other things, is in the panels. The original 'Standard' sail featured horizontal cut panels. The new MkII sail has radial cut panels. There is no difference in size between these two versions, and as of 2020 all new Laser Standard sails are available in this updated cut.

How to tell if you have a 'Standard' sail: The first and most obvious way to tell if you have a 'Standard' sail is to look at the panels. If they are horizontal, it is most likely a standard sail. Next, you can measure the luff (the front edge of the sail along the mast sleeve). This measurement should be about 5130 mm or 200 inches from the top of the sail to the bottom.
How to tell if you have a 'Standard' lower mast section: The 'Standard' lower mast section should measure about 2865 mm or 113 inches . It is a fairly stout mast section compared to the two smaller mast sections.
Laser Radial / ILCA 6
Originally called the 'M' rig when first designed, the Laser 'Radial' sail is smaller than the 'Standard' sail at 5.76 square meters (62 square feet). At the time, it was the only Laser sail to feature the radial cut panels, which allowed the sail to be de-powered more easily in bigh winds. Per the notes about the 'Standard' rig above, both the Standard and Radial sail feature the radial cut design. Another typical indicator of a Radial size sail are the blue panels at the tack and clew of the sail.

How to tell if you have a 'Radial' sail: The first and most obvious way to tell if you have a 'Standard' sail is to look at the panels. If they are radial, as in emanating out from the center, it is most likely a radial sail. Next, you can measure the luff (the front edge of the sail along the mast sleeve). This measurement should be about 4560 mm or 180 inches from the top of the sail to the bottom.
How to tell if you have a 'Radial' lower mast section: The 'Radial' lower mast section should measure about 2262 mm or 89 inches . It is also a bit smaller in diameter than the standard section.
Laser 4.7 / ILCA 5
The Laser 4.7 (or ILCA 5) is the smallest of the three Laser sails and was designed for young sailors just getting into Laser sailing. The 4.7 lower mast section is also different from the others in that is has a pre-bend near the boom fitting, allowing the sail to depower much easier. This is the least common Laser sail size, and if you have an old one around, chances are it is not a 4.7 sail.

How to tell if you have a '4.7' sail: The 4.7 is similar to the old 'Standard' sail as it has cross cut panels. Many 4.7 sails also have an obvious 4.7 logo somewhere on the cloth. Next, you can measure the luff (the front edge of the sail along the mast sleeve). This measurement should be about 4080 mm or 160 inches from the top of the sail to the bottom.
How to tell if you have a '4.7' lower mast section: The '4.7 lower mast section has a pre-bend in it and should measure about 1810 mm or 71 inches . The bend is the easiest way to tell it apart from the others.
What is the difference between 'Race' and 'Rec' rigging?
Up until about 20 years ago, the Laser featured very basic boom vang, outhaul, and cunningham controls. These were basically just long lengths of line with a series of loops and knots designed to create 'purchase' or pulling power to help tighten the controls and further shape the sail. In many ways, these rudimentary controls limited the type of sailor who really excelled in terms of performance, as you needed to be very strong and athletic to control the boat (you still do at the very top of the racing scene, particularly if you hope to compete in the Olympics). If you have a 30+ year old boat that hasn't been updated, chances are it is a 'rec' rigged boat. There is no problem sailing a Laser like this and many sailors enjoy the simplicity of the rigging and low cost of replacing line and parts.

In 2000/2001, a new set of controls was approved, designed to make it easier to manipulate the sail (particularly for lighter sailors) and to rig/unrig the boat. These included a 15:1 boom vang, 8:1 cunningham, and 6:1 outhaul system. What was introduced at this time was and is still referred to as the 'Race' or 'Pro' set up, as opposed to the 'Recreational' or 'Standard' set up found before 2000. Between 2000 and 2010, many active Laser sailors upgraded their existing boats to this new standard with a series of kits (these are still available) and new boats started to include them. Starting in 2008/2009, basically every new Laser sailboat included some version of this upgraded Race rig set up. Lets take a look at how to quickly tell if your current boat is set up as a 'Race' or 'Rec' boat and then some of the differences between the two set ups.
Deck Hardware: Differences Between Race & Rec

The most common question we get is how do I tell if my boat is set up with Race or Rec equipment? The quickest way to find out is to look at the hardware mounted on the deck of your Laser. Refer to the image above.
The 'Rec' setup (or 'Standard') is shown on the left , and the 'Race' set up (or 'Pro') is shown on the right. The Rec set up features a single bullseye fairlead just aft of the mast step and a single clam cleat just forward of the daggerboard trunk. These two pieces of hardware are for the cunningham control line.
The 'Race' setup (or 'Pro') is shown on the right , and features more advanced hardware. This hardware includes a deck plate with blocks just aft of the mast step (replaces the single fairlead) and a dual deck cleat in place of the single clam cleat. This new system allows both the cunningham and outhaul line to be lead down the mast and back to the cockpit for easy cleat/uncleat and adjustment from the new deck cleat system.
Insider Tip: Upgrade to 'Race' Rigging with just two kits! Back in 2000, Laser builders knew that sailors with existing boats would want a way to quickly upgrade from the 'Rec'/'Standard' rigging to the upgraded 'Race' rigging. For this reason, we still offer two kits just for this purpose.
- Laser Outhaul / Cunningham Upgrade - This kit includes everything from the blocks, cleats, hardware, line, blocks and instructions to fully update an older Laser to the latest outhaul and cunningham controls. This is the easiest way to upgrade your boat, though you will need a few basic tools to remove the old hardware from the deck and install the new components. In terms of an upgrade, this is one of THE BEST you can do to make your Laser easier to sail and to control in strong breeze.
- Laser Vang Upgrade - Upgrade to the latest 15:1 vang, no tools required! This vang system connects the same way as your old one (with a pin at the tang on the mast and with a 'key' to the fitting on the boom) and can be ready to go in minutes.
Deck Hardware: Shared Components Between Race & Rec

The rest of the hardware on a Laser deck is the same, regardless of what rigging specification you use. The image above shows the traveler set up, which consists of two fairleads mounted on the back corners of the boat and a single cleat mounted just aft of the cockpit on the deck. There are a few components to this area we'll mention here for your reference:
- Fairleads - Depending on the year of your Laser, you'll need either a 23mm Fairlead (found on most older boats ) or a 26mm Fairlead . We also have replica versions of both the 23mm and 26mm fairleads.
- Cleat - A single aluminum clam cleat is used for cleating the traveler. We recommend the CL221 Cleat .
- Traveler - We recommend 11 feet of a low stretch line. You can also purchase our premium Vectran Traveler with has a nicely spliced eye on one end.
Mainsheet System & Blocks

Regardless of specific rig set up, the Laser mainsheet is rigged the exact same way. The mainsheet system includes a ratchet block attached to the deck just forward of the cockpit, two blocks mounted on the boom, and a set of traveler blocks at the rear on the deck. There are a few different components and some upgrades we'll reference here.
- Mainsheet Ratchet Block - You can use any ratchet block here that is designed for a 6-8 mm line (the desired range of diameter for a Laser mainsheet). We recommend:
- Harken 57mm Ratchet Block
- Ronstan 55mm Orbit Block
- Mainsheet Spring
- Eyestrap (Stainless)
Boom Vang: 15:1 Race Vang vs 3:1 Rec Vang

The Laser boom vang is a series of blocks and line that connect to the boom with a key style fitting for quick removal and to a tang fitting with a pin at the base of the mast just above the deck line.
- Rec Vang (3:1) - Sometimes called the classic vang, this is a simple '3:1' purchase vang system with two blocks and a length of line. Here are the components.
- Classic Vang Block Upper
- Classic Vang Block Lower
- Classic Vang Assembly
- Classic Vang Line
- Race Vang (15:1) - Sometimes called the pro vang, this is a more powerful '15:1' purchase vang system with more turning points. It uses both a covered control line and pure dyneema/spectra line for strength. This is available as a full upgrade kit in a few different versions for easy install to your Laser. It is easier to install than the Outhaul/Cunningham kit as there are is no deck hardware to install - simply clip in the same way as your old vang.
- Harken Laser Vang Upgrade
- Vang Becket Block - Used at the top of the Harken Vang assembly
- Practice Vang Upgrade (Generic)
- Shared Components - There are a few pieces of hardware used on the boat regardless of what vang you have.
- Laser Vang Tang - Attached to lower mast section for connecting lower part of vang to mast
- Laser Vang Strap - Attached to boom for connecting top part of vang to mast with the key fitting via the slot
Outhaul Control System

The outhaul controls the back corner, or the clew, of the sail. The 'rec' / classic rigging is quite simple, whereas the 'race' rigging adds more power to the sail control, making it easier to adjust and flatten the sail to depower in heavy wind.
- Rec Outhaul - Uses a 10 foot length of line and the clam cleat on the boom to achieve a basic purchase system for tightening the sail. The entire control exists right on the boom.
- Race Outhaul - The upgraded race outhaul system has a few variants, but adds twice as many turning points for a more power purchase system. It uses two sections of line, a primary dyneema or spectra line in the rear and a secondary covered line in the front, which is lead down to the deck cleat for easy adjustment.
- Harken Outhaul/Cunningham Kit - Includes everything, down to the deck hardware, for adding the upgraded Outhual and Cunningham set up to your existing Laser.
- Practice Outhaul/Cunningham Kit - A less expensive alternative to the Harken kit from Allen.
Cunningham (Downhaul) Control System

The cunningham, sometimes called the downhaul, controls the front edge of the sail The 'rec' / classic rigging is quite simple, whereas the 'race' rigging adds more power to the sail control, making it easier to adjust and flatten the sail to depower in heavy wind.
- Rec Outhaul - Uses a 10 foot length of line and the single clam cleat on the deck. The line is tied around the vang tang, up through the tack grommet, down to the fairlead, and back to the clam cleat for adjustment.
- Race Outhaul - The upgraded race cunningham system also has a few variants, but creates a powerful 8:1 purchase system. It uses two sections of line, a primary dyneema or spectra line to pass through the tack grommet and a coverer secondary line which is fed through the blocks and lead down to the deck cleat for easy adjustment.
- Harken Outhaul/Cunningham Kit - Includes everything, down to the deck hardware, for adding the upgraded Outhual and Cunningham set up to your existing Laser.
- Practice Outhaul/Cunningham Kit - A less expensive alternative to the Harken kit from Allen.
Subscribe To Our Newsletter
Sign up for our newsletter to receive exclusive discounts, new product announcements, and upcoming sales.
- Forums New posts Unanswered threads Register Top Posts Email
- What's new New posts New Posts (legacy) Latest activity New media
- Media New media New comments
- Boat Info Downloads Weekly Quiz Topic FAQ 10000boatnames.com
- Classifieds Sell Your Boat Used Gear for Sale
- Parts General Marine Parts Hunter Beneteau Catalina MacGregor Oday
- Help Terms of Use Monday Mail Subscribe Monday Mail Unsubscribe

Mainsail downhaul
- Thread starter brockangelo
- Start date Jun 2, 2022
- Catalina Owner Forums
- Catalina 22

brockangelo
One thing that's still a difficult thing for me and typically requires me to leave the cockpit is bringing down the mainsail. I have a line rigged as a downhaul for the main, and have it attached to the main halyard, but it inevitably bends the top of the mainsail and flaps out away from the mast and the mainsail gets caught and doesn't come down. I have some mainsail "sliders" that I'm going to replace, and I got the spray lubricant to make it flow easier in the track, and I've not installed those yet; but thought I'd ask if there are things I should be doing to fix that. I kind of hate when I can't bring it down as it adds stress.

kappykaplan
McLube SailKote is your friend in this application. The main should drop freely when the halyard is released. Is your downhaul below the headboard of the main? I'd think you'd want it attached a couple of sliders below the headboard.
Okay thanks - I have the SailKote, but haven't applied it yet. Is it enough to spray it on the sliders, or do I need to bring the mast down and spray down the whole track?
brockangelo said: Is it enough to spray it on the sliders Click to expand

Tie the downhaul to one of the sliders/grommets BELOW the top one, where the halyard is attached. If you want to clean and lube the entire track, tie a messenger line to a spare slider that you've wrapped in something soft, like terry cloth. Hook the halyard to the top end, squirt some lube on the cloth, and run it up and down the track a few times.

Joe said: Tie the downhaul to one of the sliders/grommets BELOW the top one, where the halyard is attached. If you want to clean and lube the entire track, tie a messenger line to a spare slider that you've wrapped in something soft, like terry cloth. Hook the halyard to the top end, squirt some lube on the cloth, and run it up and down the track a few times. Click to expand
AaronD said: A cheap track-cleaning system I bookmarked awhile back: Main hard to raise Click to expand

I moved up from a C22. It had a downhaul on the jib, but not the main. The main dropped, like others have said, as soon as I released the halyard. So lube is a good idea. If you still need the downhaul, I think you should move the attachment point down a few sliders, so you get a good downward tug on a section of the luff, rather than just pulling on the top.
Thanks all - I replaced all the mainsail sliders (they were pretty gunky) and then I did @garymalmgren 's approach to lubricate the mainsail track a few times and the difference was pretty astounding. It dropped like a rock afterwards. I removed my mainsail downhaul and am planning on setting up an aft-led reefing system with the room it left me.
brockangelo said: It dropped like a rock afterwards. Click to expand
That's a great idea. I kept the section of line that I tied up, but your's looks way better!
- This site uses cookies to help personalise content, tailor your experience and to keep you logged in if you register. By continuing to use this site, you are consenting to our use of cookies. Accept Learn more…
⛵️ Fast Dispatch - Getting You Back on the Water ⛵️

- MENS SAILING CLOTHING
- DYNEEMA TRAPEZE LINES AND ROPES
- SINGLE SHEAVE BLOCKS
- Gelcoat Fillers
- Dry Lubricants
- Adhesive Glues
- Hooks & Clips
- Catamaran Launching Trollies
- Jockey Wheels
- Hitch Locks
- Lighting Board
- Breakaway Cables
- Clew Straps
- Upper Masts
- Lower Masts
- Rope Thimbles
- Wind Indicators & Burgees
- Parrel Beads
- Whipping Twine
- Sailmakers Palm
- Digital Compasses
- DEVOTI ILCA
- LASER SAIL BOATS & DINGHYS
- BAHIA SAIL BOATS & DINGHYS
- Numbers & Letters
- Dinghy Covers
- Under Covers
- Catamaran Covers
- Single Handed
- Double Handed
- 18 Foot Skiff
- Exocet Moth
- Musto Skiff
- Dart 15/ Sprint 15
- Hurricane 5.9
- Laser Bahia
- Laser Cascais
- Laser Funboat
- Laser Stratos
Your Cart is Empty
- £0.00 Subtotal
Tax included and shipping calculated at checkout
Order before midday Monday to Friday and we will ship your order the same day.
- 01268 222912
- Accessories
- Laser Products
- Sails & Covers
- Rope Lengths
- Parts By Boat
- Boat Care & Cleaning
- Splicing Tools
- Boat Covers
- Dinghy Rope Lengths
- Laser Rope Lengths
- RS Rope Lenghts
- Catamaran Rope Lengths
- Laser Performance
- Topper Sailboats
- Other Boats

- Mens Sailing Clothing
- Womens Sailing Clothing
- Repair Kits
- Skiff Suits
- Life Jackets
- Trapeze Harnesses
- Buoyancy Aids
- Hiking Pads & Pants
- Hiking / Toe Straps

Zhik Superwarm
- 100m Rope Reel
- Polyester Ropes
- Control Lines
- Double Braids
- Braid On Braid
- Anchor Lines & Ropes
- Spools & Reels
- Windsurfing

Mini Spools
- Single Block
- Double Block
- Triple Block
- Soft Attach
- Split Rings & Pins
- Inspection Hatches & Covers
- Bungs & Sockets
- Rudder & Tiller Parts
- Bushes & Fairleads
- Marine Screws
- Penny Washers
- VHF Aerials & Antennas
- Marine Tapes
- Traveller Systems And Parts
- Traveller Blocks
- Pico Hull & Deck Fittings
- Hull & Deck Fittings
- Laser Boats
- Laser Sails
- Laser Sail Packages
- Laser Spars
- Laser Rig Packages
- Laser Foils
- Laser Hull & Deck Fittings
- Laser Ropes
- Laser Dinghy Covers
- Devoti ILCA Boats
- ILCA Sail Packages
- ILCA Rig Package
- Devoti D-Zero Boats
- Devoti KDK Boats

New Devoti ILCA
Search our chandlery

Laser Sailing - Laser 8:1 Downhaul System
September 26, 2018 3 min read
Laser 8:1 Downhaul System
Current Laser National Champion and Sailing Chandlery sponsored sailor Sam Whaley explains how his Laser 8:1 Downhaul system is rigged and the ropes he uses.
In 2016 the MK2 Laser Standard sail was released and amongst many small improvements on the previous design, the most notable change was an increase in cloth thickness used. Whilst this has meant that the sails are competitive for longer and harder wearing it does have some knock-on effects, such as controls being harder to pull on. This especially applies to the downhaul and with many people previously just using a 6:1 purchase it was simply not powerful enough to pull the correct amount of downhaul on in new sails.
The Laser class rules allow a maximum purchase on the downhaul system to be 8:1 and many sailors started beefing up their systems by adding another block. This trend has swept across the Laser standard world over the past year with almost every single top sailor in the world using this 8:1 downhaul.
Here we will take a look at my version of the 8:1 downhaul . I switched to this system at the beginning of 2018 and despite being sceptical at first it really does make a huge difference, allowing you to be able to depower the sail in the windy conditions even when hiking. I would recommend it to everyone sailing a standard rig and maybe even to small people in a radial who struggle to pull the downhaul on in the big stuff.
Primary Rope Line
For my primary line I use some 5mm dyneema which goes through the sail and then around the gooseneck. I loop it around the gooseneck to avoid the rope getting caught in the boom and save a few grams of weight with less rope. Going any thinner with this primary is risky as there are such high loads on this rope if it snags on anything it can break easily.

I then used a Harken T18 block and attached it to the bottom of the top T29 block using some thinner dyneema. Whilst you can use a bigger block, a T18 block underneath makes the system flow easier as the secondary line does not rub upon movement, therefore less friction.

At the kicker fitting near the bottom I have a simple loop with another T29 block, held up by my sailing watch.
Optimum Time Big Sailing Watch

My system works just like a 6:1 downhaul system, with an added block, so is very easy to rig and is just tied off at the bottom block by my watch as opposed to the top block by the foot of the sail.

As you can see by the picture above my downhaul system is also slanted forwards slightly to stop the rope getting caught in between the boom and the gooseneck.
In conclusion the 8:1 downhaul system is a must have upgrade for Laser sailors, especially standard sailors, and really helps make your Laser easy to control.
Products Used
Here are the products which are used for Sam's 8:1 Laser downhaul system:
- 5mm Dyneema
- 4mm Evolution Race Dyneema Core rope
- Harken 29mm Soft Attach Block
- Harken 18mm Soft Attach Block
Want more content like this, and a first order discount?
Sign up for more great articles like this and receive a unique first order discount code. Share your birthday too and we'll send you a gift for your special day.
Recent Articles
- ILCA Outhaul Calibration Markers
- ILCA Daggerboard Calibration Sticker
- 90˚ Marked Laser/ILCA Main Sheet - Sailing Chandlery
- Pre season Check List
- Where Should My ILCA Tell Tales Go
- What Are The Basic Tools Needed To Start Rope Splicing?
- You Don't Always Need Dyneema
- Boat Care and Cleaning Products
- Ropes for Club Boats and Club Dinghies - The Bosuns Guide
- Why You Should Use Two Sailing Watches
Let customers speak for us
Nearly 40 years on from my first "Laser" I have just taken delivery of my second - a Devoti Ilca 7. Buying this new ILCA has been a 5 star experience, and dealing with Andrew, Jason and Steve at Sailing Chandlery have all been great - candid advice, all the help and assistance I could have wished for. And to cap it all Steve delivered the new Devoti to my home address - 5 hours away, and up in the hills, not easy to get to - and what's more Steve then stayed to help me sort out the rigging - all very different from what I remember. When I last sailed a Laser you had to lean on the boom to put on more kicker. I'm very happy to give the team at Sailing Chandlery a fulsome recommendation.
quick and easy to deal with prompt delivery on order will use again
We ordered a 100m reel of sheet rope for our sailing club's training fleet of Toppers and Fevas. It runs through the blocks very easily and is great to hold. The children on the courses love it!
Great little piece of kit, use it for giving me an idea of wind direction in the marina on my narrowboat!!
Great harness, really comfortable, looks to be good quality and well made. Great service from Sailing Chandlery.
Delivery was super quick after bank holiday, and product is just as described. Super convenient pockets inside a comfy backpack kitbag so great and practical for walking to/from dinghy parks
Just a small item, a bung! The super quick delivery got me back on the water. Thank you.
Good rope for low load jobs - easy to splice, smooth and flexible.
Perfectly layed out numbers
WIP have really pulled out all the stops on this impact vest to suit all forms of hi-performance watersports. Feels great on, good snug fit - no restrictions to movement and doesn't impact on trapezing like a lot of buoyancy aids. A very well made, high quality vest that has everything you need to keep you safe on the water.
Purchased for my old Albacore sailing dinghy. This is a well made quality cover with straps and clips that look like they’ll last many years. I no longer have to bail out the boat before sailing!
Found the staff at Sailing Chandlery most helpful to a no-yachtsman with flags to fly to cheer the day.
It may seem strange but my husband purchased this item as he was making me some wooden bunting for our outside space. The range of colours was fab and the rope is ideal for our needs. Easy to order and arrived quickly….great service
Made with good quality material and sizing is accurate. Comfortable to wear with plenty of secure pocket space. Buoyancy aid arrived promptly and securely wrapped.
Waterproof, spacious and different ways to carry it
SIGN UP TO OUR NEWSLETTER
Save up to 40% on your next order.
ACCESSOIRES
Rigging Guide
Camber sails, camber sail rigging instructions, skyscape, skyblade, switchblade, racingblade, speedblade, bladefr & raceboardblade.
1. Lay out your Blade on a dry, sand-free and ideally wind-free surface. 2. Check that the Tekcams matches the mast you want to rig on it: Large for SDM masts, REDUCED for RDM masts 3. Insert the recommended mast fully into the mast pocket WITHOUT threading the mast thru the Tekcams (by-pass all cams so that the mastgoes easily above the battens & mast panel and directly up to the sail top). Check that the sail top plug is correctly seated into the mast top 4. Set your mast extension to the recommended length, thread downhaul line and apply firm tension so the mast bends to allow the boom to be mounted. 5. Set the boom to the recommended length and mount the boom on the mast. 6. Apply FIRM outhaul tension; pull the sail flat so that the Tekcams are pulled back and away from the mast. 7. FULLY release downhaul tension. 8. Set Tekcams into position on the mast by pushing up on the cams from the lower side with one hand and down on the sail batten inside the mast pocket (cam zips open, enter boomhole) for each cam. This action allows the cams to be pushed up into place. Do not over-apply pressure! If cams do not easily go into place, apply more outhaul tension & less downhaul tension. 9. Once all Tekcams are set in place on the mast, apply full downhaul tension. 10. Check all batten tensions with the Loftsails batten tensioner included inside your mast pocket. 11. Set outhaul tension to suit windsurfing conditions and GO ENJOY THE WIND! TIP Avoid allowing cams to ‘snap’ off the mast when de-rigging. Manually removing cams from the mast (opposite of rigging sequence above) will extend the life of your Blade. Tekcam Spacers
- 4 to 6 Tekcam spacers are included in your sailbag.
- Tekcam spacers can be placed between the cams andmast panel front edge to promote a cleaner leading edge.
- Spacers may affect cam rotation (more difficult).
- Mounting more than 2 spacers per Tekcam is not recommended !
Non-Camber Sails
Purelip, wavescape, airscape, oxygen.
1. Lay out your Loftsail on a dry, sand-free, and ideally wind-free surface. 2. Insert the recommended mast fully into the mast pocket. Pull the sail down unto the mast at the molded label just above the boomhole- a large foldwill arrive at the sail boomhole. Once the top plug is correctly seated into the mast top, then pull the sail down at the tack corner. Do not only pulldown at tack- this causes damaging pressure between the mast top and the mast sleeve and will void the warranty! 3. Set your mast extension to the recommended length, thread downhaul line and apply firm tension. 4. Set the boom to the recommended length, mount boom on mast, tension outhaul.allow the boom to be mounted. 5. Apply full downhaul tension. 6. Check all batten tensions with the batten tensioner key included with your sail. Upper battens (flat profile) need less tension, lower battens (full profile) need more tension. Over tensioning battens may affect rotation and possibly damage your sail. 7. Set outhaul tension to suit windsurfing conditions & GO ENJOY YOUR SESSION! Trim! Trim your Sail ! When powered-up- apply full downhaul tension! Release outhaul to suit wind conditions. Adjust your outhaul: strong winds- flat = easy. Light winds- released = power. Items to note...
- Be sure the bottom mast section is fully inserted into the top section before applying full downhaul tension.This can be easily done by carefullyfeeling the mast through the mast pocket, or use tape to cover the connection.
- Keep sand away from your sail! Sand degrades cam rotation, and may cause excessive wear of the mast, And promotes early aging of your sail. Never drive the mast top into the sand as a method of anchoring the rig. Should sand enter the Blade mast pocket, take care to completely rinse.
- Control and Keep clean the Tekcam rollers and Tekcam friction area and on the mast too, large scratches on the mast will avoid the warranty
- Your sail should be dry and sand-free when rolling for storing in the sailbag.

Rigging Videos
DOWNHAUL – TECH TALKS FROM MONTY&DIONY ABOUT THE TRIM
LOFTSAILS PURELIP RIGGING AND TUNING GUIDE VIDEO
LOFTSAILS RACINGBLADE RIGGING AND TUNING GUIDE
LOFTSAILS OXYGEN NO-CAM FREERACE RIGGING AND TUNING GUIDE
LOFTSAILS SWITCHBLADE RIGGING AND TUNING GUIDE
LOFTSAILS RACEBOARDBLADE RIGGING AND TUNING GUIDE

Magazine Test Results
Where to buy, product feedback.
Home » Rigging guide for Goat Island Skiff – Efficient lug sails
Rigging guide for Goat Island Skiff – Efficient lug sails
How do you rig your goat island skiff or other lug sail rigged boat – step by step details below..
This page is to assist setting up of lug sails. selection of rope, rope lengths and show all the rigging details. Scroll down to read the information. Some of the methods will be highly relevant to other Lug rig and Lateen rigged boats.
Link – All our core Lug setup articles with many tricks and tweaks Link – Fittings list for the Goat Island Skiff
- We also make sails including lug sails see our sailmaker here.
- Goat Island Skiff Information here.
Why do Traditional Rigs like Lugsails have a bad reputation?
We know they GO. Which is a great advantage when turning up to an open regatta. The Regatta Handicapper won’t!
In the past many or most lug setups are pretty poor – mostly because the much of the writing and the understanding about the rigs were not properly documented. And much of the documentation was based on repeating out of date information.
This has changed as the better designers and more sailors have spent more time sailing with the wee beasties. We have played a significant part in this education process with the extensive information on this website on lug rigs that we started compiling from about 2004 that led to the articles in this link.
Link – All our core Lug setup articles with many tricks and tweaks
Much of the old misinformation was based on not knowing to tension one part or another. Also many designers are hampered by being unaware – or even reactionary toward – some of the advances and improved rigging materials that modern boats use. And others don’t document what they know so the builder can set up the boat optimally.
There are designers who really know their stuff as well. And it is well worth following every detail.
For those who think traditional rigs are slow and cumbersome – they are in for a lesson . Properly set up a balance lug rig (in particular) has very similar performance to any mainstream conventional sailboat rig when fitted to boats without trapeze or leaning racks.

Modern and novice sailors are horrified about the lugsail being distorted by pressing against the mast on one tack but regular racing of the Oz Geese has shown little difference – and the Goose sailors and Traditional Breton sailors know the side with the sail against the mast is the fast one .
As a result of fleet racing in the Philippines we know the conventional wisdom about which is the “bad tack” is the wrong way round. So their theory about the crease in the sail is wrong and it always has been.
There isn’t much difference in speed from side to side if the steerer is attentive upwind. With the mast on the leeward side, and the crease, the speed is easier and it is hard to sail the boat badly. With the mast on the windward side the same speed is achievable, but it takes more attention.
Dramatic cost savings to rig a sailing boat without performance compromise
The great thing is that where a mainstream rig might cost you hundreds or a thousand dollars by the time you have fitted
- jib and sheeting system
- big bunch of mast rigging
The lug rig will cost a fraction of the same money and offer 90 to 95% of the performance. In fact our Oz Goose rigging package is Spectra Line, Rudder fittings, three simple mainsheet blocks; and for the halyard a SS ring at the top and a $2 horn cleat. That’s it!
Here is a comparison of lug vs sloop rigs between two similar sized boats . A single sail lug like the Goat is even cheaper.
A good equation if you ask me! (I know you didn’t – but I’ll tell you anyway!)
* The exception to the advantages of the rigging system shown here is that the halyard system is prone to chafe on long ocean trips. The halyard on the boat pictured above is 12 years old – and is in excellent condition. But the wear and tear is different on larger boats that will spend extended periods making coastal or longer voyages. But for smaller boats it is well worth considering
Learnings from a century of racing lug boats make our rigging guide.
Also I had a long discussion with Brian Pearson who races traditional lug boats in a regular race fleet. While his rigging setups are perhaps more complicated than my simpler and easy to rig version, there may be something of serious interest to those seeking more performance from their lug rig. My feeling is the single most useful addition is a loose footed mainsail which allows the rig to be powered up more. However this will require the boom of my boats to be made a bit heavier to prevent excessive bend.
General Information on the Goat Island Skiff (GIS) is here Detailed plans – easy enough for a 1st boatbuilding project
The picture above is of Peter Hyndman’s GIS “Gruff” which is now 12 years old. Everything is original too – showing how cheap lug rigs are to run. The pictures below are also of Peter’s boat.
If you don’t want all the details but just to look at the pictures that show you how to rig the boat then skip down to the Case Study heading below
Spars for Lug Rigs
This drawing from the plan is much more important than it looks. When you have the sail rigged properly this will be the position of the sail. The main thing is that the back of the boom should be higher than the front to give the crew plenty of space. The most common error in rigging is that the boom ends up too low at the back.
Every good boat plan has a well thought through drawing that looks like this. It is the singe most important guide to how the sail should look when properly rigged and is the major resource when the boat is unergonomic to sail, sails like a cow or has some odd bad habits. Now we sell sails we spend a lot of time debugging new sails. A most useful resource is a side on sailing photo of the boat and the sailplan drawing from the plan.
A good reason for a bit of lawn sailing the day before launching.
The main requirement for the lug spars is that the mast be relatively stiff but the yard and possibly the boom be flexible.
With the rig set up this way the boat will have the gust response of a modern rig as the yard and boom bend and allow the sail to twist. That’s why such a light boat can carry a large sail but still be easy to handle in brisk conditions.
The GIS spar tapers have been specified to achieve this result. A builder or two have substituted aluminium spars but have found that it makes the boat quite hard to hold up in stronger conditions ( article ). Generally because they have chosen sections that are too stiff. Aluminium will work but just have a look at the pictures on this page.
Sail Setup for Lug Rigs
The sail has to be cut to allow for the bend of the spars. When the downhaul is tensioned correctly for most wind strengths there is about 50mm of bend in the boom and yard. Most modern sailmakers will know what to do to allow for this bend.
Fittings cost is vastly reduced with a lug rig
My general choice of fittings for lug rig setup is to choose parts from the budget range of marine fittings manufacturers.
Ball bearing blocks (pulleys) are just not required – leave them to the racing guys who are happy spending $700 to get a stay tensioning system working smoothly.
Thinner Ropes
The biggest development in recent years in racing classes has been the use of thinner ropes. When run through the blocks used for the older, thicker lines there is so much clearance that the friction is hugely reduced.
The other thing that is reduced is the cost – THINNER ROPES ARE CHEAPER!
This is of course assuming that you want to go to the bother of getting the best performance – and you would probably only be reading all this if you have some interest :-)
Use rope purchases for tension
Another place I economise is by reducing the number of blocks by using simple rope purchases – like Trucker’s Hitch Knots . With conventional racing boats these are a no no because of the friction – but with traditional rigs there is not that much adjustment – about the only line that need regular adjustment is the downhaul to get tension in the luff of the sail which can be adjusted for different wind strengths if desired.
A lot of adjustment a few years ago anyhow was just to take up the slack as the ropes stretch – but using some high tech ropes like spectra/dyneema or vectran mean that they don’t stretch – so need little or no adjustment.
See how it works? Modern ropes mean less adjustment which means you need fewer blocks.
Ropes and types for the Goat Island Skiff and other Lug rigged boats
Huge leaps have been made with ropes in recent years.
You can setup the lug rig for the GIS with cheap ropes if you like but I would like to suggest using modern high tech ropes in one place at least.
One of the big advances with small boat rigging has been the use of small diameter ropes. They are less likely to rub when they pass through blocks (pulleys) so have less friction and are easier to adjust.
Spectra/Dyneema
Before I wrote “I would use spectra in a few other places if budget allows”.
Now there is so little price difference use Spectra for everything except the mainsheet and lacing along the yard and boom
The one place where you should definitely consider using a high tech rope is for the main halyard (the rope that pulls the sail to the top of the mast) – or indeed the halyard on any boat.
The beauty is that they stretch very little. So if you hoist the sail at the beginning of the day it will be still in the same position after 6 hours of sailing. With a conventional rope it has to be tightened every hour or so over the same period to retain the sail shape. In reality most people don’t realise and wonder why the boat seems so sluggish and hard to get home at the end of the day.
A second advantage is that spectra and dyneema have fantastic UV resistance.
Tip 1 – We also use them to provide strong built in loops for the downhaul rather than using deck eyes or other stainless steel fittings. Blue loop next to the mast. Two holes. Spectra loop with figure 8 knots under the deck. Keep it short.
Tip 2 – Another trick is that most spectra lines have an outer rope and an inner rope – double braid construction. The outer rope is just there for easy grip. All the strength is in the inner rope. For the corner lashings we often remove the outer and just use the inner so the lashing will go through the holes in the yard and boom more easily. Pic below
Choosing a slightly smaller diameter is important with high tech ropes. When ropes stretch there are two phases
- Initial stretch – The twisted or braided threads that make up the rope are pulled as straight as the geometry allows. All ropes made the same way stretch about the same during this phase – no matter what material they are made of.
- When the threads have pulled straight the load goes onto the fibers themselves – so spectra will stretch much less than polyester.
The result is that if you use too thick a rope all the stretch will be in phase 1 where the rope will stretch the same as something cheaper. A bit thinner and you start to get a performance advantage. The halyard is an ideal rope as the only time it is handled is to pull the sail up or drop it – both times when the loads are quite light. But once the downhaul is tensioned it takes higher loads than any of the other ropes on the boat.
is another rope type that has even less stretch and can be considerably cheaper than Spectra/Dyneema.
But Vectran doesn’t have the extremely good resistance to ultra violet light of spectra/dyneema.
Fine for a small boat that will be kept out of the sun but if it spends extended periods outside Vectran is a poor choice. Particularly for a multi role boat like the Goat that can be used for years without much deterioration. The Vectran will whither and die.
Most conventional rope is made of polyester or terylene. With prestretch they make the rope then stretch it under very high load so that it will stretch less when put on the boat.
Spectra is so close to the price of prestretch now … I would go with 4mm spectra for everything but the mainsheet and lacings along the yard and boom.
If you don’t want a spectra halyard then prestretch is the next stop down – much inferior in my opinion – but might be OK for sails under 3 sq metres (30sq ft) – small canoe sails and the like.
Ronstan/Marlow makes a good one called Excel that instead of stretching a braided rope the inside is not braided at all – the fibres just run straight – so it operates as a prestretch.
Double Braid
Is a polyester that is set up to be really sof t and pliable to handle. It is perfect for the mainsheet and any other sheets on a boat as they are the ones that spend the most time in peoples hands. Often there is a tendency to get a big thick rope that feels easier to hold. It is a bad choice – it makes the rope move very slowly through the blocks when released unless they are oversized (and expensive).
VB Cord/lacing cord
So fully battened mains and short footed jibs for the most part – and hullweights that end up weighing with fittings around 10lbs/foot. This is a cheap white or coloured cord made of polyester – it is very cheap and is good for lacing sails along the length of the the yard and boom.
This is a line made up of a bundle of elastic rubber with a woven casing around the outside to keep it all together. It is used as a bungee cord in a number of useful applications.
CASE STUDY – Setting up the GIS balance lug rig
The Goat Island Skiff (pictured above is a 15ft 6″ (4.73m) long boat with a 105 square foot (9.75sq m) balance lug sail
The hull has a good performance potential in modern terms because of the fineness of the entry and the light weight of the hull. So the rig and setup also need to match the performance potential of the hull.
Here I go through the process of rigging a GIS and most lug rigged dinghies for the first time.
Rope Sizes and Conversion – Diameters
Rope sizes and lengths for GIS Rope diameters and types should suit dinghy sails from 70 to 115 square feet GIS has 105sq ft mainsail Note – Rope lengths are an estimate. I have tended to overestimate.
Attaching the corners of the sails to the spars.
Line choice – We like to use multiple turns of thinner line to do the corner lashings. They should be kept separate from the lacing along the edge as they are a separate function and pull in the opposite direction.
One way we get thinner line is to use the same 4mm Spectra/dyneema with polyester outer used for most of the rigging and use the spectra core only by removing the outer. See video below

Holes – One improvement is that at the front of the yard and at the front of the boom we drill two holes usually around 3/8″ or 8mm. One 20mm 3/4″ from the end, the second around 45mm or 1 3/4″ from the end. At the back end of the boom and yard you only need one hole.
Corner Lashings – The correct way to lash the corners of a sail are according to the drawing below. To get the proper shape in the sail the corners need to be pulled out toward the ends of the spars as well as held in.
Often you see corners lashed as in the picture on the left. The picture on the right is the correct way.
Initial Tension
The sails need to be pretensioned on the spars – which can be drilled with holes – 8mm (3/8″). This means that there should be a crease in the sail along the length of the yard. Don’t sweat it really tight – but firm so a obvious crease is formed as shown below. After that the sail is laced with the VB cord.
Here is a picture of the lacing on the GIS sail. Instead of using the spiral lacing I tend to introduce half hitches so the rope is a bit more aerodynamic as far as the wind is concerned as most of the lashing hides along the edge of the sail inside the wake of the spars. This is more relevant for the yard than the boom.
Now that the sail is attached to the yard and boom it stays there – no need to undo all those knots!
One good trick is to ask the sailmaker to make a long sailbag that the sail still attached to the yard and boom can fit in.
Setting up the Lug Rig mast
There are two things that have to happen with the mast.
Top of the Mast
Some of the cheapest and lightest pulleys have very high breaking strains for the top of the mast. eg RF571 from Ronstan has a 19mm sheave diameter and very high breaking load.
Preferred Method – is to drill two holes 6mm diameter one above the other near the top of the mast.
Thread a pulley or a 1″ stainless steel ring onto a piece of 4mm spectra, thread forward through the holes and put figure 8 knots as short as possible to hold the rope in place.
Alternative – A deadeye fitted to the top for the halyard. An alternative is to use a block and saddle, but this deadeye has been working fine for 10 years. It goes on the back of the mast. It is plastic with a stainless steel ferrule in the hole to prevent wear.
If going toward cheap – you can just drill a hole through the mast and clean it up with sandpaper and files so there is a smooth radius for the rope to pull through – termed a “dumb sheave”. I don’t really like it except for very small sails as there is a lot of friction and it chews up the varnish so the mast is unprotected. Some people fit a metal strip to protect the varnish but that’s more hassle than the method here.
Halyard Cleat on Mast
For hoisting the sail on a lug rig setup we need a cleat for the halyard. This goes on the side of the mast – bottom of pic below. It is on the side opposite the downhaul saddle, spectra rope loop or U-Bolt fitted to the deck adjacent to the mast . The cleat is positioned around 350mm (14″) above deck level. The screws or machine threads that hold it in place should be epoxied into the mast
We will come back to this pic later as there is a change eliminating the square lashing. This photo is still fine to understand the cleat position on the opposite side of the sail.
General Theory of attaching Blocks to Spars – Booms and yards.
Some people like to screw or bolt blocks to spars. I’ve used simple rope loops on lug rig setups since I started building and sailing weird wooden boats rather than high performance conventional boats.
The funny thing is that high performance conventional boats now swung toward rope lashings and loops! :-) The main reason is that they don’t have to drill any holes in the boom and risk weakening it.
Actually it is not my method – it is probably a thousand years old using a simple cowhitch to attach the block to the spar. The loop is tied with a reef knot and the length of the loop is exaggerated in the middle drawing. The length of the loop should result in it looking like the last illustration in the series.
The Mainsail Halyard
This is the rope used to pull the sail to the top of the mast.
Some designers use a two part system where there is a loop of rope to hold the yard against the boom and a separate halyard to pull the yard up to the top of the mast. ‘ That system is prone to jamming as if the halyard is eased the back end of the yard drops down which tightens the other lashing garrotlike around the mast.
The method I use was drawn from the canoeing chapter of “The Dixon Kemp Manual of Seamanship” from about 1870. It is a brilliant system which uses one rope to do both jobs as well as keeping the yard horizontal during hoisting and dropping. The only other designer I have seen use it is Iain Oughtred, but he doesn’t specify it for all his boats.
One end of the halyard is tied through the forward hole in the yard – unlike the pic below I usually pass it through the hole then take it one time right round the yard before tying it with a bowline – this eliminates the risk of splitting the end of the yard.
The photo shows a block is attached at the midpoint of the yard using a rope loop as above. We used to recommend a block on the yard. But have found a better way.
This is the alternative way of attaching the halyard to the midpoint of the yard. We take a spectra or prestretch rope three times around the yard (red rope) at the midpoint and tie it with a reef knot.
Then the halyard blue rope it taken through TWO of the loops only. The tension on these makes sure the last loop will firmly grab the yard and not slide around.
The only downside of this system has is in terms of wear and tear on larger ocean going boats. I did suggest it once to a fellow who was cruising with a lugger. He found it worked well in terms of raising and lowering the sail and reefing but it was prone to chafe.
This is not a problem with small and medium size boats – particularly if you use spectra halyards – my halyard on the BETH sailing canoe is around 10 years old and the one on the Goat Island Skiff here is about 12 years old.
Downhaul – the single most important adjustment on a lug rig.
The downhaul is used to tension the sail – so is the most highly loaded rope in the boat. It is probably the most important adjustment in terms of creating the correct sail shape.
If your boat does not perform well this aspect of lug rig setup is most likely the culprit. Don’t be afraid of damaging the sail – It can handle more then you can throw at it.
Downhaul needs to be medium firm for light winds – until the boat is moving reliably. Very firm once the boat is moving well but is not difficult to sail nice and flat in the water. Fiercely firm once the boat starts to be harder to hold up – it flattens the sail considerably which reduces power.
It is attached to the deck beside the mast. This can be a stainless steel fitting like a saddle or a deck eye. We have started using spectra loops in the Philippines as in the photo below on one of the Oz Goose sailboats. We just cannot get the stainless fittings. If using a loop make it as short/low as possible.
The diagram below shows two alternatives The only flaw in the diagram is that the block needs to be higher closer to the boom.
Note that the plans suggest that the boom should be 200mm above the partner – this is a mistake – it should be 200 to 250mm above the sheerline as shown in the drawing in the section above. With a loose footed boom or using the downhaul as a vang it might be necessary to prevent the purchases of the downhaul from sliding with a small saddle/deckeye on top of the boom or a small timber hook screwed and glued to the top of the boom.
Controlling the boom so it stays in contact with the mast
There has been some discussion about whether this is necessary.Back to the photo used earlier. But every couple of inches the boom moves away from the boom is a degree less pointing ability. Simple trigonometry
We now use a preventer, which some of us jokingly call a “Bleater” … it is a Goat after all.
This is the system.
The blue rope is the Bleater. It is a bowline around the boom behind the mast. Then it ties to the front of the boom to make sure the boom can’t move forward.
As an advanced technique beyond the scope of this page the “bleater” also works well if the degree of vanging is to be increased by moving the downhaul back along the boom a modest amount. Read more about vanging and bleaters for sail twist control and more performance here
Position of sail sets the position of the front of the boom and the halyard attachment point
The sail needs to be set in the right position relative to the mast. Peter’s boat has the front corner of the sail where it attaches to the boom around 350 to 400mm (16″) in front of the mast. For boats of other design looks closely at the designer’s sailplan for the boat and duplicate the position and angle of the boom in the drawings for the boat.
Peter fitted the neat leather chafe guard to protect the varnish after sailing a few times. Basically soak some leather in water for a day or two, cut it slightly undersize (about a 10mm gap), punch some holes in the edges that you want to sew. Sew tight – when it dries it will be really tight.
Note that the plans suggest that the boom should be 200mm above the partner – this is a mistake – it should be 200 to 250mm above the sheerline as shown in the drawing above
Traveller and Mainsheet the simple way
Mainsheet block set up to drop out of the way when rowing.
The plans show a block bolted or screwed to the top of the middle seat. Peter came up with a much better solution that doesn’t risk pain and inconvenience to certain tender regions.
He used a simple bridle from the limber holes in the seat. That way when the sail is not in use the block just drops to the floor. Generally it is good idea to use a ratchet block which reduces the load your hand has to carry when holding the mainsheet. A small simple ratchet block is perfect – no need for a fancy upmarket one and is worth the cost in terms of making the boat simpler and more fun to sail. If you haven’t seen one before get them to show you in the shop – you don’t need one with an on/off switch.
Simple rope traveller
The traveller is a rope that goes across the back of the boat above the tiller (yellow in the picture below).
There is a block threaded onto it that is free to move across the boat. Make sure the block lines up with the fore and aft axis of the boat – if it is crossways then the system will jam. If you can’t buy a block that will sit facing the right direction buy a shackle and put the shackle on the bottom of the block with the shackle running on the traveller line.
The ends of the traveller line simply tie round the inwale as shown around the bulkhead frame. The screws through the inwale into the heads of the frames will take the splitting loads.
The mainsheet is tied through the eye at the back corner (clew) of the sail. Then thread like the purple coloured rope in the photo above. Or the more detailed shot below (green rope).
Mainsheet can be left tied to the back of the boom and put away with the sail.
Setting the sail.
We have a complete run through on our sister website
- Point the nose of the boat into the wind – it makes everything easier
- Put the mast in place. The halyard is already threaded with both ends made fast to the horn cleat.
- Unroll the sail. Yard and boom are left permanently attached. Thread the main halyard
- Tie the preventer to stop the boom moving forward
- Hoist the sail almost to the top
- Attach and tighten the downhaul. Store it lashed permanently around the boom.
- Thread the mainsheet
Setting up the Rudder and Centreboard
The plans are pretty good with this information, but here are some pics to show what it looks like and how it works.
LINK – How to protect your beautiful Centreboard and rudder for little cost
This is the rudder attached to the transom. I prefer the single pin type rudder attachment. It cuts the risk of the rudder coming off the boat.
A couple of tricks – make sure the rudder pin is not so long it goes in the water.
The white flecked cord is shockcord – it provides the tension to hold the rudder blade in place.
Rudder blade in place – not loop handle – i’ve coloured it yellow with Photoshop so it stands out against the sand.
This is the centreboard – note loop handle..
If the centreboard slides up and down or won’t stay down you can set up a piece of shockcord tied to the mast below deck one end and tied to the centreboard handle at the other. The tension of it pulling the board forward provides enough friction to make the board stay put.
There is a lot more information on other small details that utterly change the performance of any homebuilt sailboat or boat component.
Sails for the Goat Island Skiff and other Lug Rigs
Buildng a GIS is now about $300 cheaper – than any comparable boat. Sails are available from reallysimplesails.com a partner company I helped set up and developed the sails for.
More performance info that’s relevant to every small to medium size lug rigged boat .*
More GIS articles and information
Sailboat Performance WIKI – theory and methods
Trailering a flat bottom sailing dinghy or utility boat
The trailer set up for a flat bottomed boat like the GIS is very simple. Here is a picture of Peter’s flat bed trailer.
The cross pieces go through directly under bulkhead 2 and bulkhead 4 so the boat has the maximum level of support.
And here is the tie down on the front of the boat. Bolt it through at a height just above the front seat level.
The fitting has a metal plate that is fitted inside the boat and Peter has glued a 6mm plywood pad under that area to prevent the risk of the stem splitting.
The Value of Discussion
Our active facebook groups are excellent for working out rigging and sail issues. They are a route for sharing good information and filtering out ideas that might not be quite right. Our members keep them very much on target.
Facebook Groups for lug and other rigs
- Goat Island Skiff for about the best in depth discussion for details of boat setup and technical details. Sailing and building. Useful for other boats too.
- Really Simple Sails has setup and tuning information as well
- Storer Boat Plans is the best place for general questions. It does have a much more general direction about wider issues in design, structure and sailing.
- Open Goose is more oriented toward the specific boat with a more introductory flavour.
Who said box boats with lug rigs are slow? They are fast enough to be interesting indeed!

RC Sailboat Rigging Setup- Briefed in 17 Easy Steps
Table of Contents
Introduction
To build a model sailboat, you’ll need a lot of time, patience, and talent. Remote control sailboat beginners should start by altering or fixing a pre-existing model. It is possible to create a quicker and more sophisticated sailboat by rigging an existing model.
What to do for the rc sailboat rigging setup ?
Tether the retaining bolt and wire mainsail luff. Insert the mast stub and slide the entire main boom assembly. Push the masthead and backstay crane. Adjust the sail to match the mast reinforcement ring. Attach the eye in the mainsail clew. Close the hooks. Set the backstay’s length to the right.
To get the overall understanding, read the entire article.
Things to Bring
- Stitching Device
- Sailboat Controlled via Remote
- Thread Made From Polyester
- Fisherman’s Spectra Line
- Dacron Sails
- Utility knife
Procedure for Rigging
Use these rigging guidelines to their full extent. This ensures that the boat will sail with the qualities and performance that its creators intended. You can also check the RC dirt oval setup guide to ease your work.
Step 1: Replace Old Sails
Remove and replace the old sails. Cut out the new main and headsails from Dacron. Measure the old ones from the model and add a half-inch on each side to the new measurements. Tether the retaining bolt.
Step 2: Wire Mainsail with Eyelets
All six eyelets on the mainsail luff should have wired mainsail luff rings attached to them.
Step 3: Place the Mast Stab
Be careful not to get the plastic collar’s bevelled edge. Insert the mast stub into the bottom of the mast.
Step 4: Slide Main Boom
From the bottom, slide the entire main boom assembly onto the mast stub.
Step 5: Slide Rings Under the Mast
Starting at the luff of the mainsail, slide all rings beneath the mast one at a time.
Step 6: Assemble Plug
Push the masthead and backstay crane. Assemble the plug into the mast. Cut a 250mm Dyneema length and tie the mainsail’s head to the backstay crane.
Step 7: Layout the Sail
Adjust the sail to match the mast reinforcement ring at its highest point. The sail’s head may readily swivel. Poles are sheeted out at an angle of 80 degrees when the boat’s sailing with the breeze.
Step 8: Attach the Cunningham
Attach the Cunningham (downhaul) as demonstrated by cutting a 300mm length of Dyneema. Tie a cord to the eye in the gooseneck fitting’s uppermost eye.
Step 9: Tie Bowsie’s Eye
Follow this path: First, tie one end to a Bowsie’s eye. Then, tie a second Bowsie’s eye; finally, tie a third Bowsie’s eye.
Step 10: Attach the Mainsail Clew
Attach the eye in the mainsail clew (bottom right corner) to the mainsail clew using a line.
Step 11: Close the Hook
Close the hook’s open end with thin-nosed pliers. Keep your sail from falling off while you’re out on the water.
Step 12: Replace the Sail If Needed
If you need to replace the sail, simply use a flat-bladed screwdriver to pry it open once again.
Step 13: Cut Dyneema
For the Backstay, cut a 900mm length of Dyneema. The Backstay Crane’s end hole has a loop where you can tie a piece of string.
It’s time to attach one of our 6mm stainless steel rings to its bottom end. Using a Mast Socket, insert the mast and the rigged Mainsail into the hull.
Step 14: Attach the Loop
Once you’ve cut a 500mm piece of Dyneema, tie a loop in one end. Weave the other end through the first small gaps in a Bowsie. Then throw the rim at the bottom of the Backstay.
Finish it back at the Bowsie. Using a metal hook in the Transom (rear edge of the hull), attach the loop to the backstay. Then put the Bowsie nearly halfway along the bottom rope and secure it.
Step 15: Tighten the Leech
To allow the leech (back edge) of the main to twist a little, lightly tighten the compression strut. Such that the leech (back edge) is under mild tension. Adjust the Cunnigham such that the luff of the sail is just slightly strained.
Step 16: Adjust the Position of the Rings
Set the backstay’s length to the right. A spacing of roughly 25 millimetres between the boom tube’s centre. Achieve the sail foot midway by adjusting the position of the silicon rings (SR5) and the mainsail clew hook.
Step 17: Connect the Foresail
Use the spectra fishing line to loop between the grommet and the eyebolt. Connect the foresail to the top of the mast before the mainsail.
To make use of the foresail, equip the boat’s bow with a second, shorter boom. Connect the sail’s grommets to the short boom’s front and back eye bolts with spectra lines.
You can check these suggested rigging tools. You need these tools for rigging setup-
Apply a few drops of thin CA adhesive into the Dyneema cord at the point of the cut. Then cut through it at an angle. The cut end will be firm and pointed, making it simple to weave through the Bowsies.
A dollop of thin CA adhesive applied to the knot can help keep it in place. Once you’ve tied it, trim any extra rope.
Don’t use hot gun glue as it doesn’t stick to this type of surface. If you take the time to secure all knots now, you’ll have a long-term reliable vessel.
Tips for Better Setup
A Dacron sleeve should be added where the lines come into contact with the hulls or plastic parts. Because Spectra is extremely powerful and can shred into the material.
Ask sailmakers for scraps or old, ripped sails that you may use to build the remote control boat sails. Only if they are willing to part with them.
There are a few things to keep in mind when it comes to rigging more sophisticated rigs. Like double mast designs or using spinnakers until you’ve gained some experience in the activity. Always clean your RC boat as you clean your RC car to avoid rusting.
How tight should the rigging on a sailboat be?
If you push or tug on them, they shouldn’t wiggle about too much. So make sure they’re snug. Tighten them up if they’re still slack or floppy.There is no need to tighten any of the other shrouds after the cap shrouds are in place. Because they follow in consecutive order.
What’s the simplest way to sail a boat?
The Lateen Rig is a great starting sailboat. It only requires 2 ropes in its basic form.The Lateen Rig is one of the most basic sailing rigs. A spar, boom, and mast are all part of this rig. As are a single jib sheet and mainsheet.
How much does it take to replace a sailboat’s rigging?
Re-rigging a sailboat can cost anything from $1,000 to $5,000. Re-rigging a 40-foot boat with wire is estimated to cost roughly $100 per foot. Which includes the round-trip costs of hauling, launching, and unstepping the rig (about $2,500).
Final Words
We’ve discussed here in detail on the rc sailboat rigging setup. This should help with the rigging setup, and we sincerely hope it does.
OK, so the above may look a little daunting. You’ll be able to recall this procedure with ease after completing it five or six times. Be familiar with and comfortable with your tools, settings, and methods.
The very best to you!
Travis Murray
Leave a Comment Cancel reply
Save my name, email, and website in this browser for the next time I comment.

IMAGES
VIDEO
COMMENTS
The downhaul is a line which is part of the rigging on a sailboat [1]; it applies downward force on a spar or sail. The most common downhaul on a modern sailboat is attached to the spinnaker pole, though this may be referred to as the foreguy in some rigging nomenclature. The term is also commonly applied to the cunningham on the mainsail .
Rig a light line to the hank cringle one below the top hank. 2. Run the line down the leach to a block at or near the base of the forestay. 3. Run the line back to where you can handle it from the cockpit. 4. Have some belaying lines tied to your life lines to contain the sail smartly when it is down. Notes. 1, Some can get away with tying the ...
Attach the downhaul. The other 3/16" line is the downhaul. Tie one end to the ring on the gooseneck. ... If you're new to the Butterfly, try rigging and de-rigging the boat a few times in your yard. Once you get the hang of it you'll be able to rig it in around 10-15 minutes. Take a minute to inspect your boat and rigging. If any cables are ...
HERE WE'RE LOOKING AT HOW TO RIG THE MAINSHEET AND DOWNHAUL ON A CATAMARAN SUCH AS A HOBIE TIGER, TORNADO, F18 OR SIMILARJoin this channel to get access to p...
Cunningham downhaul. In sailing, a cunningham or cunningham's eye is a type of downhaul used on a Bermuda rigged sailboat to change the shape of a sail. It is named after its inventor, Briggs Cunningham, a victorious America's Cup skipper and yacht builder. [1] The cunningham differs from a typical downhaul in the way that it attaches to the sail.
Install the block on the boom eye strap, the fairlead cleat on the side of the boom, and reave the line as shown in the picture below. Simpler 2:1 outhaul is also shorter. In this system, the line runs through the clew grommet itself. The line isn't as easy to trim as with multiple blocks, but it's still easy enough.
Downhaul (left) terminated in a stanchion mounted clam cleat. To douse the headsail, first uncleat the headsail downhaul and the halyard at the same time. This is best done while pointing straight into the wind so that the sail will fall on the center of the foredeck. Haul in the downhaul as you simultaneously release the halyard.
Some types of sailboat rigging don't use a topping lift for their boom but a boom vang instead. Others have both! Topping lifts can also be used to lift other spars. Downhaul. A downhaul is a line used to lower with and typically used to haul the mainsail down when reefing and lowering the spinnaker and whisker poles.
5. Secure the mast using the appropriate rigging and fasteners. Attach the standing rigging, such as shrouds and stays, to the mast and the boat's hull. Fact: The mast of a sailboat is designed to withstand wind resistance and the tension of the rigging for stability and safe sailing. 2.
4. TUNING THE DOWNHAUL The downhaul controls the sail's shape and performance. Discover its effect by pulling and slowly releasing the line. Use an easy-rig or downhauling tool so the line is easier to pull hard. Watch the change in depth and tension of the leading edge (front 1/3 of the sail), and the flattening and loosening of the head ...
There are two types of downhaul system and it is important to select what is right for you. The decision should be based on the rig you are using, and your weight and strength. 6:1 Downhaul System - This is what the majority of Laser sailors use for the 4.7, Radial and the old Standard MKI sails. It gives sufficient purchase for those rigs ...
The cunningham controls the fore and aft position of draft in the mainsail or genoa and works together with the traveler, mainsheet, outhaul and vang to optimize sail shape and increase boatspeed. Cunningham controls lead to the crew to encourage adjustment as wind speed changes. Typical Boat Length: Small Boat: 22' - 28' (6.7 - 8.5 m)
The Downhaul on a balance lug is responsible for tensioning the both the luff and leach (front and back edges of the sail) . Leach tension controls the twist of the sail. Before Bermudan rigs started to be scientifically developed in the second decade of the 1900s the lug rig was the predominant small boat racing rig - because it has twist ...
A boom downhaul is one of the three possible control lines for the three sides of the mainsail. The other two are the boom vang (controls leech tension) and the mainsail outhaul (controls foot tension). Catalina 22 and similar sailboats have a short length of line attached to the bottom of the gooseneck car on the boom that ties off to a cleat at the base of the mast as shown below.
Paul - downhaul Paul, Very simple and cheap to rig a downhaul. I ran a 1/4" line from the main halyard,down to the base of the mast where I mounted a turning block. Another turning block ran the line parallel to the hatch cover and back to the cockpit. You'll need some kind of a cleat to secure the end of the downhaul line.
In fact, half a centimeter makes a difference of 20-to-30 kilograms in the sail. At intermediate and professional levels, it is basically critical to get a fine-tuned sail. The downhaul is one of the most important steps to rigging. It will control the shape of your windsurfing sail and can't be changed while sailing.
The corner of the sail that is at the bottom of the luff is called the TACK. Hanging down from the tack is a line attached to the sail called the DOWNHAUL. Now refer back to the mast hardware descriptions and this will start to come together. Tie the downhaul line to lowest cleat on the mast, the one just above deck level, the downhaul cleat.
Cunningham (Downhaul) Control System. The cunningham, sometimes called the downhaul, controls the front edge of the sail The 'rec' / classic rigging is quite simple, whereas the 'race' rigging adds more power to the sail control, making it easier to adjust and flatten the sail to depower in heavy wind.
Catalina 22 12482 Champaign-Urbana, IL. Jun 2, 2022. #1. One thing that's still a difficult thing for me and typically requires me to leave the cockpit is bringing down the mainsail. I have a line rigged as a downhaul for the main, and have it attached to the main halyard, but it inevitably bends the top of the mainsail and flaps out away from ...
Laser 8:1 Downhaul System. Current Laser National Champion and Sailing Chandlery sponsored sailor Sam Whaley explains how his Laser 8:1 Downhaul system is rigged and the ropes he uses. In 2016 the MK2 Laser Standard sail was released and amongst many small improvements on the previous design, the most notable change was an increase in cloth ...
9. Once all Tekcams are set in place on the mast, apply full downhaul tension. 10. Check all batten tensions with the Loftsails batten tensioner included inside your mast pocket. 11. Set outhaul tension to suit windsurfing conditions and GO ENJOY THE WIND! TIP Avoid allowing cams to 'snap' off the mast when de-rigging.
Downhaul - the single most important adjustment on a lug rig. The downhaul is used to tension the sail - so is the most highly loaded rope in the boat. It is probably the most important adjustment in terms of creating the correct sail shape. If your boat does not perform well this aspect of lug rig setup is most likely the culprit.
Re-rigging a sailboat can cost anything from $1,000 to $5,000. Re-rigging a 40-foot boat with wire is estimated to cost roughly $100 per foot. Which includes the round-trip costs of hauling, launching, and unstepping the rig (about $2,500). Final Words. We've discussed here in detail on the rc sailboat rigging setup. This should help with the ...