

How To Tune Your Sailboat Rig
- August 2, 2023
Table of Contents
Sailing, with its perfect balance of adventure and tranquility, has enchanted mariners for centuries. Whether you’re cruising coastal waters or vying for victory in a thrilling regatta, your sailboat ‘s performance hinges on a seemingly unassuming yet critical aspect: rig tuning. Understanding how to properly adjust the tension in your sailboat’s standing rigging is the key to unlocking the full performance of the boat. In this article, we delve into the art of sailboat rig tuning, exploring the reasons why it is not only important but fundamental to achieving optimal performance, safety, and overall sailing enjoyment.
Why Tuning Your Rig Is Important
Tuning your sailboat rig is essential for several reasons that directly impacts your sailboat’s performance, safety, and overall experience. Here are the main reasons why rig tuning is important:
- Sailing Performance: Properly tuned rigging ensures that the sails are set up optimally for various wind conditions. A well-tuned rig allows the sails to achieve their best shape, providing better lift and speed. It improves the boat’s pointing ability, acceleration, and overall sailing performance.
- Sail Shape and Balance: Rig tuning helps control the shape of the sails, allowing them to perform efficiently. The correct tension in the rigging ensures the right amount of luff tension on the headsail, preventing excessive sag and maintaining proper sail balance. This, in turn, results in better boat balance and easier handling.
- Safety and Durability: An improperly tuned rig can lead to increased stress on the rigging components, mast, and sail. Over-tensioned rigging can cause excessive loads, leading to potential failures or damage. Conversely, under-tensioned rigging can cause the mast to pump or the rig to be unstable in rough conditions. Proper tuning helps prevent rigging issues and increases the overall safety and longevity of the rig.
- Weather Conditions: Different wind conditions require adjustments in rig tension. In light winds, a looser rig allows for a fuller sail shape, while in heavy winds, a tighter rig flattens the sails and depowers the boat. Adjusting the rig to suit the conditions helps maintain control and optimize performance.
- Boat Balance and Helm Feel: Rig tuning affects the boat’s balance and how it responds to the helm. Properly tuned rigging ensures a balanced helm and a boat that tracks well, making it easier to steer and reducing fatigue for the crew.
Regularly checking and adjusting the rig ensures that your sailboat operates at its best, whether you’re cruising or racing. If you’re unsure about rig tuning, consider seeking advice from a professional rigger or an experienced sailor to help you get the most out of your boat.

Sailboat Rig Tuning Process
Tuning a sailboat rig involves adjusting the tension in the standing rigging (shrouds and stays) to achieve the correct balance and shape of the mast and sails. Here’s a step-by-step guide to help you tune your sailboat rig:
1. Check the Basics:
- Ensure the boat is level and upright, preferably in the water, with the mast straight.
- Check that all turnbuckles are free and not corroded or stuck.
2. Determine the Baseline:
- Refer to your sailboat manufacturer’s manual, sailmaker ‘s tuning guide, or rigging expert’s recommendations for the initial baseline settings of your rigging tension. This usually includes the recommended tension for the upper and lower shrouds and forestay/backstay.
3. Loosen the Rig:
- Loosen all the rigging turnbuckles to the point where they are free to move. This step allows you to start with a clean slate and avoids putting undue strain on the rigging while adjusting.
4. Center the Mast:
- Use a measuring tape or a specific mast rake measurement tool to ensure the mast is centered and straight on the boat, both athwartships (side-to-side) and fore and aft.

Closed Reel Long Tape Measure – Flexible Fiberglass Double Face Printing Inch/Metric
5. Adjust Shroud Tension:
- Begin by tensioning the lower shrouds to the recommended baseline tension. Use a tension gauge, Loos gauge, or tensiometer to achieve the desired tension. Repeat this process for both sides of the boat.
- Next, adjust the tension in the upper shrouds to match the recommended baseline tension. Be careful not to overtighten any of the rigging.

Spinlock Rig Sense Tension Gauge for 2-5mm Wire
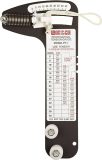
Sailboat Rigging Tension Gauge from Loos & Co., PT-2 Professional Hands-Free Force Gauge Up To 2,000 lb

Sailboat Rigging Tension Gauge from Loos & Co., PT-3 Professional Hands-Free Force Gauge Up To 4,500 lb
6. Check Mast Bend:
- Securely, attach the main halyard to the lowest point on the rear base of the mast. From there, tighten the main halyard until there is a fair amount of tension on it. The main halyard represents a straight line which is the base line for your measurement. If there is mast bend present, there will be a gap between the main halyard and middle of the mast at its furthest bend point. This gap is what is to be measured for your mast bend measurement.
7. Check Mast Rake:
- Mast rake refers to the fore and aft angle of the mast. It can impact boat balance and helm feel. Use a mast rake measurement tool or reference marks on the boat to adjust the mast rake as needed, following the manufacturer’s recommendations or your sailmaker’s advice.
8. Check Forestay Tension:
- Adjust the forestay tension to achieve the desired amount of luff tension on the headsail. For sailboats with adjustable backstays, make sure your backstay off off when taking this measurement. For boats with a fixed backstay, a proper forestay tension ensures proper sail shape and minimizes sag in the forestay.
9. Tune the Backstay:
- If your boat has an adjustable backstay, adjust it to control the bend in the mast and headsail shape. More tension on the backstay usually flattens the mainsail and depowers the rig, while less tension allows for a fuller sail shape.
10. Fine-Tuning:
- Go sailing and make small adjustments to the rig while underway to achieve the best sail shape and performance. Pay attention to how the boat behaves in different wind conditions and adjust the rig accordingly.
11. Periodic Checks
- Rig tuning is not a one-time task. Check your rig regularly for any changes due to sailing conditions, mast compression, or wear. Make adjustments as needed to maintain optimal performance.
It’s essential to keep a record of your rigging settings and changes so you can refer back to them and fine-tune your rigging over time. If you’re unsure about tuning your rig, consider seeking advice from a professional rigger or experienced sailor.
The Sailor’s Marketplace for Sailboats and Sails.
Sell Your Sailboat
Sailboats for sale.
- New Sailboats
- Used Sailboats
- Cruising Sailboats
- Racing Sailboats
Sell Your Sails
Sails for sail, sail manufacturers.
- North Sails
- Quantum Sails
- Doyle Sails
- UK Sailmakers
Sailing Reviews
- Sailing Line
- Safety Equipment
- Sailing Accesories
As an Amazon Associate SailTrader earns from qualifying purchases.
This website uses cookies to ensure you get the best experience possible.

Cableware® Division / How To’s / How to use Tension Gauges
Military Critical Technical Data Agreement
Helpful Information: Rigger’s Guide to proper swaging techniques

How to use Tension Gauges
How to use tension gauges video transcript.
Ahoy mateys
Hey today lets talk a little bit about the tension of your stays
I’ve got good news and bad news
The good news is Loos and Company helps take some of the guess work out of what the tension ought to be
Now they make three different tension gauges and it’s a function of how big your stays are, the size of your cable
So this is the middle one and there’s one for smaller cables and one for bigger cables
Now there’s certain tolerances that your stay should be within and that helps right here
They’ve got a little thing on here
The bad news is you’re not going to find a chart somewhere that says you have ABC boat and your stays are a quarter inch and you have such and such a sail, so your tension needs to be 900
While the tension on the stays is also a function of sailing performance, the shape of the sail
But you know there are certain tolerances that you should be within and Loos helps take the guesswork out of that
Now you may say to yourself well hey I’m not a professional rigger, what do I need this for?
All the more reason you need one of these
You know these professional riggers they can go around and they can test things out pretty well
Here you want to make sure that you’re somewhere in the tolerance levels of this and then fine-tune it as you get more comfortable and learn more about sailing
Especially racing sailors tension is very very important
Well let’s talk with Eddie the shop foreman here at the Salient Emporium who is a professional rigger to give us some general guidelines as to what we should be looking for and what we should have on our stays
And then he’s going to come on board my boat and we’re going to go through the process of how to use this gage and how to tighten the stays
Alright guys so here we are with Ed, a professional rigger, give us a little more information
Now Ed, as a typical cruising sailor how tight do I want my rigging to be?
You want it, you don’t want it tight tight but you do want it on the tight side because what you want to do is that so when you’re sailing if you’re on a starboard tack then the rigging on the port side is not loose
So you want everything to stay tight so say when the wind comes across starboard side pushing the sail and everything that way then if everything is too loose and all your rigging
you’ll see it on the port side will hang loose and vice versa if you want a port tack then all of the wind of the rigging on the starboard side will be loose
You don’t want to be able to see it moving around in the wind
So you want it to be a little bit tighter than looser?
Okay, now on this gauge here we’ve got now I’ve got quarter inch stays
I’ve already tested that guy’s
So here we’re going to go on anywhere from 450 pounds of tension to 2,000
Where do I wanna be at
I would start that somewhere about in the middle
So maybe somewhere around the 900 to 1100
Somewhere in that area at 11-13 percent
All right now is that for all the stays or just the two main ones that go up to the top
Well the uppers and the forward and the lowers will be tighter than your, the uppers your back stay head stay will be tighter than your lowers will be
Okay so we’re going to go out to the boat and see where I am
Now I did notice guys I took my main halyard and I brought it down
I measured on the starboard side and I brought it over to the port side and I seem to off a little bit there
You know so the mast is not quite straight
So I wanna straighten that out first
You want to get it to the center of the boat as far as side-to-side
You don’t want it more towards the starboard side, the top, or the port
You want to have it dead center of the boat
Okay now what stage are those the first ones we want to do?
We will start with uppers and get the masthead in the center of the boat as far as side-to-side
Okay, and then we’re gonna do the ones that go up to the spreaders?
Do the lowers yeah and that way once you get to the top of the mast in the center then you work down and you get the rest of the mast lined up with it
Okay, and so the tension is really a matter of the size of the cable?
And sail shape and kind of sailing you’re doing?
All right well guys let’s go out and just see how we do this, how we test this, and then how we actually adjust the turnbuckles to get the right tension
All right let’s go
Okay what we want to do is make sure the top of the masthead is in the center of the boat, side to side
So what we’ve done we’ve got a line hook here to the main hired and we’ll stretch it down to the top of the staunch and then go to the other side to see how they compare
You always want to make sure that whatever you use is it’s the same on both sides
That way you get a good accurate measurement
So we’ll pull it down and top of the staunch is right here so we’ll go to the other side of the boat and do the same thing and see how far off we are
All right so Eddie has given me this, let me see what we got here
You can see we are that far off so the mast, that top of the mast is actually heading towards the starboard side of the boat
So what we want to do is either loosen up on the starboard side and crank up on the port side, pull it over to get it straight
Or just crank up on the port of the rigging if it’s loose enough maybe we can pull it over and straight it out that way
And then once get it in the center then you take up evenly on both sides so that everything is tight
The same tightness on both sides and a mast stays on the center of the boat
Okay we’re going to check the tension now on this
We’re going to use the Loos gauge
Check tension on the upper
To use this we’ve added a safety feature here so we are gonna clip this around here so if we drop it, it doesn’t fall overboard
Okay then you just put the stays in between these two knobs here at the bottom
And you pull back on this and let it clip in there
And that’s where you get your reading from
You can see it’s on about 17 and then we look down this gauge here and 17 is up here
We need to be down in this area here somewhere
So that’s telling us we need to tighten up on this cord upper to get it one thing to get the mast over this way but also tighten up on the rig all together
All right yeah I’m pretty far off there Ed
All right now let’s look down at the turnbuckle and how do I actually do that
Okay once you get the locking nut loose
Not all boats have the locking nut sometimes they just have the stud coming down into the turnbuckle
And then there’s just cotter pins going through to hold it in place so if you have that you just pull those cotter pins out and then it’s ready to loosen or tighten
To tighten this we’re going to put the wrench on the flat spot of the fitting here coming down the rigging
And you can stick a screwdriver into the turnbuckle, the body turnbuckle, and turn it
Most time it’s counterclockwise to tighten so we will put a few turns on this and then check our tension gauge and see how much it changed
Okay so I’m tightening up on the turnbuckle and we’ll see how it changes on the gauge as I’m tightening up on this
Well this is pretty good Ed because we’ve got the gauge in place and as you’re tightening I can see it’s moving and we’re getting closer to, let me see what number we wanted
We wanted 32 and we’re at 25 right now so we’re getting there
Okay but now before we tighten up too far on this what we ought to do is check the top of the masthead again and see if we’re getting closer to pulling the mast back over to the side
we don’t want to go too far this way and then watch and loosen up on this side and pull it back on the other side
Okay so we want to take it in small increments?
All right well let’s test this and see here where we are on our straightening
Inside we are now here, we’ll take it over to the outside
Tail a little bit these gotta go to port just a little bit more but we’re getting real close
Actually right now we have gone too far to the port side
So when you tighten up on the starboard side and bring masthead back over this way a little bit
Alright so now we’re going to bring the gauge back over here and work on this one
Okay so you can see we’re right on 25 over here so we still need to get down into this area here around 30-32
So when we tighten that we bring that down, we’re also going to be tightening the other side too?
Yes we’re going to pull on the other side
So masthead back in the center and at the same time we’ll be tightening the rig both the uppers to get where it needs to get
Tightened it up on the starboard side now to bring the masthead back over this way and also tighten everything down to get it where it needs to be on the gauge
All right so now Ed we’re up to about 26-27
All right so now we’re on 30 here now we need to check for our straightness again?
Yes we’ll check straightness again and if we still want to make it tighter at that point if the mast in the middle then we want to take up the same on both sides
Take a turn here take a turn there or two turns here two turns there
It’s that way once it’s in the center we’ll keep it in the center
Okay so we’re kinda just gonna bounce back and forth?
Okay it’s pretty much right at the same height from each side to side so we got the mast pretty much in the center of the boat now
So then what we’ll do, we’ll work down from that
We’ll go down to the lowers and get the middle of the mast lined up with the top and the bottom
Okay we’ve got this set on 30 which is about midway of where I wanted to get it at
We’ll leave it there, we’ll get everything tightened and pinned and locked back in place and then we’ll start with the forward air flows get them tensioned and get the middle of the mast lined up with the top and the bottom
And you take it out sailing and check things out and then we’ll recheck it once you come back in
All right so now on these other ones that we’re going to do here
These things here ‘the half lowers and full lowers’ those need to be the same tension?
No they will not be as tight as the uppers are
they will be somewhere around the 20-26-28 somewhere in that range
Okay so we’re gonna do that next
All right Ed so now I got a pretty good idea of how this thing works and really it’s pretty neat
I don’t want to tie you up so I’ll go ahead and do the forward and half stays and can you come back and check me then?
Sure yeah I can check it, but just don’t forget when you get done, make sure all the turn buckles are locked back down so these nuts will screw down to the top and the bottom will screw up to the bottom
and then once you’re done that as an extra safety thing put in these caudal rings as it will go through the turnbuckle and in the holes and the studs there and that would keep those turnovers from backing out on their own
All right well I’m gonna give it a shot Ed
Man I tell you what, I’m just really shocked at how loose these stays were and how crooked my mast was
I’ma feel a lot better about heading out tomorrow
You’re sailing should be a lot better
Well thank you
All right Ed what do you think?
Well first thing I’m going to check is I want to make sure you got the mast in a straight column going all the way up and what I’m going to use is I’m gonna look at the sail track and if it’s off one way or the other here in the middle it’ll look like a snake or look like a banana
It would be bent so I’m just gonna look up the mast and see if it looks straight
Actually Dominic you’ve done a pretty good job as the mast track is straight all the way to the very top
Wow! All right
So the next thing we want to do probably is to check the tension on all the rigging to make sure everything’s at the proper tension
Okay and you’ve got that on actually pretty well, it’s up on 29
So you’re right in the area of where I wanted you to be
As long as this one’s the same and then what you want to do is just take this off of here and go over to the port side and make sure that everything is set to the proper tension on both sides
Which I would say they’re going to be because if not the mast when we pull it over to that side of the boat would not have been straight
And that you’ve got it exactly on 29 so that looks good
All right so I’m ready to be a professional rigger?
No, but you will be able to go out and adjust your sails and get it fine-tuned for you to sail the boat you know to what it’s supposed to be sailed at
I’ll get this cable out of the way here Eddie
Well Ed I really appreciate the help on this I think it’ll be helpful for a lot of cruisers
I’m headed out tomorrow so I’m gonna give it a test
Okay well good you definitely will see an improvement in the sailing I’m sure of that
Guys did you see how easy that was?
It didn’t take long at all and I’ll tell you what, I feel much better about going out sailing tomorrow, knowing that I’ve got even tension
I mean this thing was so far off it was unbelievable
This (Loos Tension gauge) I think is going to very very handy to have on board on a regular basis
Anyway guys happy and safe boating to you, your family, and friends
The Loos Tension Gauges take the guesswork out of cable or rod tension adjustment. The tension gauges are especially designed for accurate, repeatable tuning of a sailboat’s standing rigging.

Model #PT-CR
(Cable Railing)
Sizes 1/8, 3/16, and 1/4

Model 90 & 91
Sizes 3/32 to 9/32 and 2.5mm to 7mm

Model RT Series
(Sail Rigging (Rod))
Sizes .172 to .375 and 4.4mm to 9.5mm
The Loos tension gauges take the guesswork out of cable or rod tension adjustment. The tension gauges are especially designed for accurate, repeatable tuning of a sailboat’s standing rigging.
Contrary to popular thought, a slack rig is more punishing on a hull than a properly adjusted, tight rig. Insufficient tension will not reduce the loads transmitted in the hull. Slack rigging will punish the spar and rigging needlessly by allowing excessive movement, chafe and shock loading. Modern fiberglass hulls should not be damaged by a properly adjusted, tight rig.
Figure 1 lists the rigging tension under different conditions for a typical boat with a properly tuned rig and with a slack rig. It will be noted that the maximum load is the same. However, for properly tuned rig the leeward / shrouds will not go slack under normal sailing conditions.
The lateral stiffness of the mast and the fore and aft stiffness of the spreaders is reduced by a factor of 2 when the leeward shrouds go slack. This Important structural characteristic is not generally recognized.
Rigging tension is becoming more important as a result of the trend toward the use of mast bend to control mainsail shape under different wind conditions. Mast bend will also affect the shape and trim of the jib, since mast adjustment generally affects forestay tension. The expert skipper will benefit by maintaining consistent rigging tension while developing the optimum sail shape and sailing tactics.

Safety and Performance
The failure of a fitting, shroud or stay could damage your boat, buckle the mast or even cause personal injury. To avoid such failure of (cable or rod) and fittings from fatigue or shock loading, it is important to set up your standing rigging with the proper tension. Too little tension in the shroud will permit the leeward shroud to go slack, only to fetch up with a jolt when the boat rolls or pitches. A less common problem is excessive tension. This can cause permanent stretch to the (cables or rods) and possibly damage the mast.
PERFORMANCE
The actual set of sail under load is determined by the cut of the sail and the shape of the structure which supports the sail. Rigging tension plays an important part in determining the set of the sails.
When the boat has been tuned for peak performance, measure (cable or rod) tension should be recorded. The stainless steel used to make the rigging can stretch a little bit over time under high loading. Thus, marking turnbuckles, etc. cannot guarantee that subsequent adjustments will provide the desired tension. Only by gauging is it possible to repeat the initial tuning or improve it.
Limiting the sag of the forestay is perhaps the most important benefit to performance from having the proper rigging tension. Forestay sag permits the jib luff to fall off to leeward, tightening to leech and seriously degrading the performance to windward.
Tension in the upper and lower shrouds will influence the mast bend and set the mainsail. This is especially important on modern, fractional rigs where the mast bend is used to de-power the sail in heavy winds.
If the shrouds are not set up with enough tension, the leeward shrouds will go slack when the boat is sailing to windward. This can result in fore and aft pumping of the mast in a head sea. This mast movement will change the shape of the mainsail and can cause performance loss as well as possible structural damage.
Specific tension requirements for your application must be obtained from the boat, mast, or sail manufacturer or the manufacturer of the product on which the (cable or rod) is used.
The Worldwide Leader in Sailmaking
- Sail Care & Repair
- Sailing Gear
- Sail Finder
- Custom Sails
- One Design Sails
- Flying Sails
- New Sail Quote
- 3Di Technology
- Helix Technology
- Sail Design
- NPL RENEW Sustainable Sailcloth
- Sailcloth & Material Guide
- Polo Shirts
- Sweaters & Cardigans
- Sweatshirts & Hoodies
- Accessories
- Mid & Baselayers
- Deckwear & Footwear
- Luggage & Accessories
- Spring Summer '24
- Sailor Jackets
- NS x Slowear
- Sailor Jacket
- Sustainability
- North Sails Blog
- Sail Like A Girl
- Icon Sailor Jacket
- Our Locations
- North SUP Boards
- North Foils
- North Kiteboarding
- North Windsurfing
SAIL FINDER
SAILING GEAR
COLLECTIONS & COLLAB
COLLECTIONS
WE ARE NORTH SAILS
ACTION SPORTS
Popular Search Terms
Collections
Sorry, no results for ""
How to Tune Your Rig
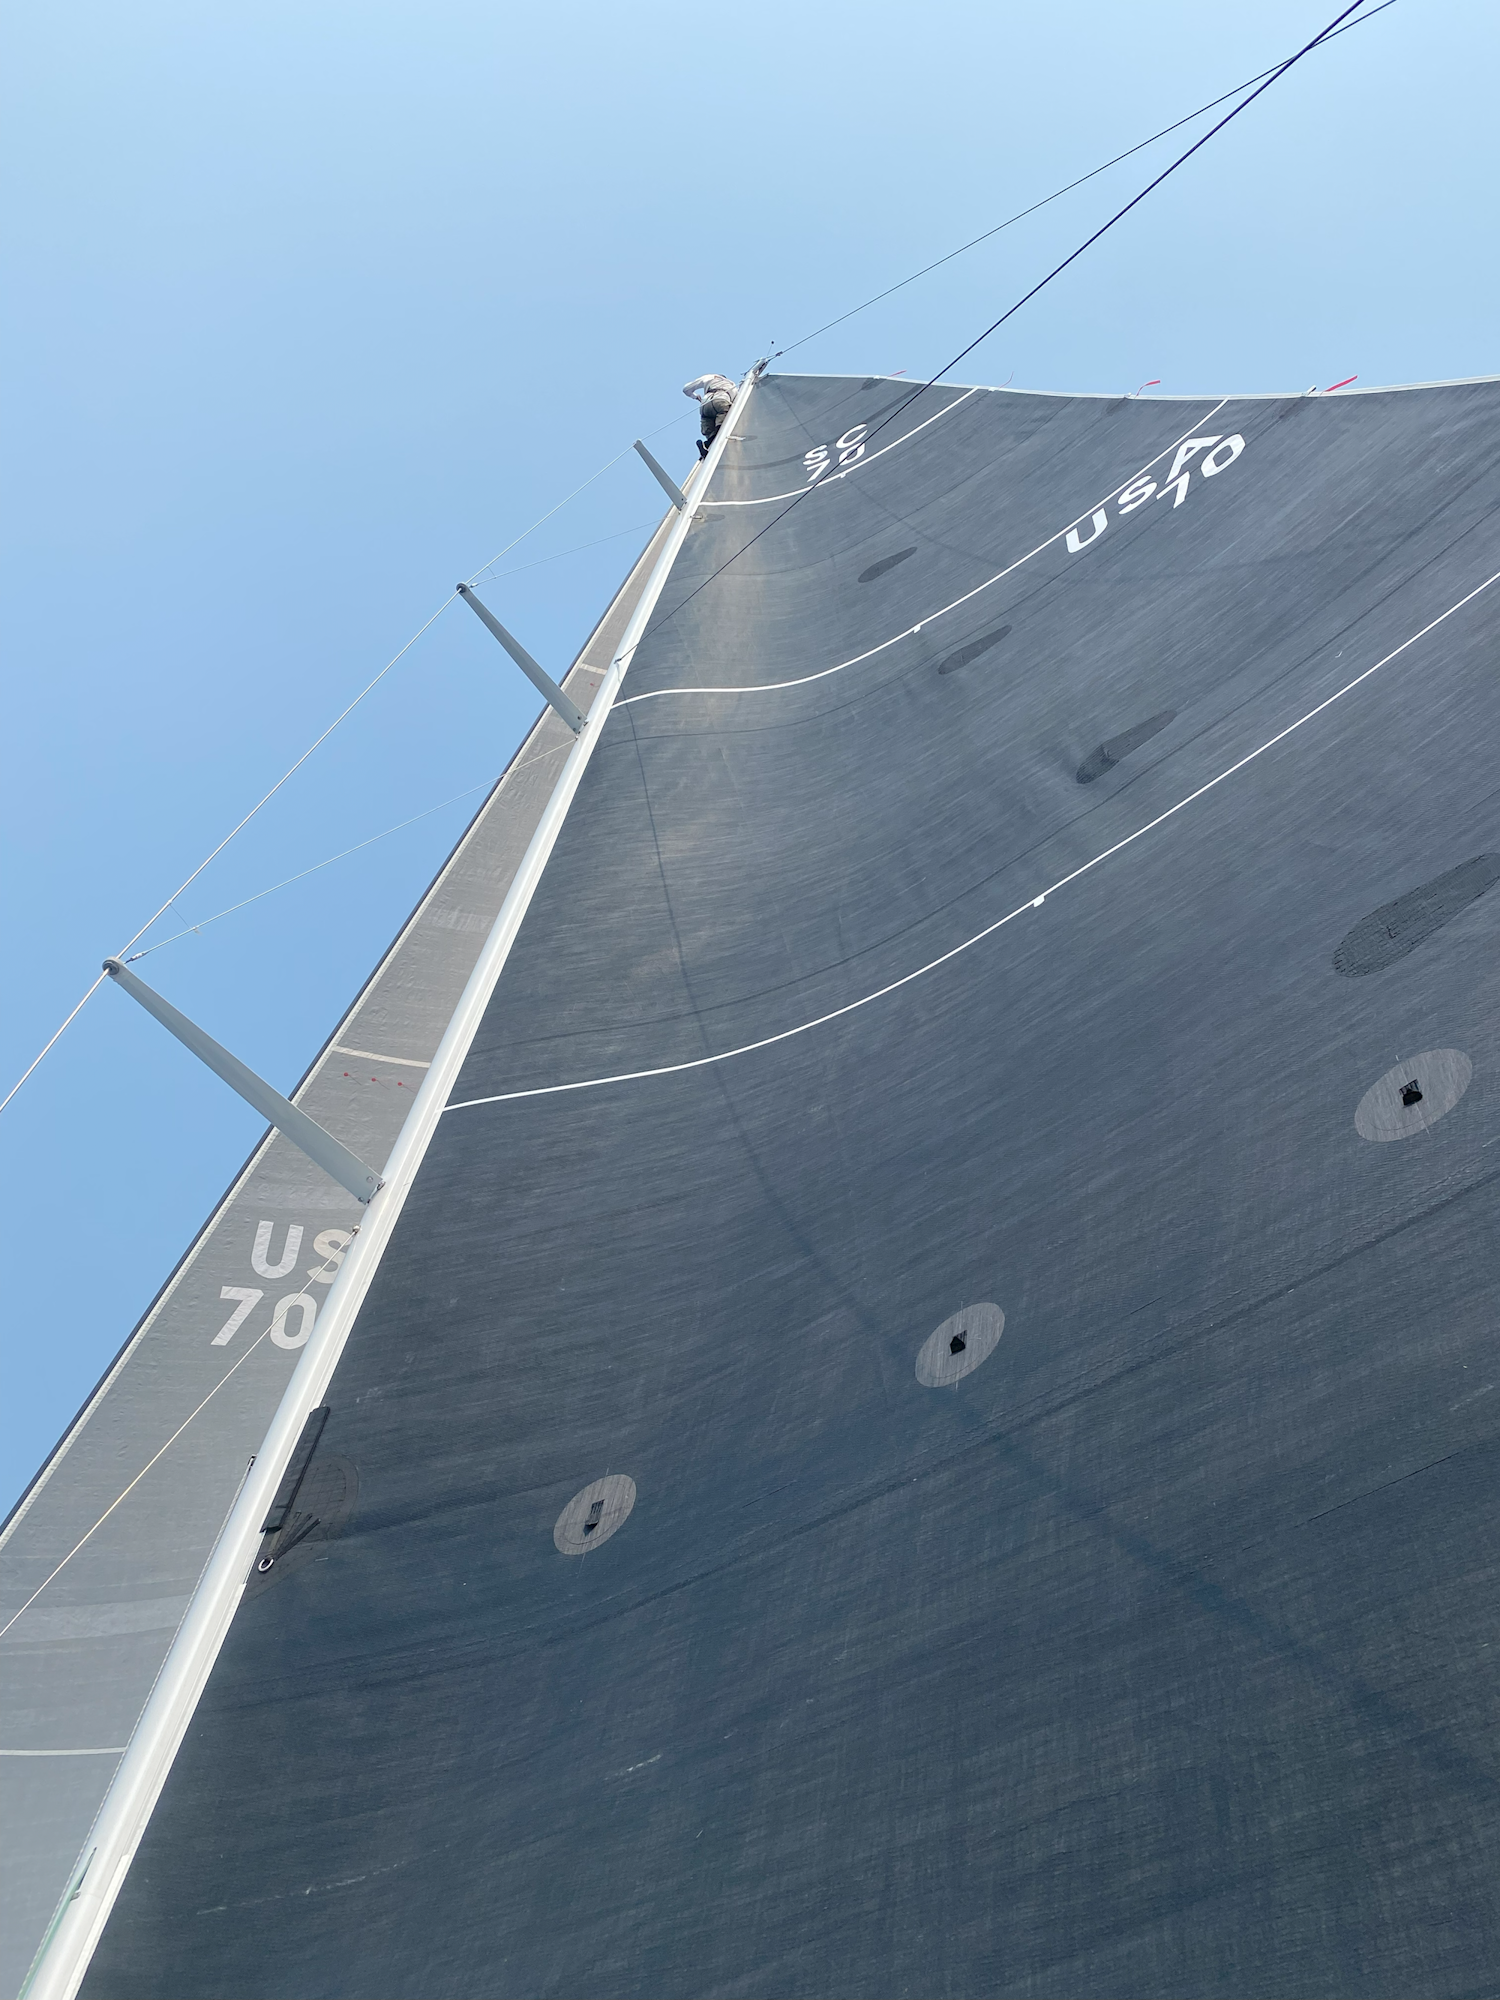
Without a properly tuned rig, you won’t be able to control your mast’s behavior over the full range of conditions. Fortunately, rig tuning is a straightforward step by step process for both masthead and fractional rigs.
The goals in rig tuning are the following: (1) Eliminate side bend and lean, (2) Set mast rake for proper helm balance, (3) Set pre-bend to match the mainsail design, and (4) Control mast bend and headstay sag.
Here are a few definitions and explanations to get us started.
FEATURED STORIES
Npl renew faq, flying sails 101.
21 December
CAPE 31 TUNING GUIDE
- Refresh page
- BOAT OF THE YEAR
- Newsletters
- Sailboat Reviews
- Boating Safety
- Sailing Totem
- Charter Resources
- Destinations
- Galley Recipes
- Living Aboard
- Sails and Rigging
- Maintenance
- Best Marine Electronics & Technology

How to Inspect and Tune a Sailboat Rig
- By Ralph Naranjo
- Updated: May 14, 2020
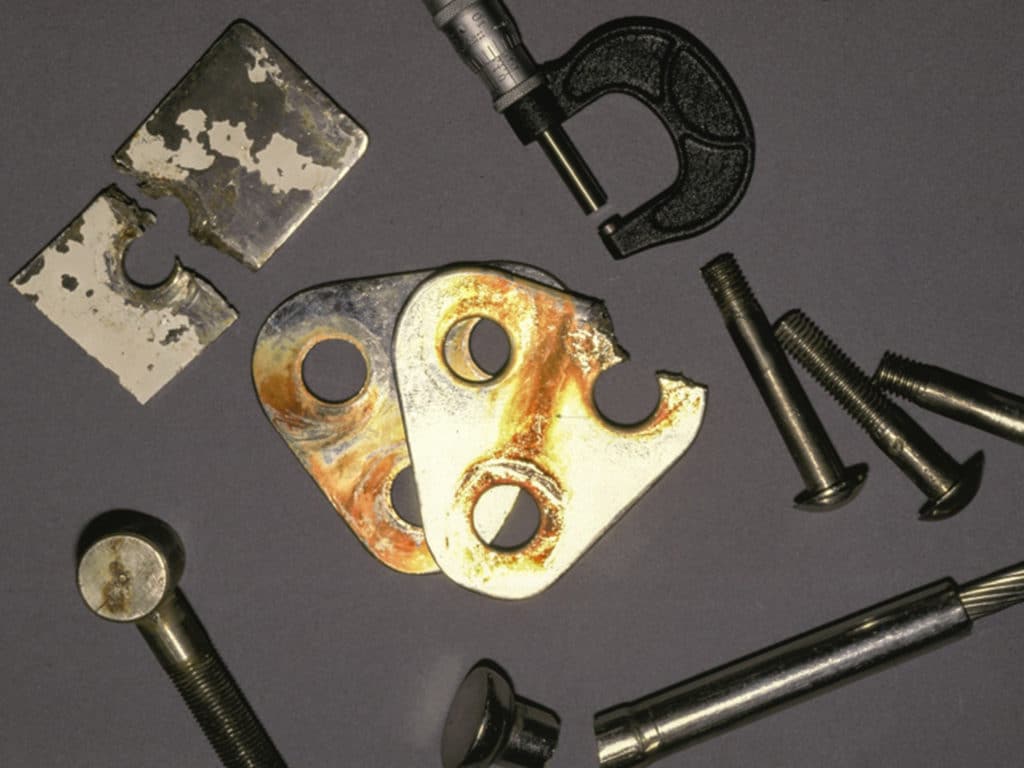
Major mast failures usually begin as minor hardware problems. At least that’s what scrap-bin forensics seems to confirm. So, instead of dreading a dismasting, prevent it with a sensible approach to rig maintenance.
Some sailors inspect their masts and rigging with the spar stepped, but most recognize how much will remain unseen. Riggers recommend that the mast come out every few years and be placed on a pair of sturdy sawhorses ready for close-up scrutiny. My DIY approach focuses on hardware junctions and points where load paths intersect. Packed in my rigger’s bag are the usual hand tools, plus a Scotch pad, a quality magnifying glass and a small digital camera to record the findings. The old rule of thumb is that standing rigging has a decade’s, or one circumnavigation’s, worth of reliability; it’s a benchmark that remains valid today.
Another important issue is the rigging’s designed safety factor, or how much stronger the components are than they need be. The catch here is material deterioration over time, and the fact that there’s a direct correlation between stronger structures and increased reliability. For example, by increasing 1-by-19 shrouds and their attendant hardware from 5/16 inch to 3/8 inch, the higher safe working load translates into a longer life span. It’s a legit assumption, but doing so is both costlier and adds weight aloft, which can rob performance. The same tenets apply for a larger-diameter spar section and greater wall thickness. Engineers and naval architects try to balance these competing factors.
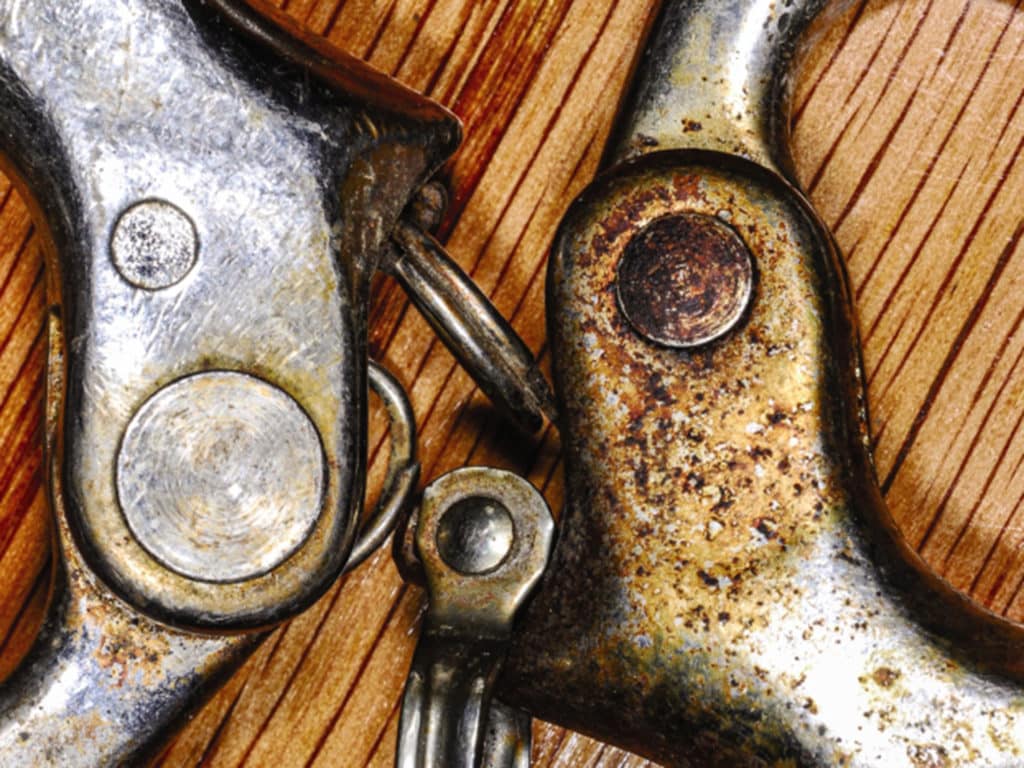
Some decades ago, I watched the deck-stepped spar of my first little cruising sloop drop into the drink. It drove home the fact that it really is the little things that count. In that case, it was a stainless- steel toggle, connected to an upper shroud turnbuckle, which had endured a few too many on-off load cycles. A tiny, nearly invisible crack had opened up, and salt spray had found a new home. The resulting corrosion tipped the scale and led to a dramatic failure. Since then, rig scrutiny has become my obsession.
The old rule of thumb is that standing rigging has a decade’s, or one circumnavigation’s, worth of reliability.
Wire and rod end fittings need a close look, especially in areas where there are brown stains and signs of cracks, pitting or other surface deterioration. This includes an evaluation of clevis-pin holes that should be circular, not elongated. Confer the same level of scrutiny to the clevis pins themselves. Don’t confuse stainless-steel clevis pins with chrome-plated bronze pins. The latter are just fine when used in bronze fittings, but when a bronze clevis pin is placed in a stainless-steel chainplate hole, the bronze pin can be carved away by the much harder stainless-steel chainplate.
My inspection process includes a rigging-wire wipe-down with a rag that easily snags on tiny cracks. It includes careful scrutiny of hardware junctions. I search for signs of chafe, especially where fiber or wire running rigging makes directional changes at sheave boxes, and around where the headsail furler’s top swivel rides. Looking closely at masthead exit points, I check for sheave wobble, excess side play and signs of pulley damage.

This is also the time to sort out halyards that are rubbing against external or internal obstructions. I use a bright, narrow-beam LED flashlight for a good visual inspection of the internal portion of the mast. Not only will it pinpoint screws and sheave boxes that might be causing chafe, but it also will help you untangle crossed halyards and confirm fairleads. While working at the heel end of the spar, look closely for corrosion and a condition riggers call “elephant foot.” It’s an actual wrinkling of the alloy tube section caused by too much compression and a too-thin wall section. It’s most often seen on raceboats with powerful hydraulic mast-adjusting systems, and on cruising boats that have pounded into too many steep wave faces.
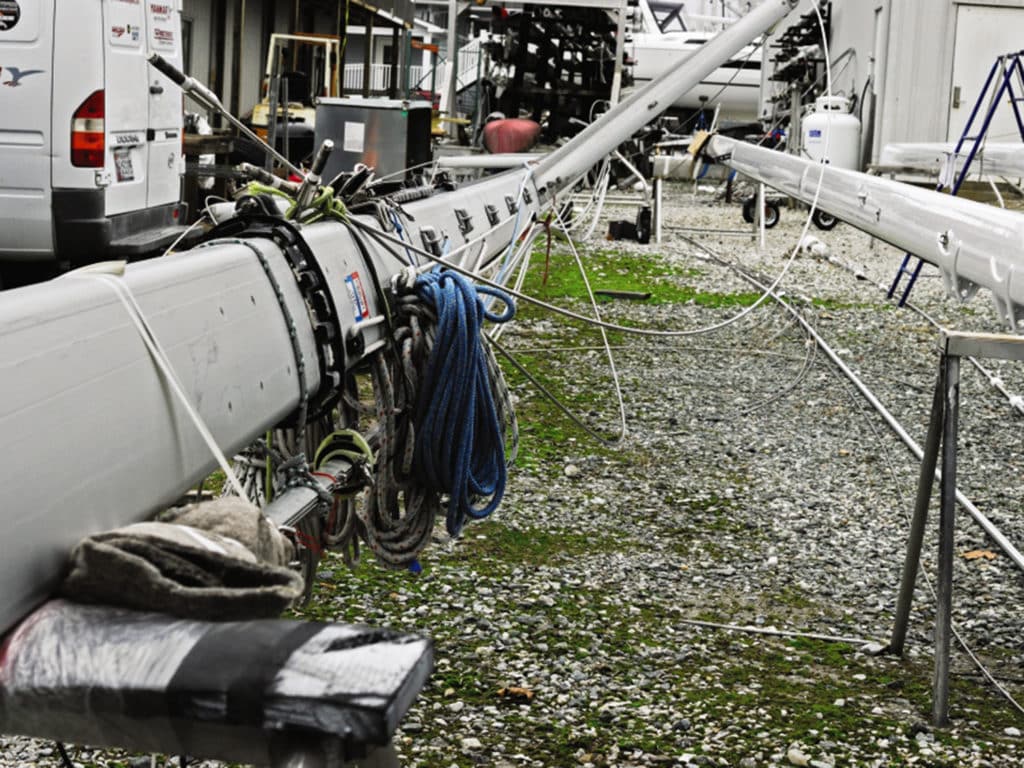
Roller furling foils hide the wire or rod on which they spin. Rigging end fittings and terminals can usually be inspected, but a broken strand of wire inside the foil might initially go unnoticed, at least for a little while. This is another reason why offshore cruisers opt for a cutter or solent rig that adds a second stay for some extra insurance. Following the once-a-decade rule, it makes sense to completely disassemble furling systems, and replace the wire along with any worn bearings, bushings or plastic spacers.
My inspection process includes a wire wipe-down with a rag that easily snags on tiny cracks. I search for signs of chafe everywhere.
Keep in mind that when the mast is unstepped, many roller furling drums and head foils (especially on boats with deck-stepped rigs) extend beyond the heel of the spar. If the yard doesn’t splint and immobilize the extended foil and drum, do it yourself. All it entails is a couple of 2-by-4’s, or a pair of old oars lashed or duct-taped to the mast just above the heel. This double splint should extend to the base of the roller-furling drum where it too is lashed or taped. It keeps the drum from dangling and bending the foil during transport, and while the rig is stored on a mast rack.

Spreaders also deserve a really close look. All too often, excess anti-chafe protection results in the spreader tips becoming a water trap that turns into a hidden corrosion bath. So, when the rig is down, cut away the spreader-tip padding, and use white vinegar and a plastic scrub pad to get rid of any white powdery oxidation. Remove the spreaders from the spar, and inspect the area where spreader bases make contact with the mast. Look for compression damage to the mast wall and signs of corrosion damage. If all is well, reassemble using one of the tried-and-proven water-resistant lubricants. I’ve settled on Lanocote, McLube Sailkote and Super Lube, using Boeshield T-9 and WD-40 as my go-to spray protectant and penetrant. Throw away the old cotter pins, and use new pins on all of the reassembled rigging.
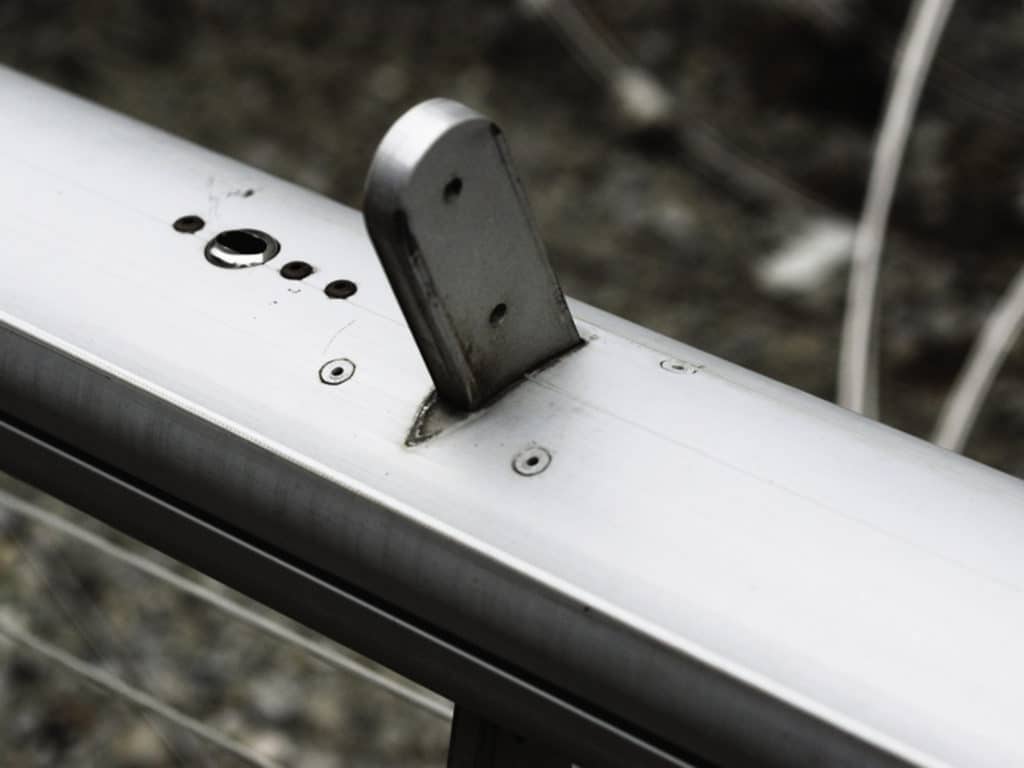
“She’ll be right, mate,” was the favorite phrase of an old Kiwi friend, but it isn’t good advice when it comes to keeping the rig where it belongs. Don’t shy away from calling in a qualified rigger to handle larger problems.
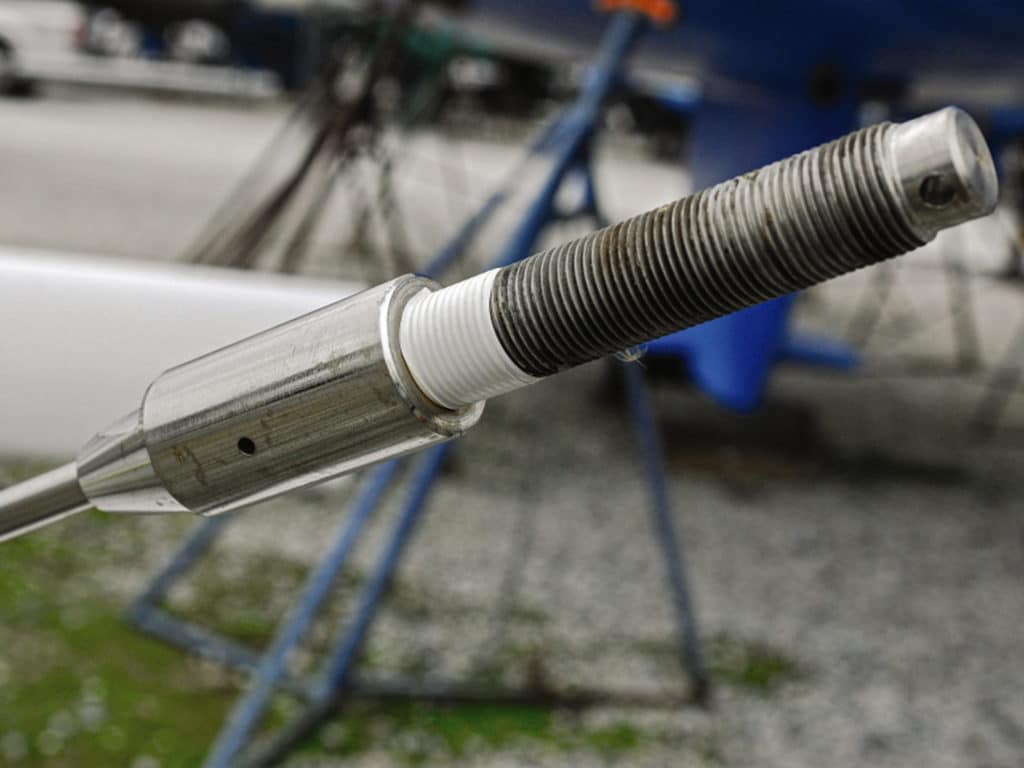
Most boatyards will restep spars but won’t tune the rig. Their goal is to set up the mast and rigging to approximate how it arrived. Occasionally, they hit the mark and even replace the mast wedges appropriately. Otherwise, I wait for a flat calm to make sure that the boat has no list. This involves using a tape measure to confirm the athwartship trim (waterline to rail-height port equals waterline to rail-height starboard). Then I check the perpendicular and rake of the mast using the main halyard with a makeshift plumb bob (dive weight) attached. The retune requires loosening the turnbuckles and incrementally retensioning the rigging. Small amounts of headstay and backstay adjustment relocates the masthead, causing the makeshift plumb bob to move significantly. I use prior measurements from previous mast-tuning successes to set the rake to a sweet spot that, in the past, delivered a minimal amount of weather helm.
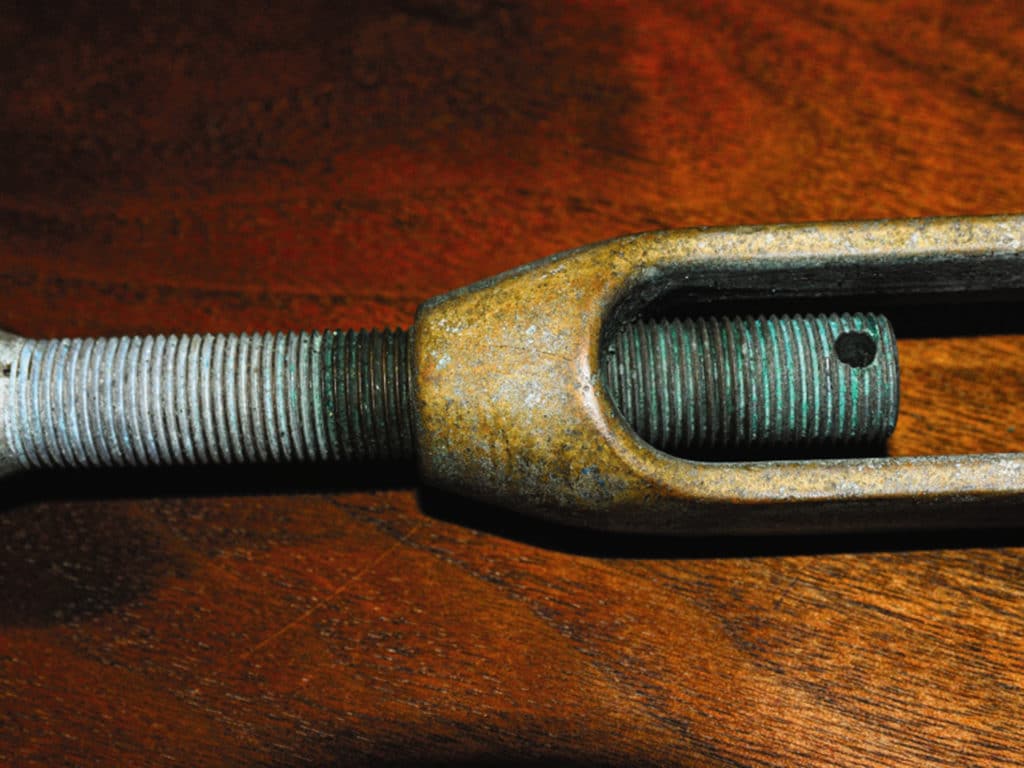
With the rake set, I insert a set of teak or high-density hard-rubber wedges between the mast and the mast partners. These wedge-shaped spacers have a top flange that prevents them from falling into the bilge when the mast compresses on one side of the partners and opens the gap wider on the other. With all the wedges set, I incrementally add tension to the rig, tightening headstay and backstay first, while carefully maintaining the rake angle. Next, I adjust the upper shroud (or V1), working from side to side to keep the mast perpendicular. Finally, I snug up (but not overtension) the lower and intermediate shrouds. This static tuning sets the stage for an underway final tune, during which I check how well the spar remains in column. Leeward bends and S-curves are problematic and must be minimized. Boats with discontinuous rigging have shrouds that are not one continuous wire run. They utilize turnbuckles located above spreaders that must be individually adjusted to eliminate side bend.
During sea trials, make sure the leeward standing rigging is not overly slack and flopping around like loose spaghetti.
Intentional fore and aft mast bending can influence sail shape, and is put to good use aboard raceboats. Adding such complication to most cruising boats, which are normally steered by an autopilot, makes less sense. In-mast furling spars are least happy with powerful hydraulic backstays bowing the mast. So, get sound advice from a rigger/mast builder before adding hydraulic sail-shaping gear.
A sea trial should follow your static mast tune. And as you beat to windward in a modest 10- to 15-knot true breeze, check the leeward standing rigging. Make sure it’s not overly slack and flopping around like loose spaghetti. If so, add more shroud tension to both sides. A tension-testing gauge will work, but many sailors do fine estimating by hand. Cruising-boat rigs shouldn’t have the same amount of rig tension as a raceboat beating to windward. However, if your sailboat’s mast is deck-stepped, make sure the coachroof isn’t deforming due to the compression load. A compression post, ring frame or other rigid structure should be spreading such loads. If you’re unsure of the correct rig tune, arrange a session with a rigger or sailmaker—and start the season in optimized trim.
Technical expert Ralph Naranjo has inspected the rig on his Ericson 41, Wind Shadow , on countless occasions.
- More: fitting out , hardware , How To , mast , rigging
- More How To

3 Clutch Sails For Peak Performance

It’s Time to Rethink Your Ditch Kit

8 Ways to Prevent Seasickness
How To De-Winterize Your Diesel Engine

Kirsten Neuschäfer Receives CCA Blue Water Medal

2024 Regata del Sol al Sol Registration Closing Soon

US Sailing Honors Bob Johnstone

Bitter End Expands Watersports Program
- Digital Edition
- Customer Service
- Privacy Policy
- Email Newsletters
- Cruising World
- Sailing World
- Salt Water Sportsman
- Sport Fishing
- Wakeboarding
What You Need to Know About Rig Tune & Performance
For many sailors, the relationship between rig tune and performance often seems like a black hole. Quantum’s Dave Flynn takes us on a tour of the core elements of the rig and what you need to know to demystify tuning for optimum performance.

Mastering rig tuning for optimal sail trim and performance might seem daunting, but fortunately it’s not as complicated as tuning a Stradivarius violin! To keep it in perspective, remember you are just pulling on a hunk of aluminum or carbon with cables. To master the rig, there are four elements you need to understand: rake, athwartship tuning, mast bend, and headstay sag. Each of the four elements of rig tune either adds power or takes it away. If you understand the basic mechanics of each element, you can tune your rig to improve trim and overall setup.
Mast rake is a measure of how far the mast is angled aft from a straight vertical. A typical mast rake ranges from one to one-and-a-half degrees on a cruising masthead rig to as much as four degrees on a fractional racing rig. A mast should never be raked forward unless there is something unusual in the boat design (You’ll know if this is the case!). When you add rake to the mast, you tilt the whole sail plan aft. This, in turn, shifts the power aft, pushing more load on the stern and forcing the bow up into the wind, creating weather helm.
Rake is determined by headstay length: The longer the headstay, the greater the rake. To adjust your rake, adjust the length of the headstay. How much rake a boat needs to generate the right amount of weather helm is a function of hydrodynamics (hull form, keel shape, and placement). In most one-design racing classes, where lots of time is invested in figuring out what works best, tuning guides specify headstay lengths for conditions. In more developed classes, this will change as a function of wind speed. You’ll want more rake in light air when it is hard to generate helm and less as the breeze builds. For boat setup and trim, adding rake is a tool for generating power in light air, and reducing rake is part of the de-powering process in heavy air.
For cruisers and many non-one-design rigs, you likely don’t have a tuning guide to work from, so to optimize upwind performance you need some helm loading in light-to-moderate conditions. Three to five degrees of rudder angle in 8kts-10kts of wind is a commonly cited target. To test if this angle works for you, sail upwind in 8kts-10kts and let the helm go; the boat should turn gently into the wind. If it goes straight or bears off, you need more rake and vice versa if it spins out of control. Don’t try this test when it is windy; your boat will round up and exhibit too much helm due to heel not rake, and you’ll get a false read.
ATHWARTSHIP TUNING
If the rig is not centered, performance and trim will be different tack to tack. To remedy this, center the top of the rig. Using the diagonal shrouds, bring each successive panel in line with the top. The amount of tension you need is tough to predict at the dock–the mast really needs to be under load. Test tension by sailing upwind in 10kts-12kts of breeze with appropriate trim settings and then check the mast. Is it straight when you put your eye to the aft face and look up the mainsail track? If the tip is falling off, you need more upper tension. If the leeward upper shrouds are flopping around, you need more tension for a given velocity. The shrouds should be firm.
Work on the diagonals next. How much tension you need in the leeward diagonals is determined by how stiff the mast is. In over 10 kts, you definitely want the mast to be straight. For more power in light air, you can let the middle of the mast sag an inch or two to leeward to increase the depth in the mainsail. It is common in one-design classes to ease tension on the diagonals in light air to create this smooth sag.
Dinghies and small keelboats are great boats to experiment with how tuning inputs affect your sail plan. The smaller diameter wire shrouds and relatively small masts dramatically show the impact of tuning adjustments. This isn’t as visible on larger racing or cruising boats with rod rigging. Cruisers will want to set a good base athwartship tune as well. If the rig is uneven side-to-side, you will experience frustrating differences in point and power on each tack. Skip the headache and set a good base tune early in the season. Whatever the condition you are sailing in, once you have established good upwind trim, have a look up the mast to make sure it is in column or sagging slightly to leeward in the middle in light air.
If you have an older cruising boat with a mast stiffness that resembles that of a telephone pole, you can skip this section! But for cruisers with a relatively modern rig, swept-back spreaders, traditional sails with flaking system, or even in-boom or in-mast furling, pay attention here.
While rake is the amount the mast is angled aft, mast bend is the amount you bend the mast aft after you have set your rake. A rig that bends gives you a powerful tool for changing the shape of the mainsail: More mast bend flattens the sail and de-powers it; a straighter mast creates shape and power. Rig tune affects how much a mast bends, particularly on modern fractional rig boats with swept back spreaders. But no matter what type of rig you have, you want to start with a little mast bend, or pre-bend, which refers to the amount of bend that has no backstay tension. Lengthening the headstay increases the bending moment and adds pre-bend. This is why it’s important to set the rake first. Other factors affecting the pre-bend are the position of the mast step and the blocking of the mast in the partner, which is the hole where the mast goes through the deck. To add pre-bend, either move the mast step aft or move the mast forward in the partners. A target of 1”-3” of pre-bend is typical on a medium-sized boat. Pre-bend ensures the mast will move forward in the middle and flatten the mainsail when you pull on the backstay.
On a rig with in-line spreaders (typically masthead rigs), the side shrouds have little impact on the mast bend created by pulling on the backstay. On some rigs, however, there are check stays to keep the mast from bending too far. Sometimes there are even multiple sets.
How far is too far when bending the mast? You’ll know when your mainsail develops diagonal wrinkles from the clew up to the luff and is beginning to turn inside out. For maximum de-powering, bend just to the point where wrinkles appear. If available, use check stays to help.
On modern fractional rigs with spreaders swept well aft, the side shrouds have a big impact on mast bend. The diagonal shrouds are controlling not only athwartship tuning but also acting like check stays to inhibit mast bend, since they are swept back and pulling aft. Too tight, and the diagonal shrouds will keep the mast from bending and flattening the mainsail; too loose, and the mast can over-bend and turn the sail inside out. In many classes, overall rig tension is increased by taking turns on the shrouds, shortening the headstay, or pumping the whole rig up with a mast jack for more backstay tension without allowing the rig to over-bend as it gets windier.
HEADSTAY SAG
If some mast bend is good, why isn’t more better? The answer is headstay sag. When the headstay sags, the headsail becomes full and more powerful, which is great in light conditions. But as the breeze builds, you want to reduce the amount of sag as much as possible to de-power the boat and help with pointing. In breeze, it’s all about headstay tension–you can’t get too much. So why is mast bend a factor? When you pull back on the rig with the backstay, it will tighten the headstay, which is good. But you are also pulling down and compressing the rig, which makes it bend. You want some mast bend in order to flatten the mainsail, but not so much that you soften the whole rig and increase headstay sag. This is why we use check stays to control mast bend on a masthead rig and tighter diagonal tension on a swept aft spreader rig.
Rig tune still matters even when you aren’t routinely adding turns to your shrouds based on the wind and conditions. Many modern cruising sailboats with in-mast furling rigs have comparatively smaller tune adjustments, as the rig needs to stay in column for the mainsail to furl properly. Some boats are outfitted with a cascading backstay adjuster that allows for minor tweaks and lets you easily reset the rig when it’s time to furl the mainsail. To get the most performance from your cruising setup, don’t overlook rig tune. Racing sailboats often have their rigs removed for transport and then re-rigged, whereas many cruising boats may never have had the rig adjusted since the boat was first commissioned. If you can't remember the last time your rig was tuned, now is a great time to give your local loft a call.
Having a properly tuned rig is essential to boat setup and performance. While this can be a DIY process, if you have questions or need additional input, please contact a professional rigger or your local loft where our expert Quantum team can help sort out your rig and tune. For one-design tuning guides and resources, select your OD class on the Quantum website or get in touch with a Quantum Class Expert.
Get in touch with David Flynn with additional questions and dive deeper into rig tune for performance. E: [email protected] P: 410-268-1161 ext. 206
The Discussion

Us, too. We pour that passion into each of our newsletters to help you enjoy sailing even more.
How to tune your rig for optimal performance
Optimizing the performance of your boat's rigging system is crucial for an enjoyable and safe sailing experience. This guide provides step-by-step instructions for tuning your rig and maintaining your sails.
How to Tune Your Rig for Optimal Performance
Sailing is an art that requires constant learning and adaptation. One of the most important aspects of sailing is ensuring that your boat’s rigging and sails are in top condition. In this article, we will discuss how to tune your rig for optimal performance, ensuring that you and your family can enjoy smooth sailing on your adventures.
Table of Contents
Understanding the basics of rigging, the importance of rig tuning, step-by-step guide to rig tuning, sail improvements for better performance, maintaining your rig and sails.
Before we dive into the process of rig tuning, it’s essential to understand the basics of rigging. The rigging system on a sailboat consists of various components, including the mast, boom, shrouds, stays, and sails. These components work together to provide stability, support, and propulsion for your boat.
Mast and Boom
The mast is the vertical pole that supports the sails, while the boom is the horizontal pole attached to the mast’s base. The mast and boom are critical components of your rigging system, as they provide the framework for your sails.
Shrouds and Stays
Shrouds and stays are the wires or ropes that connect the mast to the boat’s hull. They provide lateral and fore-and-aft support for the mast, ensuring that it remains stable and upright. Shrouds are typically attached to the sides of the boat, while stays are connected to the bow and stern.
Sails are the primary means of propulsion for a sailboat. They work by capturing the wind’s energy and converting it into forward motion. There are various types of sails, including mainsails, jibs, and spinnakers, each with its own unique characteristics and uses.
Rig tuning is the process of adjusting your boat’s rigging system to achieve optimal performance. Proper rig tuning can significantly impact your boat’s speed, handling, and overall sailing experience. Some of the benefits of rig tuning include:
- Improved boat speed and pointing ability
- Enhanced sail shape and efficiency
- Reduced wear and tear on rigging components
- Increased safety and stability
By regularly tuning your rig, you can ensure that your boat is always performing at its best, allowing you and your family to enjoy your sailing adventures to the fullest.
Rig tuning can be a complex process, but with the right knowledge and tools, it’s something that any sailor can learn to do. Here’s a step-by-step guide to help you tune your rig for optimal performance:
Step 1: Inspect Your Rigging
Before making any adjustments, it’s essential to inspect your rigging for signs of wear, damage, or corrosion. Check all components, including the mast, boom, shrouds, stays, and sails, for any issues that may affect your boat’s performance.
Step 2: Set Your Mast Rake
Mast rake refers to the angle of the mast relative to the boat’s centerline. Adjusting the mast rake can have a significant impact on your boat’s balance and performance. To set your mast rake, follow these steps:
- Attach a weight to your main halyard and let it hang freely over the side of the boat.
- Measure the distance from the halyard to the boat’s centerline at the chainplates.
- Adjust the forestay and backstay until the desired rake is achieved.
Step 3: Adjust Your Shrouds and Stays
Next, you’ll need to adjust your shrouds and stays to ensure proper mast alignment and tension. Follow these steps:
- Loosen all shrouds and stays.
- Tighten the upper shrouds until the mast is straight from side to side.
- Tighten the lower shrouds to remove any side-to-side play in the mast.
- Adjust the forestay and backstay to achieve the desired mast bend.
Step 4: Check Your Rig Tension
Proper rig tension is crucial for maintaining sail shape and boat performance. To check your rig tension, follow these steps:
- Attach a tension gauge to your shrouds and stays.
- Measure the tension in each wire, adjusting as necessary to achieve the desired tension.
- Ensure that the tension is even on both sides of the boat.
Step 5: Fine-Tune Your Rig
Once your rig is properly tensioned and aligned, you can make any final adjustments to optimize performance. This may include adjusting your sail controls, such as the outhaul, cunningham, and vang, to fine-tune sail shape and efficiency.
In addition to rig tuning, there are several sail improvements that you can make to enhance your boat’s performance. Some of these improvements include:
- Upgrading to high-quality sails made from durable, lightweight materials
- Regularly cleaning and inspecting your sails for signs of wear or damage
- Using sail battens to improve sail shape and efficiency
- Installing a roller furling system for easier sail handling and storage
By investing in these sail improvements, you can ensure that your boat is always performing at its best, allowing you to enjoy your sailing adventures to the fullest.
Regular maintenance is essential for keeping your rig and sails in top condition. Some maintenance tasks to consider include:
- Inspecting your rigging for signs of wear, damage, or corrosion
- Lubricating moving parts, such as sheaves and blocks, to reduce friction and wear
- Replacing worn or damaged components, such as shrouds, stays, and sails
- Regularly cleaning your sails to remove dirt, salt, and other contaminants
By staying on top of these maintenance tasks, you can prolong the life of your rig and sails, ensuring that your boat is always ready for your next adventure.
Tuning your rig for optimal performance is an essential skill for any sailor. By following the steps outlined in this article, you can ensure that your boat is always performing at its best, allowing you and your family to enjoy your sailing adventures to the fullest. Remember to regularly inspect and maintain your rig and sails, and don’t be afraid to make improvements and adjustments as needed. With the right knowledge and tools, you can transform your boat into a high-performance sailing machine that’s ready to take on the open sea.

Service Locator
- Angler Endorsement
- Boat Towing Coverage
- Mechanical Breakdown
- Insurance Requirements in Mexico
- Agreed Hull Value
- Actual Cash Value
- Liability Only
- Insurance Payment Options
- Claims Information
- Towing Service Agreement
- Membership Plans
- Boat Show Tickets
- BoatUS Boats For Sale
- Membership Payment Options
- Consumer Affairs
- Boat Documentation Requirements
- Installation Instructions
- Shipping & Handling Information
- Contact Boat Lettering
- End User Agreement
- Frequently Asked Questions
- Vessel Documentation
- BoatUS Foundation
- Government Affairs
- Powercruisers
- Buying & Selling Advice
- Maintenance
- Tow Vehicles
- Make & Create
- Makeovers & Refitting
- Accessories
- Electronics
- Skills, Tips, Tools
- Spring Preparation
- Winterization
- Boaters’ Rights
- Environment & Clean Water
- Boat Safety
- Navigational Hazards
- Personal Safety
- Batteries & Onboard Power
- Motors, Engines, Propulsion
- Best Day on the Water
- Books & Movies
- Communication & Etiquette
- Contests & Sweepstakes
- Colleges & Tech Schools
- Food, Drink, Entertainment
- New To Boating
- Travel & Destinations
- Watersports
- Anchors & Anchoring
- Boat Handling
Tuning A Sailboat Rig
Advertisement
If your sailboat seems slower, follow our how-to on tuning your rig for optimal performance.

Photo: Bigstock
Spring is a time of prepping your boat for the coming season. While powerboaters fine-tune their engines, sailors should consider fine-tuning their rigs. Doing it yourself may seem intimidating, but it shouldn't be. Anyone reasonably handy can do it in a few hours. The reward is easier and faster sailing throughout the coming season.
Let's start with the basics for new sailors. With a few exceptions, a sailboat mast is held up by a series of stainless-steel wires. But those wires also perform several other equally important functions. When a sailboat is at rest and there is no wind blowing, the stress on these wires is very light with almost all the load downward toward the keel. However, when the boat is sailing and heeled over in a fresh breeze, more stress is placed on the wires and they have to work harder to hold the mast upright and stop it from bending.
The wires that prevent the mast from moving from side to side are called shrouds, and the ones that prevent fore and aft movement are called stays. The larger and taller the mast, the greater the load, and the number of shrouds and stays required. On a typical cruiser, say up to about 35 feet, there will generally be one forestay, one backstay, and two shrouds on each side.
To get the best performance from your boat and sails, the rigging needs to be set up correctly — often called "tuning the rig." The rig should be tuned with the boat in the water on a day with little to no wind. You'll also want to be away from wakes and other boats that can rock your boat. To start, the turnbuckles for the stays and shrouds should be hand-tight only. This is sufficient to hold up the rig but places no strain on anything — yet. Lay on your back on the boat's foredeck and sight up the front of the mast. It should be perfectly straight with no bends or kinks. Next, tighten the lower shrouds — these are the ones that do not go all the way to the top of the mast and often attach to the mast at the base of the crosstrees (the two horizontal spars at the upper ends of the topmasts).
You'll need a large screwdriver to rotate the turnbuckle, and a wrench to hold the shroud fitting and prevent it turning as you tighten. Give a couple of complete turns on either side. Have a helper release the main halyard and keep a little tension while you pull down the end that normally attaches to the mainsail until it just touches the top of the toerail adjacent to the chain plate. Have your helper cleat off the halyard, then swing the halyard over the boom and check the measurement on the other side. They should be the same. If not, adjust the turnbuckles until they the measurement is equal on port and starboard.
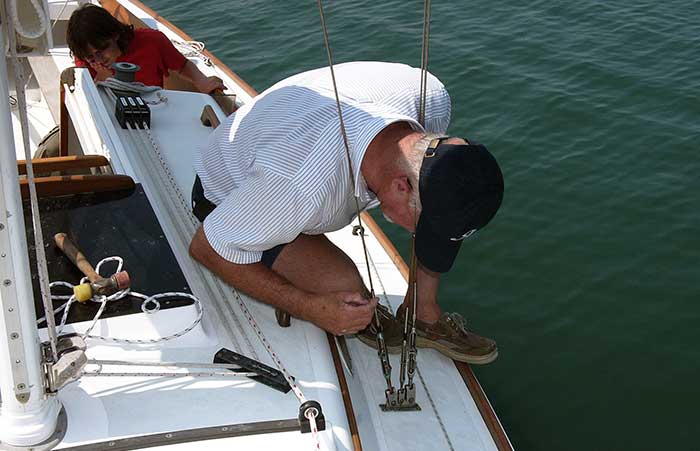
Adjusting and tuning a sailboat rig will often bring benefits such as easier handling and better performance.
Next do the same for the cap shrouds, these are the ones that go to the top of the mast, but note that due to the length of the shrouds, it is easy to bend the mast to either port or starboard. With the shrouds adjusted, sight up the mast one more time to ensure that it is still straight.
Next comes the fore and aft adjustment, which is made with the backstay and forestay. Masts should be plumb or lie back slightly. It should never rake forward. A good starting point is to tighten up the forestay and backstay a little over hand-tight. Use the main halyard as a plumb bob. Cleat off the halyard so the free end is just clear of the top of the boom and let it hang. If the shackle on the end of the halyard hits the mast, the mast is likely too far forward, so slacken off the forestay and tighten the backstay. Adjust a little at a time until the end of the halyard hangs free — 4 or 5 inches is a good starting point.
You'll need to install cotter pins into the turnbuckles to prevent them loosening over time, but before doing that, take the boat for a sail when the wind is blowing about 10 knots and see how everything works. With the boat on a beam reach, note the tightness of the windward shrouds. If they appear slack, they will need to be adjusted up. If the boat is hard on the tiller or wheel and tries to turn into wind, the mast has too much aft rake, so you'll want to slacken the backstay and tighten up on the forestay a little. If the bow wants to turn away from the wind, the mast is too far forward, so you'll need to move the mast back a little.
If you are at all unsure about tackling this task, play it safe and smart — seek out the services of a qualified rigger who has access to rig tension gauges and other specialized tools.
Related Articles
The truth about ceramic coatings for boats.
Our editor investigates the marketing claims of consumer-grade ceramic coatings.
Fine-Tune Your Side Scan Fishfinder
Take your side-scanning fishfinder off auto mode, and you’ll be spotting your prey from afar in no time
DIY Boat Foam Decking
Closed-cell foam flooring helps make boating more comfortable. Here’s how to install it on your vessel
Click to explore related articles
Contributing Editor, BoatUS Magazine
A marine surveyor and holder of RYA Yachtmaster Ocean certification, BoatUS Magazine contributing editor Mark Corke is one of our DIY gurus, creating easy-to-follow how-to articles and videos. Mark has built five boats himself (both power and sail), has been an experienced editor at several top boating magazines (including former associate editor of BoatUS Magazine), worked for the BBC, written four DIY books, skippered two round-the-world yachts, and holds the Guinness World Record for the fastest there-and-back crossing of the English Channel — in a kayak! He and his wife have a Grand Banks 32.
BoatUS Magazine Is A Benefit Of BoatUS Membership
Membership Benefits Include:
Subscription to the print version of BoatUS Magazine
4% back on purchases from West Marine stores or online at WestMarine.com
Discounts on fuel, transient slips, repairs and more at over 1,200 businesses
Deals on cruises, charters, car rentals, hotel stays and more…
All for only $25/year!
We use cookies to enhance your visit to our website and to improve your experience. By continuing to use our website, you’re agreeing to our cookie policy.
- Practical Boat Owner
- Digital edition

PBO Tested: 4 rig tension gauges
- November 9, 2016
It’s vitally important to ensure that the tension of your boat’s rigging is within the correct limits: Alex Bell tests four rig tension gauges to assess their accuracy

Getting the correct tension on the shrouds on my various boats over the years has always worried me, writes Alex Bell.
Too slack, and I know that the sails won’t be working as efficiently as they can: and, worse, the rigging and mast fittings can be subjected to shock loads and fatigue.
Too tight results in extra strain on the various attachment points of the rigging and the shrouds themselves, and can distort the hull as the loads are transmitted through the chainplates.
Most mast breakages occur when the mast is overloaded, either by the wind or, more frequently, a collision.
Modern stainless steel shrouds themselves rarely break, but the fittings to the mast or the boat do fail, with consequent failure of the mast.
Fortunately, there are devices available on the market that enable one to measure the tension and make sure it is set within the right limits.
There are currently three makes of rig tension gauge on the UK market designed for yacht rigging:
- The Loos, which comes in Standard and Professional models, each in three different shroud diameter ranges, from 2.5 to 10mm.
- The SureCheck, which comes in four sizes, from 2 to 10mm.
- At the time of going to press, the newly-launched Spinlock Rig-Sense was only available in one size: 2 to 5mm diameter. A larger version of the Spinlock Rig-Sense for 5 to 8mm diameters has since become available.
Yacht rigging
Whether a yacht has a masthead or fractional rig, they all have common rigging features: a forestay and a backstay to support the mast longitudinally (i.e. forward and aft), and the lateral rigging supporting the mast across the boat.
Many yachts will have an adjustable backstay in which the tension can be varied: such adjustments will always affect the tension in the forestay, particularly with a masthead rig. The lateral rigging, known as the shrouds, requires a fixed tension to keep the mast upright in the transverse plane.
Most sloop-rigged yachts will carry two sets of shrouds. One set will terminate just below the spreaders – the lowers. The other will pass through the ends of the spreaders and terminate at the masthead (masthead rig) or lower down at forestay level (fractional rig) – the cap shrouds.

Credit: Andrew Simpson
A larger mast will require more spreaders spaced up the mast to support it. Spreaders on masthead-rig yachts tend to be angled transversely across the boat, while fractional-rig boats usually have the spreaders swept back at an angle to help support the mast in a longitudinal direction.
Mast theory
In purely engineering terms, yacht masts are structural columns designed to resist the compressive forces and bending moments applied by the loads they are subjected to by the rigging and the wind.
Leonhard Paul Euler (1707-1783), a Swiss mathematician and physicist, provided the basic theory that structural engineers and mast designers use.
Euler established that a column will buckle long before the applied load would cause it to fail in pure compression, and went on to prove that the load at which buckling failure will occur depends on the ‘slenderness ratio’.
This is expressed as the effective length of the column divided by the radius of gyration of the column section – the l/r ratio.
Shroud construction method and material

1 x 19 wire
Most yachts have shrouds made from 1×19 wire: this comprises 19 wires of the same diameter. One wire runs up the middle, six wires are wound round it and then 12 wires are wound in the opposite direction around them.

Dyform wire
A variation is Dyform wire, which uses shaped strands which fit together in a more compact way. Another is to use wire that is itself wound: this can give, for example, a 7×19 wire.
Racing yachts also use solid rod to form their stays and shrouds, a more expensive option.
Most stays and shrouds these days are made from 316 stainless steel, which is specially produced for marine applications because of its ability to resist pitting corrosion. While not completely rustproof, the alloy is more corrosion-resistant than other common stainless steels.
How we tested them

In our test, we wanted to see how the rig tension gauges performed over a range of loads. Yacht Production & Surveying student Matt Turner and I took a length of 5mm-diameter 316 stainless steel rigging wire that had both ends fitted with a swaged eye. We set this up in an Olsen tensile testing machine in Southampton Solent University’s material test laboratory. We programmed the machine to apply five different loads progressively on the wire, ranging from 100kg to 500kg. This represents around 4% to 22% of the wire’s break load. At each load we measured the reading on the different gauges to see how they performed.
Adjusting cap shrouds by the ‘folding rule method’
Seldén, in their excellent publication Hints and advice on rigging and tuning of your Seldén mast (also to be found on their website), suggest this method as an alternative to a rig tension gauge. It works on the principle of measuring the extension of the shroud under load. You will need:
- 2m-long measuring rod (a 2m folding rule is ideal)
- Vernier callipers
- Adhesive tape
METHOD: Start with both cap shrouds hand-tight. The rig is stayed with the lower shrouds and the forestay and backstay. Attach the 2m rule with the adhesive tape at the top to the starboard shroud about 5mm from the upper end of the wire terminal. Measure the distance accurately using the Vernier callipers. Call this measurement x. Tension the cap shroud until the distance is x +1.5mm, noting the number of turns required to do this. Move across to the port shroud and tension the rigging screw the same number of turns.
Return to the starboard side and adjust the tension until the gap is x + 3mm. The shrouds are now tensioned to 15% of their breaking load. If the mast is not straight, adjust the lower shrouds. The folding rule method can be used on other stays, such as the backstay and forestay (without jib furling system). It can also be used for Dyform or rod rigging, but you will need to take the difference in stretch into account compared to 1×19 wire (see the Seldén website). This method works for different diameter wires because the extension is proportional to the cross-sectional area and the break load.

Loos Standard
Loos Standard PRICE: £84.95 Contact: www.force4.co.uk
Readings are based on 1×19 stainless steel cable: two models are available, each covering three wire sizes. Manufactured from anodised aluminium, the gauge cannot be left on the shroud when tensioning as it has to be held in position. The gauge comprises two aluminium arms which are riveted together at the bottom end. The wire is placed in a groove at the riveted end, then the gauge is placed up against the shroud and a piece of string is pulled so that one of the arms extends to a maximum value. The reading is then taken from the other arm on a scale: this reading is then transferred to a scale on the arm which enables the tension, in kg, to be read on the appropriate diameter scale. This gauge is straightforward to use, and an instruction sheet is provided.

A scale on the arm enables the tension, in kg, to be read on the appropriate diameter scale

Loos Professional
Loos Professional PRICE: £119.95 Contact: www.force4.co.uk The Loos Professional gauges are designed to have a higher accuracy than the Standard gauges. Readings are based on 1×19 stainless steel cable, and six models are available – three sizes in either metric or imperial. The gauges are manufactured from anodised aluminium, and supplied with instructions and a conversion chart. The gauge comprises a flat aluminium plate with two fixed spools at the bottom and a sliding nylon hook at the top which engages the stay. The hook is attached by pulling on a string attached to the slider, which works against a coil spring. The slider has a pointer which runs along a scale. A reading is then taken from a table on the plate graduated to wire diameter. It is simple to use, but care is needed to eliminate friction in the slider. The shroud tension can be adjusted with the gauge attached to the wire.

The slider works against a coil spring, and has a pointer which runs along a scale

SureCheck PRICE: £85.00 Contact: www.baselinemarine.com The SureCheck is calibrated for 1×19 wire. Manufactured from stainless steel, the gauge comprises two arms pivoted at one end, the other being held together by a coil spring. A grooved nylon spool is rotated until the correct wire size is selected; the gauge is then attached to the stay by pulling on a ring so that the grooved spool is hooked over the wire. The two arms should be squeezed together and released. The reading is taken against the last red dot exposed by the left-hand arm. The load reading is obtained from a graph provided as a percentage of the break load, based on a figure of 2,000kg for 5mm diameter wire. The gauge can be left on the shroud while adjustments to the tension are made. At the top end, the graph provided was difficult to get percentage break load readings from because the curve flattens out. This is a robust and good-value gauge, but it is important to ensure the correct wire diameter is selected on the spool.

The reading is taken against the last red dot exposed by the left-hand arm

Spinlock Rig-Sense
Spinlock Rig-Sense PRICE: £125.00 Contact: www.spinlock.co.uk The Spinlock Rig-Sense is a new rig-tuning tool developed to give consistent and repeatable measurement of loads on different wire composition as well as fibre. It is manufactured from anodised aluminium with glass-filled copolymer components and a composite leaf spring. The wire grips are stainless steel, which should reduce wear and give constant readings over time. The leaf spring is calibrated to output load readings to a direct linear scale in kg. The Rig-Sense allows one-handed operation, and comes with a carry bag: an app can be downloaded to smartphones or tablets to enable readings to be recorded and shared for future reference. This is easy to use and gives a direct load reading: it can be left in position while adjusting the shroud tension. The design eliminates friction, which should lead to consistent readings. It is currently only available for 2 to 5mm wire.

The leaf spring is calibrated to output load readings to a direct linear scale in kg
PBO results and verdict

The Spinlock Rig-Sense was the only gauge that allowed the load to be read directly
As we expected, the readings taken from the gauges varied slightly from the actual loads. There will be a number of reasons for this. Firstly, some readings require some interpolation between two marks on the scale. There is some skill in operating the gauge: the effect of friction, which can lead to a false reading, has to be reduced. From the graph, the SureCheck final reading looks suspect, but this was probably because the conversion graph tended to a horizontal line at the upper range which made for larger reading error. The Loos Standard gauge was simple to use, but could not be left on the shroud when it was being tightened. The Loos Professional gauge gave a more accurate reading than the Standard gauge and could remain on the shroud during tension adjustment. The SureCheck was straightforward to operate, but it was more difficult to obtain results at the top of its range. The Spinlock Rig-Sense was the only gauge that allowed the load to be read directly and whose design eliminated the effect of friction in the mechanism. For ease of use it gets the best buy, but until the model range is extended to accommodate larger-diameter wire, it has limited applications.

As we expected, the readings taken from the gauges varied slightly from the actual loads

As published in the April 2016 issue of Practical Boat Owner magazine. Prices correct at the time of going to press.
To find more archived articles browse our online copy service or call 01202 440832.

PBO’s BIG Christmas giveaway – win £2,700-worth of boat kit
Our pick of Practical Boat Owner magazine's best on test over the past year is up for grabs as one…

How to check your rigging
Maintenance of your rigging can save expensive failures and could be a lifesaver - here's how to check your boat's…

12 diesel bug treatments tested
Diesel bug can clog filters and starve your boat engine of fuel just when you need it most. Can diesel…

DIY rigging screw covers – make your own and save money
Rigging screw covers cost approximately £10 each, so for my Westerly Centaur I would have needed to spend around £60…

LED and laser flares tested
LED and laser flares claim to replace pyrotechnic flares on board: but how do they compare with a traditional flare…

Bermudan rig vs Junk rig
David Harding sets up a direct comparison between Junk- and Bermudan-rigged Splinters to find out how they handle

Raymarine Quantum pulse compression radar: tested
Exclusive: We take to the Solent to compare the performance of the new Raymarine Quantum pulse-compression radar with a same-size…

Best forward-looking sonar: 5 units tested
How effective is forward-looking sonar at flagging up shoals and obstacles on the seabed? David Pugh compares the findings from…

10 Teak Cleaners tested
We get scrubbing to find out what effect a variety of teak cleaners have on the woodwork of a Sigma…

Loose locker lids? Strut right this way
PBO reader Tim Marsden shares a practical project to ensure the smooth closure of locker lids
Rigging failure prompts Southsea yacht rescue
The yacht's forestay had snapped leaving the yacht in a precarious situation near Southsea seafront

PBO Tested: 12 mooring snubbers
David Pugh tests 12 readily-available snubbers to find out which one best absorbs a snatch load
Mast-fall yachtsman’s death was ‘suicide’ – inquest rules
A suspected drug smuggler killed himself by jumping from the mast of his yacht while Border Force agents searched below,…
- New Sailboats
- Sailboats 21-30ft
- Sailboats 31-35ft
- Sailboats 36-40ft
- Sailboats Over 40ft
- Sailboats Under 21feet
- used_sailboats
- Apps and Computer Programs
- Communications
- Fishfinders
- Handheld Electronics
- Plotters MFDS Rradar
- Wind, Speed & Depth Instruments
- Anchoring Mooring
- Running Rigging
- Sails Canvas
- Standing Rigging
- Diesel Engines
- Off Grid Energy
- Cleaning Waxing
- DIY Projects
- Repair, Tools & Materials
- Spare Parts
- Tools & Gadgets
- Cabin Comfort
- Ventilation
- Footwear Apparel
- Foul Weather Gear
- Mailport & PS Advisor
- Inside Practical Sailor Blog
- Activate My Web Access
- Reset Password
- Pay My Bill
- Customer Service

- Free Newsletter
- Give a Gift

How to Sell Your Boat

Cal 2-46: A Venerable Lapworth Design Brought Up to Date

Rhumb Lines: Show Highlights from Annapolis

Open Transom Pros and Cons

Leaping Into Lithium

The Importance of Sea State in Weather Planning
Do-it-yourself Electrical System Survey and Inspection

Install a Standalone Sounder Without Drilling

When Should We Retire Dyneema Stays and Running Rigging?
Rethinking MOB Prevention

Top-notch Wind Indicators

The Everlasting Multihull Trampoline

How Dangerous is Your Shore Power?

DIY survey of boat solar and wind turbine systems

What’s Involved in Setting Up a Lithium Battery System?
The Scraper-only Approach to Bottom Paint Removal

Can You Recoat Dyneema?

Gonytia Hot Knife Proves its Mettle
Where Winches Dare to Go

The Day Sailor’s First-Aid Kit
Choosing and Securing Seat Cushions

Cockpit Drains on Race Boats

Rhumb Lines: Livin’ the Wharf Rat Life


Re-sealing the Seams on Waterproof Fabrics

Safer Sailing: Add Leg Loops to Your Harness

Waxing and Polishing Your Boat

Reducing Engine Room Noise

Tricks and Tips to Forming Do-it-yourself Rigging Terminals

Marine Toilet Maintenance Tips

Learning to Live with Plastic Boat Bits
- Sails, Rigging & Deck Gear
Standing Rigging: How Tight Is Right?
Standing rigging tension is a peculiarly under-addressed subject. Easy to see how it would worry a new boat owner or someone going to sea.
Most experts step aboard, yank or twang the shrouds and stays and mutter, Pretty slack, Too Tight, or, Thats about right.
Youll find in the sailing literature very few discussions of the question: What does tight mean?
Even riggers rarely explain how much tension they like to see.
There are a few sailors who like the rigging so tight you could send an elephant up the backstay. It can result in excessive loads and wear on fittings, chain plates and the hull. The ultimate penalty for those who can’t stand any sag in the forestay is what ocean racing sailors call a gravity storm or, less dramatically, dropping the rig.
Others like to take up the slack just enough so that the rig is at rest when the boat is motionless. This approach sometimes leaves excessive slack to leeward that can result in shock loads, excessive wear and misalignment in fittings. It may take longer, but the ultimate penalty is the same.
In between (and probably in the most logical position) are those who like to take up the slack and stretch the wire just a bit. This is frequently accomplished, at least for the stays, with an adjustable backstay. When sailing, especially on the wind, tighten down to minimize slack in the forestay. When reaching, running or at anchor, ease off.
But the question is: How much stretch…especially in the shrouds?
If you stretch the wire 5% of its breaking strength, it will be considered moderate tension. Crank in 15% of the breaking strength and it is regarded as tight. These figures apply for any diameter of wire. You need only know the wires breaking strength.
Three years ago, in the June 15, 1995 issue, we published a discussion of the views of author Richard Henderson, Skenes Elements of Yacht Design and several riggers, along with an evaluation of an excellent booklet published by Sailsystems about a Selden Mast approach (described in detail in the October 15, 1991 issue) and an entirely new method developed by Michael Dimen, who called his gadget a Rigstick.
Mentioned was the familiar (see photo) Loos rigging tension gauge, which comes in two sizes. The Model 91 ($39) is for wire 3/32″ to 5/32″. The Model 90 ($45.50) is for 3/16″ to 9/32″. The gauge depends on the bending property of aluminum plate.
The strange-looking gauges don’t willingly produce great accuracy because you have to hold one reading steady while noting another, which also requires that you make a judgment about where the centerline of the wire falls on a scale. Not easy to do.
The big name in galvanized and stainless cable (as wire is called in the trade), cable hardware and tools, Loos & Co., Inc. went looking for a better mousetrap.
Who did Gus Loos go to? The guy who designed the original gauge, his old friend, Donald J. Jordan, an 82-year-old retired Pratt & Whitney engineer who has been sailing out of Marblehead, Massachusetts, in the likes of Lightnings, Friendship sloops, Sound Schooners (which was the prized New York Yacht Club class in 1918), Pearson Wanderers and currently in a 16′ Starling Burgess design, appropriately called a Marblehead.
The old tension gauge wasnt bad, said Jordan. But it tended to get bent. Then the patent ran out and I told Gus we could do a better one.
The new version (see photo) is a distinct improvement over the old aluminum version. A better design, its also much more substantially made of aluminum, stainless and nylon.
The design problems were interesting, Jordan said. A conventional cable tension gauge has two rollers at the ends with a spring-loaded plunger in the middle and a dial gauge to measure the plunger movement. The wheels have to rotate…because they must permit some small but vital movement. That makes the tool expensive. My approach was to have two stationary wheels and a carefully contrived square slider in a arc-slot on the other.
The new Loos gauges use a long-lasting stainless spring to produce the tension. Slip the lower grooved wheels on a shroud or stay, pull the lanyard to engage the upper hook, relax, read the tension at your leisure and consult the scale to learn the pounds of pressure on the wire and the percentage of breaking strength of the wire. There are three wire gauge notches in the edge. The gauge can be left on the wire while turnbuckle adjustments are made.
The accompanying booklet, very well-done, contains a good tight discussion of the subject; some recommendations; a table on how to equalize tension in different sizes of wire, and line-drawn diagrams clearly showing rig tensions (windward and leeward) created by light, medium and heavy winds.
The wire gauge comes in three sizes, for 3/32″-5/32″, 3/16″-1/4″ and 9/32″-3/8″. West Marine sells them, respectively, for $57.99, $69.99 and $$122.99. Defender Industries cuts them to $49.95, $51.95 and $105.95. Prices in the BOAT/U.S. catalog are in between.
What if, instead of 1×19 wire, you have rod rigging? There are four new models that are bigger, heavier and, of course, more costly. They work the same, but take some arm strength. One is for .172-.250 rod, another for .281-.375. Two others models are for metric rod. West Marine sells the rod gauges for $186.99. Neither Defender nor BOAT/U.S. shows them in their catalogs.
Contact- Loos & Co., Inc., 901 Industrial Blvd., Naples, FL 34104, 800/321-5667. Rigstick, 311 Jackson, Port Townsend, WA 98368; 800/488-0855. Sailsystems, PO Box 1218, Marblehead, MA 01945; 978/745-0440.
RELATED ARTICLES MORE FROM AUTHOR
Leave a reply cancel reply.
Log in to leave a comment
Latest Videos

Island Packet 370: What You Should Know | Boat Review
How To Make Starlink Better On Your Boat | Interview

Catalina 380: What You Should Know | Boat Review
- Privacy Policy
- Do Not Sell My Personal Information
- Online Account Activation
- Privacy Manager
How to Tune a Sailboat Mast
Here are some general guidelines for tuning your mast’s standing rigging . please see our blog on how to properly adjust a turnbuckle before you begin. as always we recommend seeking the advice of a professional rigger for more specific tips and tricks regarding tuning your boat’s rigging..
Your boat must be in the water. Begin by just slacking off all of the side shrouds as evenly as possible, so that all stays can be adjusted by hand. Once loose, try and adjust all turnbuckles so that they are pretty much equally open (or closed) from port to starboard respectfully. Also go ahead and line up the cotter pin holes (if present) in the studs so that they are in a pin-able position. Now is also the time to balance out the threads, between the upper and lower studs of the turnbuckle, IF they are not even. Do this by unpinning the turnbuckle from the chainplate – BE CAREFUL HERE – to ensure the mast is secure before unpinning any one stay. Lastly, loosen all halyards or anything that may pull the mast to port, starboard, forward or aft.
1. Check by sighting up the backside of the mast to see how straight your spar is side to side. You can take a masthead halyard from side to side to ensure that the masthead is on center. Do this by placing a wrap of tape 3′ up from the upper chainplate pin hole on each upper shroud. Cleat the halyard and pull it to the tape mark on one side, mark the halyard where it intersects the tape on the shroud. Now do this to the other side, the mark on the halyard should also intersect the tape similarly. Please note: when the mast is equipped with port and starboard sheaves, instead of just one center-line sheave, it will appear slightly off to one side. Just keep this in mind……
2. Using the upper shrouds as controls, center the masthead as much as possible using hand tension only. Some masts are just crooked. If yours is(are) crooked, it will reveal itself when you loosen all of the stays and halyards initially and sight up the mast. Although you should use hand tension only, you can use a wrench to hold the standing portion (the stay portion) of the turnbuckle. If for some reason the shroud is totally slack and you still can’t turn the turnbuckle by hand then the turnbuckle may need to be serviced, inspected, and maybe replaced.
3. Tune the mast from the top shroud on-down, making sure the mast is in column. Remember: as you tension one shroud by adjusting the turnbuckle, to loosen the opposing shroud the same amount.

4. Once the mast is fairly straight from side to side, tighten the shrouds all evenly using tools for tensioning. Typically, for proper tension, the shrouds should be tightened using these guidelines; uppers are the tightest, and then fwd. lowers, then the aft lowers and intermediates should be hand tight plus just a turn or two. ~ With an in-mast furler it is recommended to tension the aft lower a bit more to promote a straighter spar (fore and aft) for better furling.
5. Now you can tension the aft most backstay (s). If the backstay has an adjuster it should be set at a base setting (500-1000 lbs). If the backstay simply has a turnbuckle then it should be tightened well. After this has been done, in either situation (adjustable or static backstay), one should site up the mast from a-beam and notice that the masthead has a ‘slight’ aft bias. If there is no aft bias, too much, or the mast is inverted (leaning forward), then the forward most forestay (s) will most likely need to be adjusted to correct this. If a furler is present then seek the council of a professional rigger or refer to your furler’s manual for instructions on how to access the turnbuckle if there is one present.
6. Finally, sight up the mast one last time and make any necessary adjustments.
7. MAKE SURE ALL TURNBUCKLES AND PINS HAVE COTTER PINS AND ARE TAPED NEATLY TO PREVENT CHAFE!
Read HERE for how to use a LOOS & Co. Tension Gauge!
Here is a little vid from our friend Scott at Selden Masts (click the link then hints and advice for more info) on rig tune…..
[youtube http://www.youtube.com/watch?v=rcCALZ4x6R4&w=420&h=315]
Is your mast fractionally rigged, only has a single set of lowers or is just plain different? Be sure to leave any questions or comments below.
Similar Posts
Rod rigging.
In the world of sailboat standing rigging there are three common materials used, stainless steel wire, Nitronic 50 rod, and various types of synthetic fibers, which are becoming more and more popular. I want to talk today about Nitronic 50 stainless steel rod. This specific type of stainless steel is very strong and noble. Rod…
A Most Destructive Leg – VOR
Video highlights of a disastrous leg 5. Mar Mastro was the only boat to escape with no damage. Now that all boats have arrived in Brazil (one way or another), let’s take a look and review…… [youtube http://www.youtube.com/watch?v=qE1ebE34lac&w=560&h=315]
The 2012 Annapolis Sailboat Show
Pick up a free copy of the October Spinsheet issue and see our ad.
Choosing the Right Rope for Your Sailboat
Deciding what rope to buy for a specific application can be a bit complicated. Only because there are so many different manufacturers, products, and not to mention the vast array of terms associated with rope. Let’s try and simplify this process a bit. For the sake of keeping this short and sweet we’ll narrow it…
Tall Ships Leaving….
….Baltimore at 11:00 a.m.. The vast array of naval vessels have already begun their departure this morning. Ships will be leaving throughout the day. So wherever you are, maybe driving over one of the bridges, be sure to catch a glimpse. It may be a while before we see them again. Check out this video….
Let Us Knot Forget The Boat Captains
I found this on one of my favorite sites, sailinganarchy.com. What a great find on SA. Enjoy this well edited video that was narrated by Tom Hanks. Remember 911, Operation Boat Lift…… [youtube http://www.youtube.com/watch?v=18lsxFcDrjo&w=560&h=315]
Leave a Reply Cancel reply
Your email address will not be published. Required fields are marked *
Save my name, email, and website in this browser for the next time I comment.
54 Comments
I have a 1965 Alberg 30. On a starboard tack the boat has more weather helm than on a port tack. I have not been able to achieve a balanced helm on either tack. New full batten main, new 150 roller furl genoa.
Other than the boat being evenly ballasted from port to starboard, e.g. holding tanks, fuel tanks, below deck furnishings, and storage items, I would check the rig from side to side. A crooked mast or poor static tune can result in the boat sailing differently on both tacks. A good way to test this is either sighting up the mast at the dock to ensure that the mast is relatively straight side to side and in column. You can also see that when beating (aka hard on the wind), you have to make adjustment’s to the mainsail sheet tension (NOTE: the traveler will likely need to be adjusted to mirror the same setting as on the previous tack). If notice that with the traveler in the same position on each respective tack that the sail is bubbling or flogging more on one tack than on the other, it is likely necessary to re-tune the mast. This can be done at the dock by following the guidelines in the article once the everything has been appropriately loosened to tension.
Let us know if this helps.
Any Hints, tips for tuning a 1977 Whitby 27 sloop 1/4 ton rig?
Nothing special that I can think of. Just follow the guidelines in the article. From what I can gather there are only a single set of lowers correct? Are the spreaders aft swept at all or just straight out? If it is single lowers and no sweep to the spreaders you’ll need to set the rake using the forestay adjustment to set the rake and the backstay to control the forestay tension. If you are interested in optimizing sail tuning, like in racing situations: higher wind sailing conditions will desire more tension on the shrouds, a bit more tension on the lower than the upper, but only slightly; and in lighter winds loosen them up a bit, a tad looser on the lower than the upper.
Hope that helps, and good luck.
How do I tune /2 in rigging. Neither of the loos gaug s are large enough?
Thanks for the question. Yes, I think the Loos gauges only go up to 3/8″ wire. First let me say that a tension gauge is not a must for proper tuning, more for tension recording and also not exceeding max tension which is typically hard to achieve without additional fulcrums or wrench extensions. Having said that, if you know that you need one simply search google for cable tensioning gauges. There are a few others like this one https://www.checkline.com/product/136-3E , pricing is not easily apparent and may be excessive for your needs.
My recommendation is that if you have a good local rigger have them do a static dock-side tune and perhaps sail-tune in the boat’s ideal conditions. Perhaps they can provide a tutorial on their process for you to be able to make rigging adjustments over time.
Hope that helps.
Hi. Nice article. I have a Mirage 27 (the Bob Perry design). It’s a masthead rig with single spreaders and the shrouds on each side come to the same chainplate. I have been tuning so that tension on the lower and uppers is the same and trying to set them so that (as you say) the leeward shrouds are just slightly slack. But how do I induce mast rake? I have a split backstay with a 6:1 purchase on the adjuster; should the mast have rake even with the adjuster off? or do I just haul on it? or should the tension on the inners and outers be different?
HI Michael,
You will need to lengthen the headstay and shorten the backstay. This can be done a few ways either with turnbuckle adjustment or actually shortening and lengthening cables, sometimes you can add or remove toggles also.
Hope that helps!
- Pingback: Buying a second-hand luxury yacht? Here’s what you need to look for - Phuketimes news
I recently purchased a 1988 Catalina S&S 38 and experienced my first launch this season, including stepping the mast and tuning the rig. As we prepared, we found that the Cap Shroud and Intermediate Shroud were clamped together at the four spreader ends. The folks at the yard had never seen that, and I certainly didn’t know why it was there … possibly to keep the spreader ends and shrouds consistent? Anyway, as I am learning how to tune my rig, it seems to me that these clamps would prevent me from tuning the cap shroud and intermediate separately and correctly Thoughts? Should I remove them and re-tune the rig?
So it is a double spreader rig I take it? The upper shroud wire should run freely through the first spreader, or the closest one to the deck, and be clamped at the top spreader. The intermediate shroud wire should be clamped at the lower spreader.
Before stepping, if this was done correctly, both upper spreader and lower spreader should be clamped equal distance from the mast attachment point, when looking at the mast from port and starboard.
In other words, you should measure the distance from where the upper shroud attaches to the mast to the end of the upper spreader and it should be the same distance on the other side, port to starboard. Then the same goes for the intermediate shroud and the lower spreader. The upper shroud should run freely through the lower spreader although it is covered by the clamp, but not actually clamped at the lower spreader, j ust the top one.
If all 4 spreaders are clamped equally port to starboard. You should be good to tune from there. The spreaders should show a slight up angle, to be specific slightly more up at the upper spreader than at the lower, but all of them should be just ever so slightly pointing up. You even want to think about clamping them slightly higher than that before tensioning, as this will pull them down and into their preferred angle, just slightly up. Specific angles are really only determined on the spar builders drawing and vary for manufacturer to manufacturer. Generally it is pretty clear where they want to sit. With the shrouds loose if you find that angle that appears to be the right one, and push them up slightly from there then clamp. This will allow them to be pulled down slightly once tensioned.
Kind of a tricky thing to explain in writing but hopefully it helps.
Have further questions? Give us a call 443-847-1004, or email us [email protected]
I have a Catalina 275 fractional rig with single swept back spreaders and an adjustable backstay. My questions are: how much rake, tension on cap and lower shrouds and on chain plate should cap shroud be forward and lower aft. I am racing and want the best performance. Thanks for any help. Bill
If the two shrouds are on the same plate, right next to each other, and the pin holes are the same diameter, and the plate is configured in a fore and aft configuration, I would choose the aft hole for the lower shroud and the forward one for the upper shroud.
In terms of specific rake, you will need to look towards the maker of your sails and or the boat manufacturer. I discuss how to measure rake in the preceding comments.
“You can measure rake by hanging a small mushroom anchor from the main halyard, with the boat floating on its lines, if you wish”
For racing I would start off with a good static tune at the dock by following the points in the article. If you know it’s going to be light day, start off with light rig tension. Be sure to use either Velcro wrap style cotter pins or simply lash the upper and lower shroud turnbuckles together to secure them. This will give you access to removing the pins or lashing while sailing and adjusting the stays.
From there you will need to sail tune for that days specific conditions, your shrouds will tell you what needs to be tighter and looser. I have answered how to do this a few times already in the comments below, please take your time to peruse the comments section to see what sail tuning entails. Doing this will always ensure that the cable tensions are set up ideally for the conditions and the boat can be sailed at maximum potential.
“For racing, ideally once the static tune at the dock (the part we just talked about) is done, go out and sail tune. Do this by going hard on the wind and checking to see if the leeward shrouds are just starting to dance, this is ideal. If they are swaying about they are too loose for the current conditions. If the leeward shrouds are tight, they may be a touch to tight. Tension and loosen as needed; count what you did and to what shroud, then tack and do the same to the other side.
ALWAYS secure the turnbuckles when you are finished adjusting them.”
Just hit ‘Ctrl F’ and search the page for “sail tune” and “rake”
I am trying to tune a Hallberg Rassy HR36 masthead rig. The rig has two in-line spreaders. The cap shroud is 3/8 inch and terminates at the lower spreader. From the lower spreader, the cable transitions to a 5/16 inch cable passing over the upper spreader to the masthead. A second 9/32 inch cable runs from the lower spreader to the mast (just below the upper spreader). The Selden rigging suggests that the “upper shroud” be at 15 percent of the breaking strength of the cable. In this situation, is it 15 percent of the 3/8 inch lower portion? If so, how should the upper 5/16 inch and 9/32 inch cables be tensioned?
Thanks for your help.
Hi Bryant, good question. Once proper alignment and centering of the spar has happened (static tune), and you are perhaps a hair tighter than hand tight on all shrouds, you can begin to tension things to a percentage of breaking strength. Do this by using the cables at the deck and use their diameters to determine the tensioning amount.
The V1 (aka cap shroud) in your case is a 3/8″ cable which supports the two cables above ii, hence its large diameter. The 5/16 V2,D3 and the 9/32 D2 total 19/32. So if 15% of the 3/8 cable is achieved you will below that threshold for the cables aloft. Does that make any sense?
With that in mind there is a range of acceptable tension from light air to heavy air. 15% sounds like a good middle of the road tension. Generally you do not want to exceed 30%. Sail tuning in ideal conditions is generally the best way to determine the right tension, but 15% of breaking strength sounds like a good place to start.
Don’t forget your cotter pins and tape, especially aloft.
Hope that helps and thanks for the question.
T.R.C. Thanks you for the clarification regarding the V2,D3 and D2 load distribution. When I set the V1 tension to 15%, the tension on the V2,D3 was at 8 %. I then tensioned the forward shroud to 12 % and the aft shroud to 10 %. Then I tensioned the backstay to 14 %. After doing this, I measured the tension on the V1 to be 10 %. The only information I could find regarding tension on the D2 was that is did not have to be tensioned much. I tensioned it to 5%. The mast sights straight and I used a bossen seat on a halyard to measure to the lower part of the V1, which also indicated that the mast was straight. Did I overtension the fore and aft stays? Is the tension in the D2 too much or too little? Again, I appreciate your advice.
When you tighten the backstay it usually induces a bit of aft bend in the mast which will soften the upper shroud (V1) a bit. You can just take up on it again to get it back to 15% if you like. As I said there is a acceptable range for all of the stays, which you are well within. Everything else sounds like you did a pretty good job. Next up sail tune and see if there is excessive waggling on the leeward side, but in moderate breeze. The shrouds will begin to sway as the breeze builds, this could be a telltale to either reduce sail a bit or you can add some tension to the shrouds all the way around.
Should be all good as they say.
Cheers, ~T.R.C.
T.R.C., your advice has been invaluable. I took her out in 12-15 knots and was very happy with the sail luff and stiffness of the rig. Thanks for you help!😁⚓️
Hi , can you provide any tuning guides for a Swan 38 Tall mast single spreader rig with baby stay, I am keen to set the rig up for new North sails and race her competitively. The mast is an exact Nautor factory replacement in 1998. She shall not have furling sails.
Hi Peter and thanks for the comment.
Unfortunately we do not have a guide for that boat. I would ask the sailmaker however to see what info he or she might have. Alternatively you can always start with a good static tune and then sail tune the boat as I describe in some of the comments below. This is the best way. I may use a Swan 45 Tuning guide as the template and then just fill in my own numbers over time. This is ideal, but infidelity start with asking the sailmaker you are working with, he should have some good info.
This may seem like a silly question, but it has me perplexed. How long should my cotter pins be? Long enough to ‘jam’ against the surrounding body, to prevent rotation? Otherwise, I don’t see how they’ll prevent my stays from loosening.
The length should be the minimum amount to just be able to bend the legs. Too long and they get caught up on things, too short and you can’t adequately bend the legs to keep the pin in place. The head of the pin is a actually providing the security.
Does that help?
Great article to get me started, thanks! I just have a few questions…
I originally owned a Tanzer 7.5. Her mast was rigid and simple to tune with a LOOS and an eyeball. I however now own a Mirage 33 (1982) and things are a bit more complex (but not too much). When I bought her the mast was already stepped and the owners said they replaced the forestay (inside the furler) 1 season ago. I went about the boat tuning the rig as best I could but I started second guessing the rake. I found noticeable rake in the mast with virtually no backstay tension on. So I think my forestay stretched (being “new”) and I need to bring it forward.
How do I measure how much rake (at rest on the tensioner) is enough? With my rig as is I felt worried that if I pulled down on the backstay tensioner I might buckle my mast by bending it too far. It seems to me it’s ALOT of downward pressure on the column when you pull down on her especially if the mast was already raked or maybe in my case leaned too far back to start? She has a babystay too, I wasn’t sure how far to tension that other than to assist adding bend\rake but since I had too much already I just lightly tightened it and hoped for the best!
Thanks for the question. With the backstay tensioner completely off, you should be able to adjust the static/ base tension of the backstay with a turnbuckle (s). Loosen the Baby Stay so that it is completely loose, sloppy, to take it out of the equation. Then mark furling line spool direction and remove the line. Next, open the furler up to gain access to the turnbuckle inside, if present. Remove all cotter pins or locking nuts to free the turnbuckles on the headstay and the backstay. You should then loosen things so that the headstay and the backstay can be adjusted by hand. Close the headstay turnbuckle and open the backstay turnbuckle to reduce rake, and vice versa if wanting to add rake.
You can measure rake by hanging a small mushroom anchor from the main halyard, with the boat floating on its lines, if you wish. Then once you achieve the desired mast rake go ahead and tension the forestay and backstay a few turns equally with tools; not too tight, but a good base light air setting, or as loose as you can imagine the headstay ever needing to be. Lastly, tension the baby stay a bit until it just starts to tug on the mast, helping induce bend. From here the backstay tensioner will do the rest: wind it on and it will tension the headstay and induce mast bend via the baby stay. You may have to take the boat sailing and adjust things as you find out how it performs at various degrees of rake and bend.
I hope that’s not too wordy, but helps explain it all a bit. Feel free to email or call with further questions.
Regards, ~T.R.C.
Can you provide some specific information regarding rig for 1980 C&C 32. Looking to purchase new main and want to get the most from it for Wednesday nights. Boat currently does not have a pony stay, it has been removed. Can replace that track/car. What should initial bend look like, keel step is fixed so assume I need to some chock aft of mast at deck? Have rod rigging but no Loos gauge for same, should I acquire one? Love this site, very helpful RayK
Thanks for the compliment. This may be less technical than you might expect. I would start with the basic guidelines given in the article to ensure a good base, static tune setting. A Loos gauge is good but not needed. If you focus on getting the spar straight, side to side, with a slight aft bias and then the tension is set so that it feels fairly tight. I know that sounds vague, but keep this in mind: if you are anticipating heavier wind make things a bit tighter, and loosen things up if less windy. The order of tension, in regards to the which shroud (upper vs intermediate vs lower) is important; more so than the amount of tension. Make sure nothing is so loose it is just flapping about.
The headstay should have some good slack to it with the backstay adjuster totally off. Adjust the backstay and headstay turnbuckles, with them in the slack position until the masthead is favoring a slight aft lean or rake, but only slight. From there, tension the backstay adjuster very tight and see what the headstay tension feels like, should be very tight.
PLEASE NOTE: if the backstay adjustment is totally bottomed out at this point, the backstay needs to be shortened a bit. Just pay attention to how this affects the rake. …
This part is where the pony stay or the baby stay will play a critical part, for mast bend. You may even find the pony stay to be good for mast pumping in light air and waves. Making this baby stay removable is a good idea, as well as, we’ve found that Dynema rope is the best choice here.
So… a centered mast head, side to side. A straight, in column mast from the top on down. A slight aft rake to start with…and as you begin to wind on the backstay and the baby stay you will add some rake but also a good bit more bend.
Take this set up for a few test sails and see how things act, in different conditions. After that you can make some adjustments here and there as needed: weather helm, shroud tension, mast rake, pre bend, etc…Moving chocks and using a Loos gauge.
ADDT’L TIP: Chocks and mast step position affect bend and rake properties. Want more rake? Chock mast aft in collar and move step forward. Want more bend? Chock mast forward in collar and move mast aft. As all things, there is more to it than that, but that’s the gist of the whole chocks and mast step thing…
“Sail Tuning” is a blog we are in the works of, but the punchline is that if hard on the breeze, and the leeward shrouds are excessively loose, and you are sure you aren’t over canvased…then go ahead and take turns on the leeward side until they just stop waggling, count what you’ve done, tack and mirror the turns on the other side.
Once the boat is set up for that specific condition, and you return to the dock, you should take your loose gauge and record these settings…creating a tension gauge setting for various conditions.
Hi, Thanks for your information. I have a Dehler 34. 1986… How much mast prebend and rake is recommended? The boat is new to me in March. Raced ok but I want to get a new main and want it to fit a well tuned mast. What do you think of a 2 degree rake and 4″ prebend at the speaders? Also, I have a Harken furler, How do you measure the forestay tension? Thanks, Duke
The answer, this boat is pretty sporty so it should show some rake. The spreaders are swept slightly aft so this will produce some natural bend just to tension the headstay.
Head-stays are always tough to measure with any sort of gauge, there are some class specific tricks for using a gauge in funky ways in order to get data, but they aren’t really reliable in my opinion. If you live in a typically windy area, go for bit more shroud tension, headstay tension and mast bend, and see how the boat feels. This will take some trial and error. If the forestay feels too stiff, slot too tight, loosen the uppers a bit, thus reducing bend and slackening the headstay.
Once the boat is sailing well in the ideal conditions, record that bend and those tensions. This is where I would leave things set, record it, and then just adjust shroud tension to affect bend and headstay in order to compliment different wind strengths and sea states. It takes quite a bit of back and forth, and documentation to get it right. One designers have already worked all of this out and then they share it for others…..very helpful. The rest of us will have to be the trailblazers for this type of information for other boat owners with the same (similar) boats to benefit.
Hope that helps, thanks for the kind words, and good luck. Once you figure things out post a link here for others with the same boat…..would be helpful.
Hello, Thanks for all of this great info. I just purchased a 37′ boat with a 3/4 fractional rig and a tapered mast. I was wondering if there were any special considerations when tuning the fractional rig? Currently the stays and shrouds are a little loose and can be wiggled (borderline flopping) by hand although the mast stands and is visually centered. (We are in SW Florida and the boat went through a direct hit by hurricane Irma like this and still stands tall!) Also is it advisable to increase shroud tension in small increments first on one side and then do the same on the opposing side? Thanks so much for any info
Hi Nathan. There are some thoughts, so fractional masts are usually fitted with aft swept shrouds and spreaders. If so, this means that the uppers also tension the headstay and create mast bend. The lowers then also act to reduce mast bend, so the tighter you make them you are actually reducing mast curve, thus powering the mainsail up. So be conscious of these two thoughts when tensioning the shrouds. The rest is fundamentally the same as the guide suggests. Loose or wiggling shrouds (excluding the scenario where we are talking about the leeward shrouds under sail), should be tightened. Doing things in increments is definitely a good idea.
Hope that helps. Thanks for the questions.
Thanks!! Now that you say that about the swept spreaders helping create mast bend it makes perfect sense. I had an ‘oh duh’ moment. I’ll probably err on the side of looser lower shrouds knowing if we need more power we can always tighten them up. Thank you again this helped immensely!
I want to buy a tension gage. Most familiar with Loos. But do I need Pt 1 or 2? (Pretty sure I don’t need 3 or Pro.) I have two rigs to tune: a 1972 Morgan 27 and a Catalina 22, I think 73 or thereabouts. The Morgan 27 is mine, fresh water for life, and 99.9% most likely factory wire. The Catalina 22 is a borrower in the Gulf, but pretty sure the owner has never tuned it. My problem is I can’t find the gage of wire for either standing rigging anywhere! Any help?
I think this one will do… https://sep.yimg.com/ca/I/yhst-70220623433298_2270_120385950 . The Morgan is likely 3/16″ wire and the Catalina is likely 5/32″, that’s an educated guess. Hope that helps.
I just purchased a 1980 C&C 40. I was told that I need to replace the rod rigging as it is “too old”. The mast is down and the rod rigging seems ok but I have not done any penetration testing. Does rod rigging need to be replaced due to age? Thanks Rigging Co.
Not replaced, but re-headed. This can mean that some stays need to be replaced as a whole, but not typically not the whole set. There are instances where you’ve almost replaced all of it anyways, so full replacement just makes sense. Other than those scenarios, full replacement is due after a certain mileage with rod…60,000 NM. Please keep in mind these standards are very general recommendations. It sounds like in your case, you should send in the rod, tangs, and chainplates for service and inspection. once we receive everything we will make a quote for the recommended services and/or replacement.
Hope that helps and give us an email for more info.
I have had a problem with securing the spreaders to the shrouds, resulting in the spreaders dropping. I am using stainless wire to seize them but still having a problem. Any tips on how to do this properly?
Seizing the wire onto spreaders with hinged spreaders is a bit of a trick of the trade that requires some practice. We use the X’s and O’s method. The end result should be something that looks like this… https://theriggingcompany.files.wordpress.com/2011/11/2012-06-07_14-26-09_899.jpg?w=900 . A trick to make the wire bite into the spreader end a bit more is to wedge a small piece of leather between the spreader and the wire before seizing. Also parceling and serving the wire where it intersects the spreader will help create more bite too. Lastly, and I don’t like this method but you can install a bull dog cable clamp beneath the spreader, nuts facing in, to keep it from dropping when slack.
I hope that helps a little. Thanks for commenting.
I am struggling to get enough rake into my mast. 33 foot Charger 33 keel stepped. Have loosened forestay and moved mast foot forward by about 10 mm. Should the chocks in the collar be adjusted? Runners and 2 spreaders, and check spreader. Spreaders do not have much aft angle. Move mast step more forward? Outers are tight with inners looser. Thoughts?
Hey Bernard,
Yeah, it sounds like chocks are the last thing. Maybe remove the chocks with the rigging slack and see if you can get the mast to sit where you like it with just hand tension. Then chock it where it wants to sit. It sounds like you are on the right track everywhere else, perhaps add a toggle into the headstay and shorten the backstay is next. Good luck and I hope that helps somewhat.
Hi, We have a Lagoon Catamaran with fractional rig, upper and lower shrouds, fore stay and upper and lower diamonds. No back stay. The mast has a degree of pre-bend. I do not plan to drop the mast.
I may have to do some work on the port side upper diamond. Is it as easy as just undoing the turnbuckle? Or do I need to loosen the starboard one at the same time. If it needs replacement should I also replace the starboard one even if in good condition?
As a further question, what happens if a diamond breaks, does it result in mast failure?
You would need to loosen the other counterpart to that stay for sure. It is just good practice, will keep the mast straight, and also make your life easier for removal install. Now, do you replace both? I don’t know. How old is the standing rigging? Why are you replacing the one? If it is not all due for replacement and you are just replacing due to damage, just do the one, but loosen both sides to do this.
Hope that helps and thanks for the visit.
Hello! I recently purchased a keel-stepped 1982 Goman Express 30 which came with an Alado Furler. I have been sailing it since May of this year. My question is this: Despite relocating mast wedges at the cabin roof to bias the lower mast aft about 2″, I still have a pronounced backward bend (10 degrees or so) just above the highest spreader. When sailing on jib alone, most wave action causes the mast to pump right at the bend point. I have a split backstay that is as un-tensioned as possible and the forestay only has another inch of adjustment left. There is no baby stay.
How can I get the bend out of the mast? How concerned should I be that the mast might break at that point?
Thanks in advance for your reply!
Eric Hassam – Delta Flyer
Thanks for taking the time to comment on our site. It sounds like you are on the right track. So one other adjustment that you have is the mast step position. This greatly affects mast bend on keel stepped masts. For a stronger bend and less rake, move the mast butt aft. For more rake and less bend (probably what you need to try), move the mast step forward a bit. If neither of these help, you may be off to have your headstay shortened and this means it is too long. This is likely not the case, but it is a possibility.
Keep in mind….A mast should have a slight aft rake bias along with a small amount of mast bend. This is quite normal. You can send us a picture if you’d like a second opinion on if it is over-bent. Having said all of that, even if you remove all of the mast bend, the mast may still pump. This is a design flaw in many spar designs that lots of end users have experienced. This can be remedied by redesigning the stay lay out. Is there a place for a staysail stay and/ or runner backstays? If so add them. Is there a place for a baby stay? If not, that may be a consideration.
Thanks again and I hope that helps.
Hi, I have a 48 foot yawl with a 7/8 fractional rig, is the tuning procedure the same as a masthead rig? I seem to have trouble getting aft rake and proper headstay tension. Also, is there a particular tension number the upper shrouds should have? many thanks in advance
Hi Bill, thanks for taking the time. 7/8 is very close and I would treat it like a masthead rig, especially if the none of the spreaders are aft swept. Tesnsion the headstay using the backstay(s). This should pull the top of the mast aft. If there are any other forward stays, i.e. stay sail stay, forward lowers, or anything else that could be holding the mast forward, go ahead and loosen those completely. You then may need to tighten the Tri-attic (the stay that connects the top of the mizzen and top of the main) if present. OR if the mizzen needs more rake too, then lossen all forward stays and pull it back using the available aft stays for this as well.
Hope this helps and please email us and send some pictures if you need more help.
I have a 1972 Morgan 27, which has both forward and after lower shrouds. I wish to remove the forward lowers so I can trim a 110% jib inside the stays. I see a lot of boats without forward lowers and think this will work OK, but wonder if I should increase the size of the aft lowers and beef up the chain plates. Any suggestions?
THANKS FOR YOUR INPUT. I AM GOING TO REMOVE THEM ANYWAY AND SEE WHAT HAPPENS. “HOLD MY BEER, WATCH THIS….” FAMOUS LAST WORDS.
Lol! Good luck. Call us if you need assistance.
I have rod rigging on my Beneteau 32s5
Any other guidance on tuning them vs wire rigging
Hi and thanks for commenting.
Just follow the guidelines in the write up. The over all goal is that the mast needs to be straight and in-column when looking at it from side to side.
Fore and aft, the mast should show a very slight lean aft. Depending on whether or not the spreaders are in-line or aft swept; you should also see some slight bend if there is any aft sweep to the spreaders just from the tension of the uppers.
A Rod stay tends to run a bit tighter than wire, so keep that in mind.
For racing, ideally once the static tune at the dock (the part we just talked about) is done, go out and sail tune. Do this by going hard on the wind and checking to see if the leeward shrouds are just starting to dance, this is ideal. If they are swaying about they are too loose for the current conditions. If the leeward shrouds are tight, they may be a touch to tight. Tension and loosen as needed; count what you did and to what shroud, then tack and do the same to the other side.
ALWAYS secure the turnbuckles when you are finished adjusting them.
- Pingback: Tuning a Sailboat Mast | ChesapeakeLiving.com
- Pingback: Rig Tuned | middlebaysailing
Wow, I would hate to be charged by her for three trips up the rig and forget the screw driver the rubber plugs that are sacraficial and replaced everytime removed just to clean the stainless 1×19 rigging.
Username or Email Address
Remember Me
Lost your password?
Review Cart
No products in the cart.

- Privacy Overview
- Strictly Necessary Cookies
This website uses cookies so that we can provide you with the best user experience possible. Cookie information is stored in your browser and performs functions such as recognising you when you return to our website and helping our team to understand which sections of the website you find most interesting and useful.
Strictly Necessary Cookie should be enabled at all times so that we can save your preferences for cookie settings.
If you disable this cookie, we will not be able to save your preferences. This means that every time you visit this website you will need to enable or disable cookies again.
× You are using an outdated browser. Please upgrade your browser to improve your experience.
We Ship Worldwide! | FREE SHIPPING! for US Continental orders over $99. Click for details.

Shopping Cart
Your cart is currently empty..
FREE SHIPPING! for US Continental orders over $99 click for details

Rig tension gauges: readings and equivalence charts
For most racers, repeatable tuning of the sailboat's standing rigging is a must when trying to reach the right tune that makes you the fastest crew in the fleet.
Loos rig gauges allow quick and accurate measurement of shrouds and stays to achieve the perfect rig tune. With the following guide, you will be able to read both the Standard gauges (Model A and B) for 2.5 mm to 7 mm wire and PRO Rig Tension gauges (Model PT-1, Model PT-1M, Model PT-2, Model PT-2M, Model PT-3 and Model PT-3M) for 2.5 mm to 10 mm, and be one step closer to having the fastest boat of the regatta.

Which diameters are available for each Tension Gauge type?
The following table shows the Loos gauges available models and the compatibility with different wire diameters.
How to measure with Standard series?
Firstly, hook the gauge on the cable, then pull the lanyard until the pointer is positioned at the black calibration mark (green arrow). Next, read the scale at the exact point where the middle of the cable touches the scale (black arrow). For best accuracy, the gauge should be held so that the scale barely touches the cable, thus eliminating friction. Please consider that excessive pull on the lanyard (pulling the pointer beyond the calibration mark) may permanently bend the spring and damage the gauge.

How to measure with the PRO series?
Hold the gauge with one hand and place the cable between the two nylon spools. With the other hand, pull the lanyard and extend the spring until the hook on the nylon slider can be hooked on the cable. Release the lanyard and read the needle position on the scale. Refer to the calibration table to obtain the correct tension in the cable. The gauge can be left on the wire for "hands-free" cable adjusting.

To confirm you're getting accurate readings, ensure that the slider moves freely in the frame slot and does not bind. Also, lubricate the slider slot frequently with silicone lubricant.
Tip: wiggle the gauge around a little and let the slider settle to the middle position.
How to read equivalence charts?
It is essential to know that these gauges are intended to be used on 302 / 304 1X19 SS cables in appropriate sizes. If used on other cable types, sizes and construction, your readings would be consistent but pound tension values would differ from those listed on the label.
To understand how to read the equivalence tables, let's take a Hobie 33 and measure the upper shrouds. The wires are 3/16", and we used the Loos tension gauges to measure it in this example. We got 21 on our first reading, and we want to achieve at least 26% of the breaking strength of the wire.

To get the tension needed for this example, we should firstly verify at what % the shroud currently is. We then go to the equivalence table, where we first look at the Scale numbers on the left part. We got a 21 for the previous reading, so we go to the right until we cross the column of the 3/16" wire (second column).
We find that there are 3 numbers in the cell, one in black (lbs) on another one in red (% from breaking strength). So to know how many pounds of tension we got, we look at the black number, which marks 640 lbs. To know what percentage we are from the breaking strength point, we look at the red number, which indicates it is 14%.
Now we know our shroud is too loose. So then, we adjust the turnbuckles until we reach the 26% break strength needed, which equals a 28 on the scale from the tension gauge.
You can apply this logic to any of the tension gauges from Loos. Please take into consideration that the tension needed for each wire will vary. There is no simple solution since the optimum rigging tension will be a function of the boat design, the rig (masthead or fractional, one or more spreaders, etc.), and even the cut of the sails.
For the convenience of sailors who wish to upgrade from our Model A or B gauges to the professional model (PT-1, PT-2, or PT-3) gauges, L-36 develop a conversion chart so that the same recommended tension can be obtained with the PT -1, PT -2 or PT -3 gauges as with the Model A or B gauges.
If you have any questions regarding standing rigging and fine-tuning for your boat, don't hesitate to Contact Us . Our sailing experts will be happy to help you.

Tension Gauge Model B for 3/16" to 9/32" wire

Tension Gauge Model B for 5 to 7 mm wire

Tension Gauge PRO PT1 for 3/32" to 5/32" wire

Tension Gauge PRO PT1M for 2.5 to 4 mm wire

Tension Gauge PRO PT2 for 3/16" to 1/4" wire

Tension Gauge PRO PT2M for 5 to 7 mm wire

Tension Gauge PRO PT3 for 9/32" to 3/8" wire

Tension Gauge PRO PT3M for 7 to 10 mm wire

Rig Sense Tension Gauge for 2-5 mm (3/32-13/64") Wire
Spi-rgs-0205.

Rig Sense Tension Gauge for 5-8 mm (3/16-5/16") Wire
Spi-rgs-0508.
Don't forget to subscribe to our social media channels!

Copyright © 2024 MAURIPRO Sailing LLC.

The $tingy Sailor
Diy trailerable sailboat restoration and improvement without throwing your budget overboard.
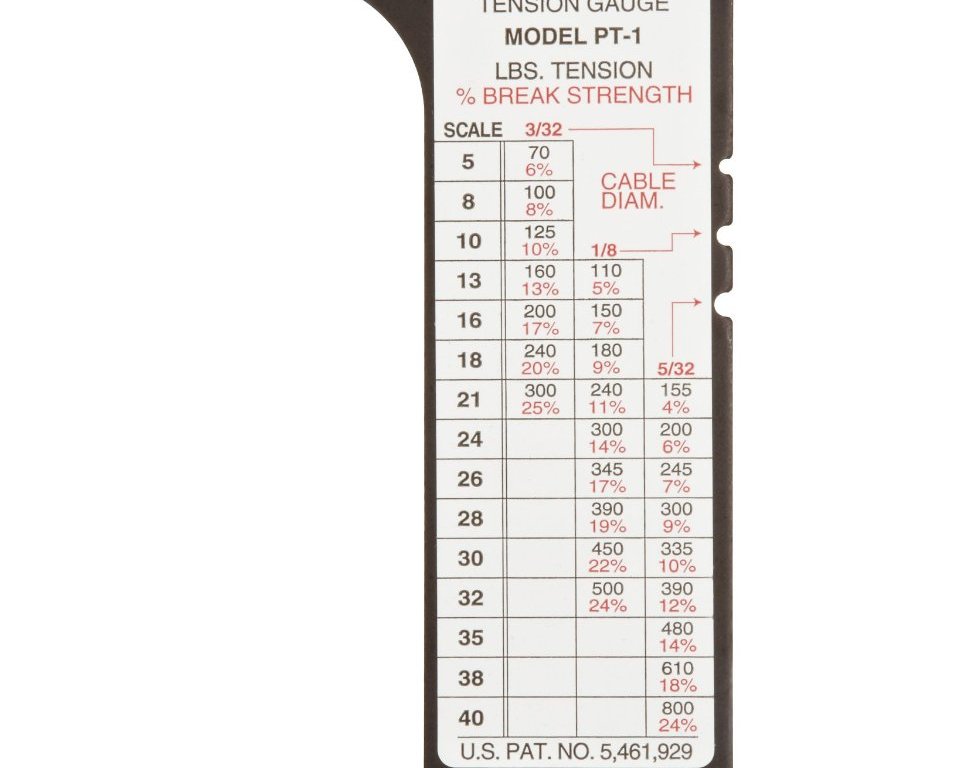
How To Measure Standing Rigging Tension
Whether or not you’ve replaced your standing rigging, you may be wondering how to adjust it. How tight should the rig be? How can you measure it? After all, what good is great rigging if it isn’t tensioned properly to perform its best?
Before I continue, a bit of legal housekeeping. This post contains affiliate links. That means I receive a small commission if you make a purchase using those links. Those commissions help to pay the costs associated with running this site so that it stays free for everyone to enjoy. For a complete explanation of why I’m telling you this and how you can support this blog without paying more, please read my full disclosure .
A properly tuned rig isn’t only important for racing, it’s also a good idea for cruisers. It minimizes uneven stress and wear on hardware, it’s safer, and it protects the shape of your sails.
Close only counts in horseshoes and hand grenades
Unfortunately, without a tension gauge, tuning your rig is mostly subjective guesswork.
The 1987 (last) edition of the Catalina 22 Owner’s Manual and General Handbook puts it this way:
Adjust forestay and backstay so that the mast is straight up and down. The upper shrouds should be firm but not far apart . A 50 pound push should deflect the upper shroud about 1″ at shoulder height. The lower shrouds (4 of them) should be adjusted so that they are looser than the upper shrouds. While at dock, they should have no slack , but no tension either. No lower shrouds, when pushed, should deflect the mast more than any other shroud when pushed equally hard. If this can’t be achieved, the upper shrouds are too tight. Back off one-half turn at a time on the upper shroud turnbuckles until the tension of the lower shrouds is brought into balance . [Emphasis added]
Not very precise, huh? It doesn’t take very much tension at all on the forestay and backstay just to make the mast plumb and that’s too loose for anything but light air sailing. How much is “far apart?” How exactly do you measure a 50 pound push horizontally against a wire at shoulder height? Standing where, on the cabin or on the deck? How much is “looser” but “without tension?” How do you measure balance between four shrouds without a tool?
That’s like your mechanic telling you that the best way to tune your car’s engine is by ear alone so that it idles well but not too fast and not too slow. It should accelerate smoothly with good power but no cylinder should exceed 10% less compression than any other.
You can’t lose with a Loos
You can skip all the guesswork with a tension gauge. Loos & Co. has manufactured cable in the US for over 50 years. They make the most popular and economical tension gauge for sailors. It’s available in several models depending on the range of cable sizes that you want to measure.
The current model numbers are:
- PT-1 (3/32″ to 5/32″)
- PT-2 (3/16″ to 1/4″)
- PT-3 (1/4″ to 3/8″)
Older models of the gauge can still be found for sale new and used:
- Model A (3/32″ to 5/32″)
- Model B (3/16″ to 9/32″)
The major differences between the newer models and the older models are:
- The older models use a flat spring built into the gauge to measure the tension. The newer models use a coil spring.
- The older models have a slot for the cable. Measuring very tight cables can produce a very slight kink in the cable. The newer models have two round, plastic guides that don’t harm the cable.
- You read the tension on the bottom of the older models. This means you either have to stoop down to read the gauge or use the gauge over your head. You can read the tension on the front of the newer models from a more natural stance.
- The older models have fewer parts and are all metal construction except for the lanyard. The newer models have more parts, some of which are plastic.
- Unlike the older models, the newer models can be hooked onto the cable while you are measuring it so that you can read the tension and your hands are free to adjust the turnbuckle. This is a nice feature that reduces trial and error.
Each gauge has handy notches in the side for measuring cable diameter.
The gauges work on the principle that if you bend a cable by applying a specific amount force, it will bend more or less depending on the size of the cable and how much tension is on the cable. The larger or the more tension on the cable, the less bend. The smaller or the less tension on the cable, the more bend. The gauges use a spring (flat or coil) to measure the amount of bend that results when you bend a cable slightly and they convert that amount into a tension number.
Dialing it in
I use my gauge whenever I modify my standing rigging in any way and periodically to recheck it, especially because I step the mast for every launch.
To measure tension with an older model Loos gauge (the process is slightly different for the newer models):
1. Hook the gauge on the cable. If you have cable covers on the cable, the gauge won’t fit over them, hook the gauge on a bare part of the cable. You read the gauge from the bottom so hook it over your head.
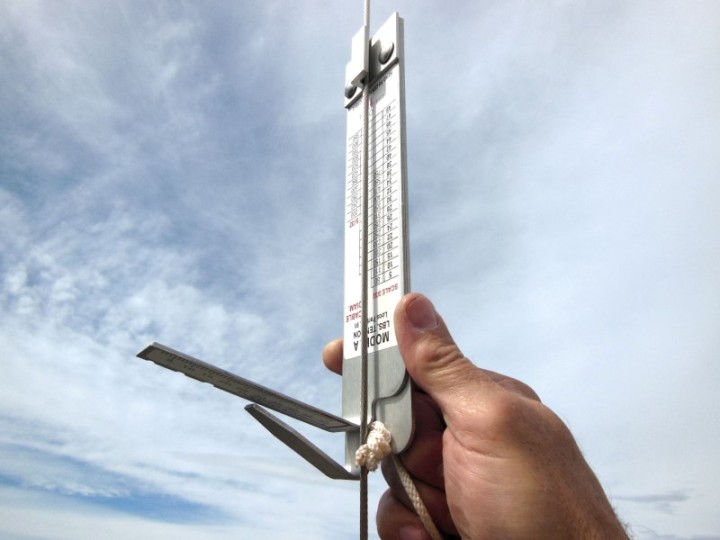
2. Pull the lanyard until the indicator aligns with the mark on the gauge.
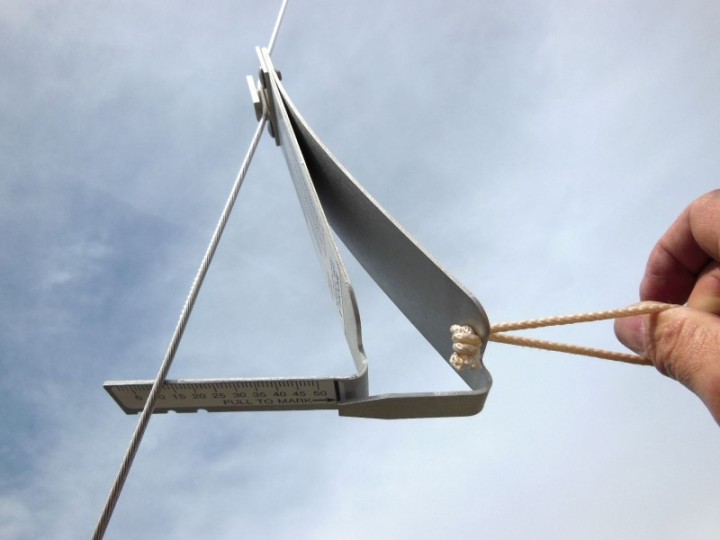
3. Read the (bend) number from the scale.
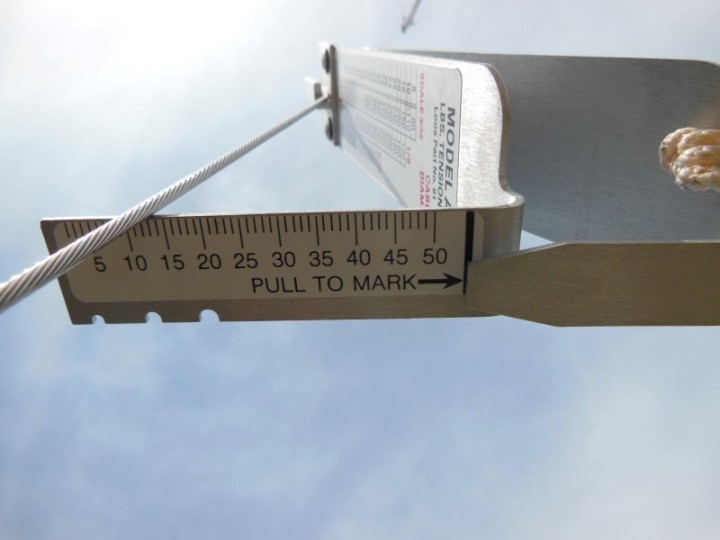
4. Measure the cable size and look up the tension in pounds that corresponds to the cable size in the chart on the gauge. This step is optional unless you’re trying to set the tension to match a recommendation stated in pounds of tension (300, for example). Some recommendations are stated as the equivalent and easier to remember scale number (24, for example). In that case, you don’t need to look up the tension in pounds.
When you know the cable’s tension, you can adjust its turnbuckle to either increase or decrease the tension by measurable amounts. With a little trial and error, you can “dial in” a very accurate amount of tension. Dial in all of your stays and shrouds, and you will have a well-tuned rig. For instructions on using the new model gauges and a video, go to How to use PT Series Tension Gauges .
Once you get your basic rig tension set, you only need to remember the scale numbers and you can confidently adjust it to best suit your style of sailing or changing conditions. There are good guides available online that recommend settings for different conditions. One of the better ones for the Catalina 22 is the Catalina 22 Tuning Guide from North Sails. They have guides for other sailboats as well.
If you don’t know anybody that you can borrow a gauge from, consider getting one of your own from Amazon . Then you’ll have one to loan to others in need.
Stop hoping that your rig tension is close enough. Tool up and dial it in!
Would you like to be notified when I publish more posts like this? Enter your email address below to follow this blog and receive notifications of new posts by email. You will also receive occasional newsletters with exclusive info and deals only for followers and the password to the Downloads page. It’s free and you can unsubscribe at any time but almost nobody does!
Subscribe to Blog via Email
Enter your email address to subscribe to this blog and receive notifications of new posts by email.
Email Address:
Share this:
14 thoughts on “ how to measure standing rigging tension ”.
Hey Ken……One of your better articles. Thanks. This has always been a point of interest for us!
Thank you, $tingy! What a great resource!
Ken, for those who don’t want to fork out roughly a $100 bucks for the gauge, they can use my poor man’s version too, which I adopted from a great resource on rig tuning (“Sail & Rig Tuning” by Ivar Dedekam). To determine wire “tension,” I measure wire “stretch.” I do this by first marking a 1-meter length on the respective wire PRIOR TO TIGHTENING TURNBUCKLES. Every 1.0 mm of stretch equals 10% of the wire’s breaking strength, so if I wanted to set my wire’s tension at 15% of breaking strength, I would start applying tension (by tightening my turnbuckles) until the 1-meter length has been stretched to 1-meter plus 1.5 mm. The wire would then be tensioned at 15% of the wire’s breaking strength. If you wanted to use 20% as your base tension, then you would tighten your turnbuckles until the wire stretched an additional 2.0 mm. (Note: This only applies to wire, not rod rigging.) Thanks for another great article!
Good point, Diego. That’s a good way to get in the ballpark.
Thanks Ken. I have an old model Loos that I’ve been using for almost 10 years. I like that it’s got very few moving parts 😉 and i’m pretty sure it’ll hold up another 10 years with no problem. For reference I use the North Sails tuning guide figures you mentioned.
For anyone just starting, keep in mind that you’ll get a lot faster doing it once you’ve done it a few times.
The old ones are built tough. The ability of the new ones to clip it onto a shroud and dial in the right tension on the first try would be convenient, though.
The owner’s manual for the Cat 25 says the standing rigging sizes are 1/8, 5/32, and 3/16. Does that mean I will need both a PT-1 and a PT-2 Loos gauge? The real question: Since I am not going to buy two, which rigging is the most important to tune? The back and fore stays or the the shrouds? Seems to me I ought to be able to “eyeball” the fore and aft rake and use the gauge on the the shrouds. Your opinion?
Hi, Stephen
You must be looking at the halyard wire sizes being 1/8″. All the standing rigging on a C-25 is 5/32″ or 3/16″. At any rate, I wouldn’t want to buy two gauges either.
The shrouds are the most important because they hold your mast in column and centered on the sailboat. The forestay and backstay tension can be adjusted with the backstay adjuster (assuming you have one) depending on sailing conditions so the gauge isn’t as useful for those.
If it were me, I’d get a PT-2 so I knew my upper shrouds were correctly tensioned. Then I’d either extrapolate the 3/16″ settings down to 5/32″ mathematically or borrow a smaller gauge, set the tension on the lower shrouds and then see what the corresponding setting is on the PT-2 and label it right on the gauge. Do that for several settings and you should have a one-size-fits all gauge.
Thanks. Good advice as usual.
On Sun, Jun 26, 2016 at 9:19 PM, The $tingy Sailor wrote:
> $tingy Sailor commented: “Hi, Stephen You must be looking at the halyard > wire sizes being 1/8″. All the standing rigging on a C-25 is 5/32″ or > 3/16″. At any rate, I wouldn’t want to buy two gauges either. The shrouds > are the most important because they hold your mast in column a” >
I’m a new C-22 owner (1985 model year). Should I go with the PT-1 version? I believe I have the original rigging. Thanks for a most helpful post for this novice sailor!
Welcome to the tribe, Tom
Yep, a new model PT-1 or old model A is what you want.
Perfect. Thanks!
Hi Ken. I’m a new owner of a 1973 C22. I bought the PT1. I’m having a hard time finding what my tension should be. Can you share what tension you use? Thanks for all the great info. I’m a fan!
I use the North Sails guidelines as a starting point, which are 28 on the upper shrouds and 24 on the lowers.
Leave a comment Cancel reply
This site uses Akismet to reduce spam. Learn how your comment data is processed .
- Already have a WordPress.com account? Log in now.
- Subscribe Subscribed
- Copy shortlink
- Report this content
- View post in Reader
- Manage subscriptions
- Collapse this bar
Fractional Rig: Everything You Need to Know
by Emma Sullivan | Aug 21, 2023 | Sailboat Maintenance

Short answer fractional rig:
A fractional rig is a sailboat mast configuration where the forestay (the wire or rope that supports the mast from the front) attaches to a point lower on the mast than its highest point. This design allows for greater control over sail shape and is commonly found in high-performance racing boats.
Understanding Fractional Rig: A Comprehensive Guide
Introduction: Sailing is an art that requires a deep understanding of boats, their components, and how they work together to harness the power of the wind. One essential aspect of sailboat design is the rigging system, which plays a crucial role in determining a boat’s performance and handling characteristics. In this comprehensive guide, we will delve into the world of fractional rigs – their purpose, composition, advantages, and tips for optimizing their use on the water.
What is a Fractional Rig? A fractional rig refers to a sailboat’s mast setup where the forestay (the wire or cable running from the top of the mast to the bow) does not intersect with the mast at its top point. Instead, it attaches at some point below it. This configuration creates two distinct sections in terms of percentage height: one shorter section above and one longer section below this intersection point – usually around 7/8 or 9/10 up the mast’s length.
The Purpose and Advantages of a Fractional Rig: 1. Versatility: The fractional rig is highly versatile as it allows sailors to adjust sail area quickly according to changing weather conditions while maintaining balance and control. 2. Enhanced Performance: Due to its ability to distribute loads more evenly along the mast, a fractional rig enables increased stability and reduced pitching moment during strong winds. 3. Improved Upwind Performance: By positioning more sail area forward compared to other rig configurations like masthead rigs, fractional rigs generate better drive upwind resulting in higher pointing angles. 4. Simplified Sail Handling: With lesser reliance on heavy overlapping headsails common in conventional rigs, managing sails becomes less physically demanding during maneuvers such as tacking or reefing.
Components of a Fractional Rig: 1. Mast Section: The mast used in fractional rigs often has slightly different dimensions than those employed in other systems due to its specialized function. Its shorter upper section allows for better control of the mainsail’s shape, while the longer lower section offers increased downwind power. 2. Forestay: The forestay is connected to the mast below its top point and usually runs from a fitting on deck to secure bow fittings. Its angle and tension can be adjusted to optimize sail trim and overall rig balance. 3. Backstay: Unlike a conventional rig where the backstay connects at the masthead, in fractional rigs, it attaches lower down – generally above or just below the intersection point with the forestay. Adjusting its tension further influences mast bend and sail shape .
Tips for Optimizing Fractional Rig Performance: 1. Experiment with Tensions: To maximize your boat’s capabilities, don’t hesitate to experiment with various forestay and backstay tensions until you find the optimum balance between mast bend, sail shape , and wind conditions. 2. Master Sail Controls: It is essential to understand how to adjust jib halyards, cunninghams, reef lines, vang tension, and other controls that directly affect sail shape and power distribution. 3. Fine-tune Rigging Settings: Regularly inspect all rigging components for wear or damage and fine-tune settings such as shroud tension or spreader positioning to ensure proper alignment and stability of your fractional rig.
Conclusion: The fractional rig is an ingenious design approach that empowers sailors with increased versatility, enhanced performance characteristics, improved upwind ability, and simplified sail handling. By understanding its composition, advantages, and optimizing techniques discussed in this comprehensive guide, you will be better equipped to master the art of sailing using a fractional rig system. So hoist your sails high with confidence as you explore new horizons guided by the power of an intelligently engineered fractional rig!
How to Set Up a Fractional Rig: Step-by-Step Instructions
Setting up a fractional rig may seem like a daunting task, but with our step-by-step instructions, you’ll be able to tackle it with ease. Before we dive in, let’s first understand what a fractional rig is.
A fractional rig refers to the configuration of the mast and stays on a sailboat. Unlike a masthead rig where the forestay attaches at the very top of the mast, a fractional rig has its forestay attached at a point lower on the mast. This design offers increased maneuverability and performance, making it popular among racing sailors.
Now that we know what a fractional rig is, let’s get into the nitty-gritty details of setting it up.
Step 1: Start by prepping your boat Before you even think about setting up your fractional rig, make sure your boat is properly prepped. Clean off any debris or dirt from the deck and check that all hardware is in good working condition. It’s crucial to have everything in place before proceeding.
Step 2: Assemble and attach your mast With your boat prepped, it’s time to assemble and attach the mast. Lay out all the sections of your mast and make sure they are aligned correctly before connecting them together. Once assembled, carefully raise the mast so that it sits securely in its step or tabernacle. Use proper support equipment if necessary for additional stability.
Step 3: Securely attach shrouds and stays Next comes attaching the shrouds (sideways supports) and stays (fore-and-aft supports). Begin with attaching the lower shrouds to their designated points on both sides of the hull. Ensure they are securely fastened using appropriate tensioning devices such as turnbuckles or pelican hooks.
Move on to attaching any intermediate shrouds if required for added stability – this will depend on your specific boat design. Finally, secure your forestay at its designated attachment point on the mast. Remember, in a fractional rig, the forestay attaches lower on the mast compared to a masthead rig .
Step 4: Tension your rig Once all the shrouds and stays are attached, it’s time to apply tension. This step is crucial as it ensures proper alignment of the rig and maximizes its performance. Use a tension gauge or similar tool to achieve the recommended tension specified by your boat’s manufacturer or tuning guide .
Ensure you evenly distribute tension across all stays and shrouds, avoiding any overtightening or loose spots. This will help maintain balance and prevent any unnecessary stress on the mast or rigging elements.
Step 5: Check for proper alignment and adjustments Now that your fractional rig is set up and properly tensioned, it’s time for some fine-tuning. Stand back and visually inspect how everything lines up – look out for any twists or misalignments in the mast or stays. Adjust as necessary.
If you notice any excessive sagging in your forestay, consider adjusting the jib halyard tension accordingly. Similarly, pay attention to mainsail luff tension by utilizing cunningham or downhaul controls provided on your boat .
Step 6: Test sail and make final adjustments With everything aligned and adjusted to perfection, take your sailboat out for a test sail . Pay close attention to how the boat performs – observe its handling characteristics in different wind conditions.
During this test sail, make note of any potential issues or areas that could be further improved. These observations will guide you in making final adjustments once you return to shore.
And there you have it – a step-by-step guide on how to set up a fractional rig! While this explanation may seem technical, don’t forget to approach each step with confidence and patience. With practice, setting up your fractional rig will become second nature, allowing you to fully enjoy all its benefits while out on the water.
Frequently Asked Questions about Fractional Rigging: Explained
Title: Demystifying Fractional Rigging – Your Comprehensive Guide to Frequently Asked Questions
Introduction:
Fractional rigging is a crucial aspect of sailing that often poses several questions for novice sailors and even some experienced mariners. In this blog post, we aim to shed light on the most commonly asked questions about fractional rigging, providing you with a detailed, professional, and insightful explanation. So let’s dive in and unravel the mysteries !
1. What is Fractional Rigging?
Fractional rigging refers to a sailboat configuration where the forestay (the cable supporting the mast from the bow) is attached at a point below the masthead. This setup determines how much of the sail area of a boat is located forward versus aft of the mast.
2. How does Fractional Rigging differ from Masthead Rigging?
In contrast to fractional rigging, masthead rigging involves attaching the forestay directly at or near the top of the mast. This design places more sail area ahead of the mast compared to fractional rigs, offering improved upwind performance but compromising downwind speed potential.
3. What are the advantages of Fractional Rigging?
Fractional rigging provides numerous benefits depending on your sailing preferences and objectives: – Enhanced control: The lower forestay attachment point allows for precise adjustment and tuning options during varying wind conditions. – Improved performance: Fractional rigs excel in upwind sailing due to increased ability to depower sails quickly, resulting in better stability and maneuverability. – Increased versatility: Unlike masthead rigs, fractional rigs exhibit superior characteristics across different wind strengths and points of sail .
4. Are there any downsides or limitations with Fractional Rigging?
While fractional rigs have many advantages, there are certain considerations as well: – Reduced downwind potential: Compared to masthead rigged boats, fractional rigged vessels may experience slightly slower downwind speeds due to lesser sail area positioned forward. – Complexity in tuning: Fractional rigs require more meticulous tuning, as the lower forestay attachment demands careful balancing of mast bend, rig tension, and sail trim . This tuning process can be time-consuming for less experienced sailors.
5. Can I switch from a Masthead Rig to a Fractional Rig?
Switching from masthead to fractional rigging is indeed possible but requires significant modifications. The conversion involves adjusting various elements, such as installing a new lower forestay attachment point and adjusting the sail plan accordingly. It’s essential to consult a professional rigger before undertaking such conversions.
6. How do I determine if my boat has Fractional Rigging or Masthead Rigging?
Determining whether your boat features fractional or masthead rigging can usually be done by inspecting where the forestay attaches on the mast. If it connects below the top of the mast, you have a fractional rig; otherwise, it’s likely a masthead rig.
7. Are there any specific maintenance requirements for Fractional Rigging?
Fractional rigging typically requires regular inspections to ensure its structural integrity and optimal performance: – Check for signs of wear and tear on all standing rigging components. – Regularly inspect fittings, turnbuckles, spreaders, and shrouds for corrosion or damage. – Perform periodic re-tuning of your fractional rig as per manufacturer specifications or with expert guidance.
Conclusion:
Fractional rigging possesses unique advantages that cater to different sailing scenarios while providing enhanced control and performance characteristics. By understanding these frequently asked questions about fractional rigging, you’ll be equipped with invaluable knowledge that will help you optimize your sailing experience. Remember to consult with professionals for advice specific to your boat model before making any major changes. Happy cruising!
The Advantages and Benefits of Using a Fractional Rig
When it comes to sailing, technology and innovation have played a crucial role in making the sport more accessible and enjoyable for enthusiasts . One such advancement that has revolutionized the sailing world is the fractional rig. This ingenious system offers numerous advantages and benefits to sailors, whether they are beginners or seasoned professionals.
To start with, let’s understand what exactly a fractional rig is. In simple terms, it refers to a sailboat rigging configuration where the forestay (the wire supporting the mast from its front) attaches below the top of the mast. Unlike a traditional masthead rig that secures the forestay at the very top of the mast, a fractional rig provides versatility and improved performance on different points of sail.
One advantage of using a fractional rig is its ability to offer better control in various wind conditions. The adjustability it provides allows for fine-tuning sail shape and balance, enabling sailors to optimize their boat’s performance. Whether you’re battling strong winds or gliding along in light breezes, being able to make precise adjustments can greatly enhance your sailing experience .
Additionally, compared to masthead rigs, fractional rigs offer increased maneuverability and responsiveness due to their lower center of effort . With less weight aloft, boats rigged with fractional systems are more agile and quick to respond to helm inputs. This allows sailors greater control over their vessel’s movements, especially when tacking or gybing.
Another significant benefit lies in the reduced loads experienced by both the hull and rigging components throughout maneuvers. By moving away from relying solely on headstay tension for stability under heavy winds, fractional rigs distribute loading more evenly along multiple stays – such as intermediates or runners – leading to decreased stress on hardware and overall increased safety levels.
What truly sets fractional rigs apart is their versatility across various points of sail . Compared to masthead rigs limited by upwind performance primarily, fractionally rigged boats excel in both upwind and downwind conditions. The adjustable forestay allows for a wider range of headsail options, enabling sailors to choose the most appropriate sail area for the prevailing wind strength and angle. This flexibility translates into improved speed, pointing ability, and overall performance across different points of sail .
Additionally, fractional rigs often feature smaller headsails – such as genoas or jibs – which are easier to handle than larger sails traditionally found on masthead rigs. This can be especially advantageous for sailors who prefer single or short-handed sailing, as it reduces physical strain and makes maneuvering the boat more manageable.
Finally, from an economic standpoint, employing a fractional rig can translate into cost savings over time. Smaller headsails generally require less fabric and maintenance compared to their larger counterparts. Moreover, the reduced loads on standing rigging components result in decreased wear and tear, prolonging their lifespan and lowering maintenance expenses.
In conclusion, using a fractional rig offers a range of advantages and benefits that enhance both the enjoyment and performance of sailing. From better control in varying wind conditions to increased maneuverability and improved versatility across points of sail, this innovative rigging system is truly a game-changer for sailors . So consider embracing this technology if you’re in search of enhanced sailing experiences – you won’t be disappointed!
Fine-Tuning Your Sailboat with Fractional Rigging: Tips and Tricks
Fine-tuning your sailboat with fractional rigging is a skill that can elevate your sailing experience to new levels. While the basics of rigging are essential, mastering the art of fractional rigging requires attention to detail, precision, and a touch of finesse. In this blog post, we will delve into the world of fractional rigging and share some tips and tricks that will empower you to optimize your sailboat’s performance .
Understanding Fractional Rigging:
To start off, let’s clarify what exactly we mean by “fractional rigging.” This term refers to a type of rig setup where the forestay is attached at a point below the mast’s top. Unlike a traditional rig setup where the forestay is attached at the masthead, a fractional rig allows for more efficient control over sail shape and balancing. The finer adjustments possible with this configuration can prove invaluable when it comes to maximizing speed and handling in various wind conditions.
Tip 1: Balancing Your Sails for Optimal Performance
One of the primary advantages of fractional rigging lies in its ability to fine-tune sail balance. To achieve optimal performance, it is crucial to ensure an appropriate balance between the mainsail and headsail. By adjusting tension on both halyards – main and jib – you can optimize leech tension and maintain proper airflow across your sails. Excessive headstay sag can lead to reduced pointing ability, while excessive mainsail luff tension can cause excessive weather helm. Experiment with different tensions until you find the sweet spot that offers maximum efficiency.
Tip 2: Controlling Mainsail Shape with Backstay Tension
Managing mainsail shape plays a pivotal role in harnessing wind power efficiently . With fractional rigging, backstay tension becomes an essential tool for shaping your mainsail on different points of sail . As you tighten or release the backstay, you will notice changes in both luff curve and mast bend. Take the time to familiarize yourself with how these adjustments affect your sail’s shape and make incremental changes based on wind conditions. Remember, a flatter mainsail works better in higher winds, while more depth can be beneficial when the breeze is light.
Trick 1: Fine-Tuning Rig Tension for Added Stability
Finding the right rig tension can enhance stability and control, contributing to overall performance. A useful trick involves adjusting cap shroud and lower shroud tensions. Incremental modifications to these tensions will influence your boat’s balance between weather helm and lee helm. If you find yourself fighting excessive weather helm, consider loosening the cap shrouds slightly or tightening the lowers. Conversely, if you experience lee helm, try tightening the cap shrouds or loosening the lowers. Striking a harmonious balance will result in improved handling and speed.
Trick 2: Mast Rake Adjustment for Upwind Performance
Fine-tuning your mast rake can significantly impact upwind performance by optimizing lift generated by your sails. By adjusting forestay tension (using either adjustable turnbuckles or backstay adjustment), you can alter mast rake subtly. Experiment with different settings to determine what works best for your boat and prevailing wind conditions. Keep in mind that a more raked mast generally provides increased pointing ability but may reduce overall downwind performance.
Fine-tuning your sailboat with fractional rigging requires a combination of knowledge, practice, and intuition. By understanding how different adjustments impact sail shape, balance, stability, and performance characteristics, you can gain a competitive edge on the water. Remember to always experiment incrementally, document changes made, and observe their effects before settling on an ideal configuration for each set of conditions you encounter. With these tips and tricks under your belt, prepare to take your sailing prowess to new heights as you fine-tune your sailboat with fractional rigging !
Common Mistakes to Avoid when Implementing a Fractional Rig
Implementing a fractional rig can be an incredibly beneficial decision for any sailing enthusiast or boat owner. It offers improved control, better balance, and increased efficiency on the water. However, like any complex system, there are common mistakes that inexperienced or unaware individuals often make when it comes to setting up and using a fractional rig. In this blog post, we will explore some of these pitfalls and provide you with professional insights on how to avoid them.
Mistake #1: Neglecting Proper Measurement and Tuning
One of the critical aspects of implementing a fractional rig is accurately measuring the mast height and properly tuning the rig. Failing to measure your mast correctly can lead to improper sail shape, reduced performance, excessive weather helm, or even mast failure in extreme cases. Take the time to measure your mast height accurately before choosing sail combinations or making adjustments.
To ensure proper tuning, consult with experts or refer to manufacturer guidelines specific to your boat model. Adjusting shrouds and stays too tight or too loose not only compromises performance but also poses safety risks. Utilize specialized tools like a Loos gauge when tightening standing rigging for accurate tension readings.
Mistake #2: Incorrect Placement of Fractional Attachment Point
Placing the fractional attachment point incorrectly is another critical error often made during implementation. This point determines where the jib’s tack attaches to the forestay above the deck level when running with smaller headsails (e.g., jibs). Placing it either too high or too low can result in imbalanced forces on the boat while sailing close-hauled or reaching.
If placed too high, excessive tension can be created in both forestays – leading to increased loads on hardware and potential structural damage. On the other hand, if positioned too low, it could cause excessive twist in larger sails – affecting overall power delivery and balance under various wind conditions. Therefore, carefully consider consulting knowledgeable sailing professionals or referring to design plans to ensure proper placement of this attachment point.
Mistake #3: Neglecting Proper Planning and Execution
Perhaps the most common mistake made during the implementation of a fractional rig is neglecting comprehensive planning and proper execution. Rushing into modifications or adjustments without careful consideration can lead to unnecessary expenses, compromised performance, or even jeopardize the safety of all onboard.
Before implementing a fractional rig, it is crucial to thoroughly evaluate your boat ‘s characteristics, sailing goals, and intended usage. Consider how various factors such as mast height, forestay length, sail combinations, and crew capabilities will impact performance. Pay attention to detail when setting up your rig by following manufacturer recommendations or consulting with experienced riggers who can offer tailored advice based on your specific needs.
Mistake #4: Using Inappropriate Sail Combinations
Matching sail combinations appropriately with a fractional rig is crucial for optimizing performance and preventing undue stress on the mast and other rigging components. One common mistake is utilizing oversized headsails with excessive overlap on staysail/stemstay setups.
Using overlapping headsails that are too big can lead to an imbalance in forces between headstay and inner forestay (stemstay), thus causing excessive loading on these components. This unbalanced load distribution can result in poor handling characteristics, diminished control while tacking or gybing maneuvers, compromised pointing ability in upwind conditions – ultimately undermining the benefits of a fractional rig setup.
To avoid this error, consult sailmakers or experienced sailors knowledgeable about fractional rigs regarding appropriate jib sizes for different wind strengths and expected sailing angles.
Mistake #5: Ignoring Regular Inspection and Maintenance
Lastly, neglecting regular inspection and maintenance is a common oversight that can have severe consequences for your fractional rig’s longevity and reliability. Failing to conduct routine checks for signs of wear, corrosion, loose connections/joints, or damaged components significantly increases the risk of catastrophic failure while at sea.
Develop a periodic inspection checklist or refer to manufacturer guidelines to assess critical points such as mast fittings, spreaders, stay and shroud terminals, turnbuckles, block attachments, and any other components integral to the rig’s integrity. Addressing minor issues promptly will help ward off major failures and ensure a longer lifespan for your fractional rig.
In conclusion, implementing a fractional rig can be an exhilarating endeavor that enhances your sailing experience. However, it is crucial to steer clear of these common mistakes discussed in this blog post. Remember to prioritize accurate measurement and tuning, ensure correct placement of the fractional attachment point, plan meticulously before execution, select appropriate sail combinations for optimized performance, and conduct regular inspections and maintenance for long-term reliability. By avoiding these pitfalls and taking heed of professional advice provided here, you will be well on your way towards maximizing the advantages offered by a fractional rig setup while enjoying safer and more rewarding adventures on the water!
Recent Posts

- Sailboat Gear and Equipment
- Sailboat Lifestyle
- Sailboat Maintenance
- Sailboat Racing
- Sailboat Tips and Tricks
- Sailboat Types
- Sailing Adventures
- Sailing Destinations
- Sailing Safety
- Sailing Techniques

- Forum Listing
- Marketplace
- Advanced Search
- About The Boat
- Gear & Maintenance
- SailNet is a forum community dedicated to Sailing enthusiasts. Come join the discussion about sailing, modifications, classifieds, troubleshooting, repairs, reviews, maintenance, and more!
Tension of Standing Rigging
- Add to quote
- Two forward stays
- Three standing/main stays
- Two strongbacks (high tension running back stays)
- One forward stay (rigged to the foremast)
- Four standing/main stays (one forward one aft and one pair of two center of the mast)
- One fully adjustable running back stay (only tightened/loosened by hand using some compound pulleys and a line clip - whatever those are called)
Sure, if you go downwind in five knots of wind. Otherwise, the tension of the stays is usually determined by a number of factors, primary among them the type of mast you have, the diameter of the stays and shrouds, the "rake" of the mast, and the type of sailing you do. Most stays are too slack, i.e. the rig is not optimally tuned. This can be seen on each tack, where the lee shrouds are slack. Too much slack leads to too much mast movement, work hardening, wear and crappy sail performance: The stays are the "ligaments" of the rig, with the mast, hull and chainplates forming the "skeleton" which transfers the power of the wind in the sails to move the boat. Slack stays=poor transfer, wear and eventually failure. Consider borrowing or buying a Loos or other type of tension gauge, and determine the usual rig tensioning for your boat. Check all chainplates FIRST, because you want to ensure that the reason the stays are loose in the first place is because the chainplates are half pulled apart. Ask for help. It's not an amateur job, but it's one easily learned and the results may surprise you. Rigging Tension: Information from Answers.com
Valiente said: Sure, if you go downwind in five knots of wind. Otherwise, the tension of the stays is usually determined by a number of factors, primary among them the type of mast you have, the diameter of the stays and shrouds, the "rake" of the mast, and the type of sailing you do. Most stays are too slack, i.e. the rig is not optimally tuned. This can be seen on each tack, where the lee shrouds are slack. Too much slack leads to too much mast movement, work hardening, wear and crappy sail performance: The stays are the "ligaments" of the rig, with the mast, hull and chainplates forming the "skeleton" which transfers the power of the wind in the sails to move the boat. Slack stays=poor transfer, wear and eventually failure. Click to expand...
Consider borrowing or buying a Loos or other type of tension gauge, and determine the usual rig tensioning for your boat. Check all chainplates FIRST, because you want to ensure that the reason the stays are loose in the first place is because the chainplates are half pulled apart. Click to expand...
Yep, that's correct. Inspect the chainplates for wear, oval boltholes and cracked knees first, prior to spinning the turnbuckle to half a ton of tension.
Heh, shows what I know. I'll buy a tension gauge and see if I can't find a local expert to help me out with this. I don't really know anyone suitable, maybe I'll hire someone. Determining the "usual" rig tensioning for my boat is going to be very difficult if not impossible. There aren't very many of these boats out there. Although my tensioning might need to be similar to other models by the same shipyard, but I would sort of doubt that since the other models this size have completely different rigging.
This is exactly what we did just before we headed out 8+ years ago. We had a Loos guage but what should the tension be. Had a professional rigger come over, a guy who a lot of racers hired for their boats, and had him tune the rig and wrote down the settings. Each year I check the rigging. Had to change out one stay in Trinidad before we left for an Atlantic crossing and again had a pro check it - that was after 5 years. On our third year in the Med we noticed that tension measures were close to what they were but we had a stay that looked liked it needed addition tension but not sure if it would move the stick a but to much so had a pro take a look at it in Sicily and he agreed that it needed a bit of turning and adjusted both sides to keep it correct. Have a pro do it, get a Loos guage and write down the settings then keep it up.
I have just purchased a rig tensioning tool. I have a Leisure 23SL and am trying to find out what tension to set on my 4mm stainless steel rigging but can't find any reference to tensioning the rigging anywhere. Can anyone help please
NB that as you increase the rig tension you are shortening the length of the shroud... and this means that you are forcing the hull to deform... ever so slightly. You can determine how much increase by how much you shorten/tighten your rigging once it is not slack (hand tight).. by measuring the length reduction from screwing down the turnbuckles. You tension a shroud to 15% of its yield strength. It is a fundamental requirement for all rig types that the cap shrouds are correctly tensioned. The cap shrouds are adjusted at the dockside, but final tuning is done while sailing. The table beside applies to standing rigging using 1 x 19 stainless wire. This is the most commonly used material for standing rigging. Your aim should be to tension the cap shrouds to 15-20% of the breaking load (the final check on tuning should be left until you are under sail). Then you know that the lateral staying is optimal both for the security of the rig and for sailing performance. There are measuring instruments of greater or lesser reliability for this purpose on the market. Seldén has developed a simple method of obtaining the information you need with material you probably already have. What you need to know is: • All 1 x 19 stainless wire stretches under load, but returns to its original length when the load is removed. 1 mm stretch per 2 m wire is equivalent to 5% of the breaking load, irrespective of the diameter of the wire. • A grp hull, on the other hand, changes its shape permanently when the rig is put under load. This makes it necessary to set up the rigging again after some time. This applies particularly to new yachts. • At the dockside, both cap shrouds always have the same load. If you tension the starboard shroud, the port shroud is affected to precisely the same extent The following materials are required: 1. A 2 metre long measuring rod (a folding rule is recommended) 2. Adhesive tape 3. Vernier callipers • Start with the cap shrouds only hand-tight. The rig is stayed with the lower shrouds and the forestay and backstay. • Tape the upper end of the folding rule to the starboard cap shroud. The lower end of the folding rule must be approximately 5 mm above the upper end of the wire terminal. Measure the distance between terminal and folding rule exactly. This is index 0, let's call it point A. • Tension the starboard cap shroud until the distance is A + 1.5 mm between the terminal and the folding rule. Measure using the vernier callipers. • Leave the folding rule attached to the starboard shroud, and move across to the port side and tension the shroud rigging screw the equivalent amount. • At intervals, check the starboard side to see how much the folding rule has moved from the end terminal. When there is a gap of A + 3 mm, the cap shrouds are tensioned to 15% of the breaking load of the wire (3 x 5% = 15%). If the mast is not straight, adjust the lower shrouds, intermediate shrouds etc. The folding rule method can be used on other stays, such as the backstay and forestay (without jib furling system). It can also be used for Dyform- or rod rigging, but please take the difference in stretch into account compared to 1 x 19 wire. The breaking loads for various dimensions of 1 x 19 strand wire. Wire Ø..................kN ....................lbs Ø 3.......................8....................1,770 Ø 4......................14...................3,090 Ø 5......................22...................4,860 Ø 6......................31...................6,845 Ø 7......................43...................9,490 Ø 8......................56.................12,360 Ø 10.....................88..................19,425 Ø 12....................126.................27,815 Ø 14....................171.................37,750 Ø 16....................216.................47,680
• Start with the cap shrouds only hand-tight. The rig is stayed with the lower shrouds and the forestay and backstay. Click to expand...
Barquito said: Nice write-up SanderO. One part I don't understand: Wouldn't it make a huge difference, that the port and stbd shrouds may not start at the same length? Do you just center the mast after getting to the proper tension? Click to expand...
Where I am sailing we put the boats on the hard over the winter. Usually without masts, ie unstep in the fall and step in the spring. Should we have pro's to do the rigging? No reason, none at all. It is easy-peasy to set the rig. There are many methods, each to their own, but most work fine. There are many theories as well, the same with those. When I step the mast I make a first setting of the rig. As both rig and boat will have stretched after a week, this is just a preliminary setting. Oh yes, start with the cap shrouds. see to that there is no inversion. As I have a partial rig, no real issues with fore and aft stays. Next step happens 1-2 weeks later. Tighten so it feels right, no science behind this. See to that the mast is stright. This is usually enough. Possible to follow up with a sailing tour an afternoon in about 8-10 m/s wind (16-20 knots). Lee shrouds should just start to slack. It is so nice to claim a very tight rig. Works fine for racing. But no need for normal cruising. Problem with high tension is the high static forces applied on the boat, all the time. /J
First and I have repeated this ad nauseum, YOU DO NOT TENSION THE SHROUDS TO SOME % OF THEIR BREAKING STRENGTH. It may be true that most shrouds are tensioned to between 10-20% of their MBL, but this is not how you set tension. There are two goals with rig tension, the first is to induce proper prebend. Basically how much the face of the mast bends backwards over the length of the mast, from the hounds to the top. Prebend really changes based on the cut of the sail and the conditions, but most cruisers set it for 15kn of breeze. Ideally you reduce prebend for light air, and increase it for heavy air, but many cruisers just don't bother, or have a hydrolic backstay required to change it on the fly. Anyway, after the amount of prebend is set, then the only tension to apply is just enough to keep the mast in column while sailing upwind. That's it. How much tension it takes just depends on the boat. It doesn't take a professional, and it isn't that complicated. 0) set prebend based on the cut of the sail 1) at the dock get the top of the mast centered by snugging up the top shrouds and working your way down the rig. 2) once the mast is centered make sure all the shrouds are snug, you can put a gague on them if you want, I don't bother. If you do just set them to the same tension. 3) go sailing and beat upwind in 5-10kn of breeze. Ideally in flat water 4) while beating look up the rig, is it still in column? If so you are done, but it won't be. So take in two full turns on the leeward shroud. 5) tack the boat 6) take up two full turns on the leeward shroud (So the shrouds on each side match) 7) look up the mast, is it in column? If not then take in two more turns on the leeward shroud 8) go back to 5 Once the mast remains in column on each side, take a tension reading on the shrouds. Then equalize them. Take a 1/4 turn off of the higher and add 1/4 turn to the lower. Then remeasure and confirm the mast stays in column. If it does then you are done, if not then you may have a slight imperfection either in the mast but placement, the mast hounds, or the chainplates. Track those down if you want, or just retension until the mast stays in column on either tack. Congratulations your boat is now tuned for those conditions! We have a base number from which to work. Next time you go sailing in say 15-20kn of breeze start at #5 and retension the boat for the higher wind speeds. It will take more tension, but how much again depends on the boat. Probably in the range of 1-2 turns. Personally I don't use a loose gague, because I don't care what the tension is, I use a set on machinist calipers to measure the distance between the rigging screws. This means I can always get back to my neutral numbers even if I forget how many turns I have added or taken off. The average shroud tension for moderate breeze is going to be somewhere around 10-15% MBL is mentioned above, but I know boats that sail with tension as high as 35% and as low as 3% of the MBL of their shrouds. For a more detailed look speak with a sail maker, North has a good write up, and PS Boat Clinic: Tuning the Masthead Rig - Web Only Article has a good one. Ideally of course your boat has been raced a lot and the class has a tuning guide for the boat. This is where tension gauges are great, because rig tension is the only way to exchange tuning numbers. 150lbs of tension on my J-22 is exactly the same as on your j-22, but 3.275" (stud to stud measurement) on my J-22 port cap shroud has no relation to yours.
I have adjusted the tension on my standing rigging on the Coronado 23 MkII by centering the mast and fine tuning under sail. I was a little intimidated by the big boat's over-sized rigging but I now plan to proceed as described above - keeping the mast in column (except for pre-bend).
But there is no pre bend needed on fractional rigs where the backstay creates mast bend.
Um, I am not sure what fractional S you have tuned but as a rule they carry far more pre-bend and rake than a masthead rig. In large part because fractional rigs are far more prone to rig inversion than mast head rigs are. The additional prebend also makes it much easier to induce more bend in the mast with the backstay. The upside is that fractional rigs generally also have swept back cap shrouds, which as they are tightened induces prebend faster than with a masthead and strait shrouds.
Get a Loos gauge or equivalent - it's the only way to get 15% on all the wires. I've found 30% and 40% difference from one to another with the tightest being well under 15% when they "felt" the same and "felt" tight enough. Some people recommend tightening keel bolts with a wrench with a piece of pipe on it and tightening the nuts "until the suckers scream". I prefer to use a torque wrench. Same thing IMO.
I can only speak for the fractional swept back single spreader deck stepped Selden rig I have. The mast is rigged without pre bend and the bend is created by increasing the back stay tension. The mast is 51' tall.
This is probably the most comprehensive rig tuning guide on the internet: http://www.riggingandsails.com/pdf/selden-tuning.pdf indeed a tension gage is needed; however, the information in this guide provides an alternative method using a 'meter stick' and an eyeball. One of the secondary functions of a tension gage is to continualy monitor the rig for permanent overstretching (yield/deformation) of wire and components & including chainplates and their attachments. If you sail your boat 'hard' or very aggresively, you can also monitor the rig while underway in boisterous conditions to ensure that the rig tension doesn't exceed about 30% wire tension ... the point at which most stainless wire begins to stretch or permanently deform (depending on how much 'safety factor' the designer included in his/her design) and the point at above which the potential of future fatigue failure rapidly accumulates. The following advice will allow you to 'properly' adjust backstay tension while underway and need to adjust for the wind strength encountered (a technical discussion or maximizing boat performance): http://www.ftp.tognews.com/GoogleFiles/Matching Luff Hollow.pdf
- ?
- 173.8K members
Top Contributors this Month

Learn How To Rig a Gaff Rig Sailboat – A Step-by-Step Guide
Alex Morgan

Rigging a gaff rig sailboat is essential for anyone who wants to embark on a sailing adventure with this unique type of sailboat. Gaff rig sailboats are known for their traditional design and distinctive triangular shape that sets them apart from other sailboats.
To properly rig a gaff rig sailboat, it is crucial to understand the different components involved, such as the gaff spar , boom , sails , and rigging . In this comprehensive guide, we will walk through the step-by-step process of rigging a gaff rig sailboat, including preparing the spar and sails, hoisting the mainsail, attaching the boom and headsail, and setting the rigging. we will provide valuable tips for rigging and sailing a gaff rig sailboat, including maintaining proper tension, adjusting the gaff spar and boom, and understanding sail trim. By following this guide, you will be able to rig your gaff rig sailboat effectively and set sail with confidence.
Key takeaway:
- Introduction to Gaff Rig Sailboats: Gaff rig sailboats are a type of sailboat that utilize a gaff spar, boom, sails, and rigging to operate.
- Components of a Gaff Rig Sailboat: The gaff spar, boom, sails, and rigging are all vital components that make up a gaff rig sailboat.
- Step-by-Step Guide: How to Rig a Gaff Rig Sailboat: Rigging a gaff rig sailboat involves preparing the spar and sails, hoisting the mainsail, attaching the boom and headsail, and setting the rigging.
Components of a Gaff Rig Sailboat
Get to know the key components that make up a gaff rig sailboat . From the sturdy gaff spar to the versatile boom , the beautifully crafted sails to the intricate rigging , each sub-section of this section unravels the essence of a gaff rig sailboat. Explore the intricate details and learn about the important role these components play in the smooth sailing of this classic rigging system.
The Gaff Spar is a vital component of a Gaff Rig Sailboat , providing support to the sail. It is a pole attached to the mast and extends horizontally towards the stern of the boat. The Gaff Spar has a significant role in controlling the shape and position of the sail, impacting the boat’s performance.
The Gaff Spar consists of several parts that contribute to its functionality. These include the jaws , which secure it to the mast, and the peak halyard , used to raise and lower the gaff. The throat halyard controls the position of the gaff on the mast.
When rigging a Gaff Spar, proper tension and alignment are necessary. The jaws should be securely attached to the mast, and the halyards should be adjusted to achieve the desired sail shape. Maintaining the correct tension throughout the sail is crucial for optimal performance.
Fun fact: The Gaff Spar is a distinctive feature of Gaff Rig Sailboats and allows for a larger sail area, making them powerful and efficient vessels.
The boom is a vital part of a gaff rig sailboat. It is a horizontal pole that extends from the mast and supports the lower edge of the mainsail. Here are some important facts about the boom:
Function: The boom controls the shape and angle of the mainsail, maintains tension in the sail, and allows for effective maneuvering of the boat.
Construction: Booms are made of aluminum or wood, depending on the sailboat type. They are designed to be sturdy yet lightweight to withstand wind forces.
Attachment: The boom is attached to one end of the mast and can pivot freely. The other end connects to the mainsail, allowing it to move as the sail is raised, lowered, or adjusted.
Manipulation: Sailors adjust the boom position using the boom vang, a device that controls tension and height. Adjusting the boom optimizes sail shape and trim, enhancing the boat’s performance.
Safety: Caution is necessary when near the boom to avoid collisions. Sailors should be mindful of their position and the boom’s movement during tacking or gybing.
Fact: The boom in a gaff rig sailboat aids in optimizing sail shape and trim, improving performance and maneuverability on the water.
The sails are essential components of a gaff rig sailboat. There are two main types of sails used in this rig: the mainsail and the headsail .
The mainsail is the largest sail and is attached to the gaff spar. It captures the wind and propels the boat forward. The mainsail can be adjusted to control the sail’s angle and shape , optimizing performance.
The headsail , also known as the foresail , is located forward of the mast. It complements the mainsail by providing additional power and stability. The headsail can be adjusted to control the wind captured, allowing sailors to adapt to different conditions.
Both sails are crucial for maneuvering and controlling the gaff rig sailboat. They are designed and crafted for efficiency and performance on the water. Sail trim , adjusting the position and tension of the sails, is vital for speed and handling.
Regularly inspect and maintain the sails to ensure a successful sailing experience. Check for wear or damage and make necessary repairs or replacements. Proper care and attention will enhance the sails’ longevity and the overall sailing experience.
Rigging a gaff rig sailboat involves several steps to ensure the sails and rigging are properly set up for smooth sailing. Here is a step-by-step guide:
1. Check the spar and sails for damage or wear. Attach the gaff spar securely to the mast.
2. Hoist the mainsail by attaching the halyard to the head of the sail and raising it up the mast. Secure the halyard.
3. Connect the boom to the mast and secure it using the boom vang.
4. Attach the headsail by connecting the halyard to the head of the sail and hoisting it up the forestay.
5. Adjust the shrouds and stays to set the rigging. Check for proper tension for stability and support.
6. Attach the halyards and sheets to the sail and boom, respectively. Ensure they are properly tensioned for sail control.
Maintaining proper tension in the rigging is crucial for stability and performance. Regularly check and adjust the tension as needed. Correctly adjusting the gaff spar and boom is important for sail control and achieving the desired sail shape and performance. Understanding sail trim is essential for optimizing the performance of a gaff rig sailboat. Experiment with different sail positions to find the most efficient settings for various wind conditions.
Step-by-Step Guide: How to Rig a Gaff Rig Sailboat
Get ready to set sail with this step-by-step guide on rigging a gaff rig sailboat. From preparing the spar and sails to hoisting the mainsail, attaching the boom and headsail, and setting the rigging – we’ll walk you through each crucial step. Whether you’re a seasoned sailor or a curious novice, these tips will help you navigate the process smoothly and get you out on the water in no time. So grab your gear and let’s rig that sailboat!
Preparing the Spar and Sails
Preparing the Spar and Sails for rigging a gaff rig sailboat involves several crucial steps. It is essential to carefully inspect the spar for any signs of damage or wear, such as cracks , splits , or loose fittings. This thorough inspection ensures the safety and functionality of the sailboat.
Next, it is important to prepare the sails by laying them out on a clean surface and checking for any tears or holes . This step guarantees that the sails are in optimal condition for rigging.
To hoist the sails up the mast, it is necessary to attach the halyards securely. It is crucial to ensure that they are properly attached and free from any knots that could hinder the smooth hoisting process.
Controlling the angle and tension of the sails can be achieved by attaching the sheets . These sheets must be securely fastened and properly adjusted to maintain the desired sail position.
Another important attachment is the downhaul , which allows for controlling the shape of the sail. It is of utmost importance to securely attach and properly adjust the downhaul to ensure an optimal sailing experience.
Carefully check the rigging , including the shrouds and stays , for any signs of damage or wear. It is crucial to properly tension and securely fasten all rigging components to guarantee the sailboat’s stability.
Inspecting the sail track and slides on the mast for cleanliness and obstructions is another essential step. This inspection ensures that the sails can smoothly and efficiently slide along the mast during rigging.
Once these steps have been completed, you will be fully prepared to continue rigging your gaff rig sailboat. Always remember to follow the manufacturer’s instructions and utilize proper sailing techniques for a safe and enjoyable experience on the water.
Hoisting the Mainsail
To hoist the mainsail on a gaff rig sailboat, follow these steps:
- Attach the halyard to the head of the mainsail .
- Begin hoisting the mainsail by pulling on the halyard.
- Keep an eye on the luff to ensure proper alignment.
- Continue hoisting the mainsail to the desired height.
- Secure the halyard once the mainsail is fully hoisted.
Suggestions for hoisting the mainsail :
- Take your time and be careful.
- Communicate with your crew members.
- Practice in calm weather conditions first.
- Regularly inspect rigging components for good condition and maintenance.
Remember, hoisting the mainsail is important for preparing the sailboat. Follow the steps carefully and stay safe on the water.
Attaching the Boom and Headsail
To attach the boom and headsail on a gaff rig sailboat, follow these steps:
1. Position the boom: Place the boom on the mast and slide it toward the aft end until it aligns with the jaws of the gaff spar.
2. Secure the boom: Attach the boom to the jaws of the gaff spar using a stainless-steel pin or bolt. Ensure it is tightly secured to prevent movement during sailing.
3. Attach the headsail: Take the headsail and attach it to the forestay connected to the masthead. Use hanks or clips on the headsail to fasten it securely to the forestay. Ensure all attachments are secure.
4. Adjust the tension: Check the tension of the headsail by gently pulling on the sheets. The headsail should be taut but not overly tight. Make necessary adjustments for the desired tension.
5. Inspect connections: Double-check all connections and fastenings to ensure they are secure. Confirm that the boom is properly attached to the gaff spar and the headsail is securely fastened to the forestay.
By following these steps, you can successfully attach the boom and headsail on a gaff rig sailboat, giving you a smooth and efficient sailing experience.
Setting the Rigging
To properly set the rigging on a gaff rig sailboat, follow these steps:
1. Adjust the shrouds and stays: Ensure that these lines are properly tensioned and secure. They support the mast and maintain its position.
2. Rig the halyards and sheets: Attach the halyards to the sails and run them through the appropriate blocks or pulleys. The halyards hoist and control the sails. The sheets control the angle and tension of the sails.
Setting the rigging is critical for rigging a gaff rig sailboat. The proper tension and alignment of the shrouds and stays ensure mast stability and performance. Rigging the halyards and sheets correctly is essential for controlling the sails and maneuvering the boat effectively. By following these steps, you can ensure that your gaff rig sailboat is properly rigged and ready for a successful sailing experience.
Gaff rig sailboats have a rich history dating back to the 17th century. They were commonly used on working sailboats and fishing vessels due to their versatility and efficiency. The design features a large, fore-and-aft mainsail supported by a gaff spar. This rigging allowed sailors to navigate different wind conditions and made these boats well-suited for hauling cargo and coastal trading. Although modern sailboat designs have evolved, gaff rig sailboats are still admired for their aesthetic appeal and nostalgic charm. Many sailing enthusiasts still enjoy the unique experience of setting the rigging and sailing a gaff rig sailboat, connecting with a bygone era of maritime history.
Tips for Rigging and Sailing a Gaff Rig Sailboat
Get ready to set sail with these expert tips for rigging and sailing a gaff rig sailboat . We’ll dive into the secrets of maintaining proper tension, adjusting the gaff spar and boom , and understanding sail trim . Discover the key elements to make your gaff rig sailboat glide effortlessly through the water and experience the thrill of harnessing the wind’s power. So, grab your ropes and let’s embark on an exciting journey into the world of gaff rig sailing !
Maintaining Proper Tension
Maintaining proper tension is crucial for the performance and safety of a gaff rig sailboat. To achieve this, follow these steps:
1. Regularly inspect the rigging for any signs of wear or damage, including the shrouds, stays, halyards, and sheets.
2. Adjust the rigging tension as needed to ensure the integrity of the rig and prevent excessive movement.
3. To check the tension of the shrouds and stays, gently apply pressure to the mast and observe the deflection. The mast should have a slight bend .
4. If the tension is too loose , tighten the shrouds and stays gradually using an appropriate tensioning device. Remember to distribute equal tension on both sides.
5. On the other hand, if the tension is too tight , release some tension by turning the tensioning device counterclockwise.
6. Pay close attention to the tension of the halyards and sheets. They should support the sails without hindering their movement.
7. Regularly inspect the tension of the gaff spar and boom, ensuring they are both secure and properly tensioned to control the shape of the sail.
8. Adjust the tension of the gaff spar and boom as necessary to achieve optimal sail trim and performance .
9. Maintain proper tension throughout your sailing trip and make adjustments as the conditions change.
By following these steps, you can ensure that your gaff rig sailboat maintains the proper tension for a safe and enjoyable sailing experience.
Adjusting the Gaff Spar and Boom
Adjusting the gaff spar and boom is imperative when rigging a gaff rig sailboat . It is crucial for ensuring the proper sail shape, stability, and control while sailing.
To begin, check the alignment by making sure the gaff spar is parallel and centered with the mast.
Next, tighten the gaff jaws by securely fastening them around the mast. This will prevent any movement during sailing.
Then, attach the throat halyard to the throat of the gaff spar . This will allow you to control the height and angle of the mainsail.
Fine-tune the tension of the throat halyard to achieve the desired sail shape. More tension will raise the gaff spar , while less tension will lower it.
Securely attach the peak halyard to the peak of the gaff spar . This will give you control over the leech tension and the overall shape of the mainsail.
Adjust the tension of the peak halyard to achieve optimal sail shape. Increasing the tension will increase leech tension and flatten the sail, while decreasing the tension will allow the sail to fill out more.
Always check the boom position to ensure it is properly attached to the mast and gaff spar . It should be parallel to the deck and positioned at the desired height.
To control the twist in the mainsail, modify the boom angle. Higher boom angles will increase twist, while lower angles will decrease it.
Increase the tension in the boom vang to control the downward force on the boom. This will stabilize the mainsail and prevent excessive leech flutter.
By following these steps and making necessary adjustments to the gaff spar and boom , you can optimize the performance and maneuverability of your gaff rig sailboat.
Understanding Sail Trim
Understanding sail trim is crucial for sailing a gaff rig sailboat effectively. Sail trim optimizes sail performance and maximizes speed and efficiency. Consider the following aspects of sail trim:
1. Adjusting the sails: Properly understand sail trim and set the sails for efficient propulsion. Keep the sails trimmed according to wind direction and strength. Well-trimmed mainsail and headsail provide optimal power and balance.
2. Controlling twist: Understanding sail trim helps maintain the desired amount of twist based on wind conditions. Too much twist reduces efficiency, while too little twist causes excessive heeling. Adjust sheets and halyards to control twist effectively.
3. Balancing the boat: Proficient sail trim helps maintain balance and stability while sailing. Understand how to adjust the sails to evenly distribute forces, minimizing weather helm or lee helm. Balanced boats sail more efficiently and are easier to control.
4. Monitoring sail shape: Pay attention to sail shape and understand how sail trim affects it. The sails should have a smooth, aerodynamic shape without excessive wrinkles or flapping. Adjust tension on halyards, sheets, and outhaul to achieve the desired sail shape.
5. Reacting to changing conditions: Understanding sail trim means being attentive to shifts in wind direction and strength. Make necessary adjustments promptly to optimize performance.
Understanding sail trim comes with experience. Regular practice and observation of how adjustments affect boat performance enhance sail trim proficiency. By cultivating this understanding, you can improve efficiency and enjoyment of sailing a gaff rig sailboat .
Facts about How To Rig A Gaff Rig Sailboat:
Some Facts About How To Rig A Gaff Rig Sailboat:
- ✅ Modern gaff rig sailboats offer practicality and simplicity, with easier trailing and rigging compared to Bermudan rigs. (Source: Classic Boat)
- ✅ The lower center of effort of gaff rigs allows for lighter lifting keels and easier downwind performance. (Source: Classic Boat)
- ✅ Trimming a gaffer can be challenging and rewarding, with boom angle and jib tension being important factors in optimizing performance. (Source: PBO)
- ✅ Gaff rig owners often prefer cream or white sails for better visibility and a classic appearance. (Source: PBO)
- ✅ Sewing the ends of two ropes together using sailmaker’s twine allows for easy replacement of worn or damaged halyards on gaff-rigged sailboats. (Source: PBO)
Frequently Asked Questions
1. how do i rig a gaff rigged sailboat with multiple blocks.
Rigging a gaff rigged sailboat with multiple blocks can seem daunting at first, but the process is actually simple if both ends of the halyards are accessible from the deck. By sewing the ends of the two ropes together using sailmaker’s twine, you can create a smooth joint that can be easily pulled through the blocks. Simply pull on the free end of the old halyard, and the new one will automatically reeve.
2. What are the advantages of using lightweight synthetics in gaff rigging?
Using lightweight synthetics in gaff rigging offers several advantages. These materials are not only lighter in weight, but they also have increased strength and durability. They are less prone to stretching and UV degradation, providing a longer lifespan for your rigging. Lightweight synthetics can improve upwind efficiency and downwind performance, resulting in a smoother sailing experience.
3. Why are gaff rigs preferred in heavier winds?
Gaff rigs are often preferred in heavier winds due to their lower rig tension and the use of high peak gaffs. The lower center of effort and shorter spars of gaff rigs allow for better balance and easier management of sail area in strong winds. This results in less heel and a more comfortable sail, allowing sailors to maintain control and stability even in challenging conditions.
4. How are gaff rigs different from bermuda rigs?
Gaff rigs and bermuda rigs differ in their sail configurations and rigging. Gaff rigs use a spar, or strong pole, on top of the sail, while bermuda rigs have a triangular mainsail. Gaff rigs were commonly used in the past and offer a classic appearance, while bermuda rigs are more modern and efficient. Bermuda rigs have become dominant in the sailing scene, but gaff rigs are still appreciated by enthusiasts for their unique sailing capabilities and timeless charm.
5. What are some modern conveniences in gaff-rigged sailboats?
Modern gaff-rigged sailboats, also known as gaffers, offer a blend of classic style designs and modern conveniences. These boats are designed for practicality and simplicity, providing easier trailing and rigging compared to bermudan rigs. They often feature improved performance, with upgrades such as carbon spars and modern hardware. Gaffers also have lighter lifting keels and better downwind performance thanks to their lower center of effort, making them suitable for a variety of sailing conditions.
6. How do I replace an old wick in a paraffin lamp on a gaff-rigged vessel?
Replacing an old wick in a paraffin lamp on a gaff-rigged vessel is a simple process. Just like replacing a worn or damaged halyard, you can use a technique called sewing. Stitch the ends of the new wick together using light sailmakers twine, creating a smooth joint. Then, pull out the old wick by pulling on the free end, and the new one will automatically be pulled through. This technique can be used both on a gaff-rigged vessel and for other purposes, such as replacing a halyard.
About the author
Leave a Reply Cancel reply
Your email address will not be published. Required fields are marked *
Save my name, email, and website in this browser for the next time I comment.
Latest posts

The history of sailing – from ancient times to modern adventures
History of Sailing Sailing is a time-honored tradition that has evolved over millennia, from its humble beginnings as a means of transportation to a beloved modern-day recreational activity. The history of sailing is a fascinating journey that spans cultures and centuries, rich in innovation and adventure. In this article, we’ll explore the remarkable evolution of…

Sailing Solo: Adventures and Challenges of Single-Handed Sailing
Solo Sailing Sailing has always been a pursuit of freedom, adventure, and self-discovery. While sailing with a crew is a fantastic experience, there’s a unique allure to sailing solo – just you, the wind, and the open sea. Single-handed sailing, as it’s often called, is a journey of self-reliance, resilience, and the ultimate test of…

Sustainable Sailing: Eco-Friendly Practices on the boat
Eco Friendly Sailing Sailing is an exhilarating and timeless way to explore the beauty of the open water, but it’s important to remember that our oceans and environment need our protection. Sustainable sailing, which involves eco-friendly practices and mindful decision-making, allows sailors to enjoy their adventures while minimizing their impact on the environment. In this…

Loos Cableware
The industry leader in aircraft cable accessories, pulleys, swaging tools, and cable cutters, what is a tension gauge in sailboat rigging.
A tension gauge is an essential tool for eliminating any guesswork from cable or rod tension adjustment. Tension gauges measures the tension in your sailboat standing rigging. In today’s blog we are going to be looking at what a tension gauge is, how it is used in sailboat rigging, and some of the different gauges available. Continue reading to learn more about tension gauges!
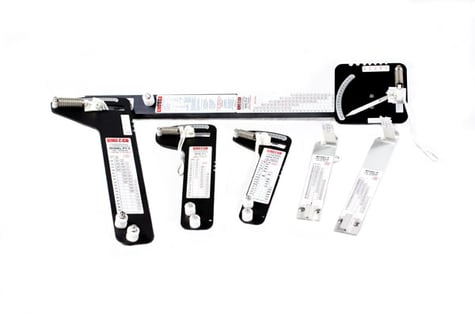
Why are slack rigs worse than tight rigs?
Despite what many say, a slack rig is more damaging to a hull than a correctly adjusted tight rig. A slack rig means that you will have insufficient tension that does not reduce loads transmitted in the hull. Slack rigging means you will have excessive movement, chafe and shock loading.
Why is rigging tension important?
Rigging tension is important because mast bend is using to control mainsail shape of your boat under different wind conditions. Bend also affects the shape and trim of the jib.
What can happen without the proper tension?
The main issue that could happen is damage to your boat. Without proper tension you could also buckle your mask or cause personal injury. If you end up having excessive tension you will also damage your setup, causing stretch to either cables or rods.
How do I use a tension gauge?
On our website we have a longer form detailed video that walks you through all the steps of using a tension gauge. Our video has a full transcript and high-quality video to show you a real life demonstration on a sailboat.
Are there different types of tension gauges?
Yes! At Loos Cableware Division we offer four different types of tension gauges. We have the Model #PT-CR for cable railing, Model PT Series, Model 90 & 91, and the Model RT Series. The different tension gauges are suitable for certain size cables. On our product page you can learn about each of our tension gauges.
Now that you have learnt about tension gauges, we recommend choosing a reputable company to complete your purchase. Here at Loos Cableware Division , we carry a wide range of tension gauges and have many years of experience in helping sailors choose the correct gauge for their needs. If you have any questions, our team is happy to help! Reach out to us by email at [email protected] or by phone at (800) 321-LOOS (5667) .
What Type of Tension Gauge Do I Need For My Sailboat?
What are the differences between locoloc® handswagers, differences between c7, cdo, and cp felco® cutters.

IMAGES
VIDEO
COMMENTS
Step 5: Check the rig under sail. The caps should be tighter than with a masthead rig, with no significant slack on the leeward side when the boat's hard on the wind and heeling 15-20°. If the static tension is up to 25% but the leeward cap is always slack, the boat might be bending.
Use a tension gauge, Loos gauge, or tensiometer to achieve the desired tension. Repeat this process for both sides of the boat. Next, adjust the tension in the upper shrouds to match the recommended baseline tension. Be careful not to overtighten any of the rigging. Spinlock Rig Sense Tension Gauge for 2-5mm Wire.
The Loos tension gauges take the guesswork out of cable or rod tension adjustment.The tension gauges are especially designed for accurate, repeatable tuning of a sailboat's standing rigging. Contrary to popular thought, a slack rig is more punishing on a hull than a properly adjusted, tight rig.
The next step for tuning the rig is to make sure the mast is square in the boat. Set the shroud tension close to base tension and loosen the D1's (& D2's). Swing the jib halyard from one shroud base to the other and make sure the hounds are in the middle. Tighten the D1's (& D2's) back up to the tuning guide and make the mast look ...
If so, add more shroud tension to both sides. A tension-testing gauge will work, but many sailors do fine estimating by hand. Cruising-boat rigs shouldn't have the same amount of rig tension as a raceboat beating to windward. However, if your sailboat's mast is deck-stepped, make sure the coachroof isn't deforming due to the compression ...
The tension you are aiming for will vary from boat to boat and between types of rigging wire, but a gauge will make it much easier to keep the tension even on opposite shrouds. For the initial set-up the boat should ideally be floating level - it makes it much easier to see whether, despite the measurements, everything looks right.
ATHWARTSHIP TUNING. If the rig is not centered, performance and trim will be different tack to tack. To remedy this, center the top of the rig. Using the diagonal shrouds, bring each successive panel in line with the top. The amount of tension you need is tough to predict at the dock-the mast really needs to be under load.
There is a simple criterion for shroud tension. The initial rigging tension should be high enough that the leeward shrouds do not go slack when sailing close-hauled in a reasonably brisk breeze. The proper value for your boat can be found by a few trial runs under sail. Once the correct tension is known, the gauge can be used to maintain the value.
Proper rig tension is crucial for maintaining sail shape and boat performance. To check your rig tension, follow these steps: Attach a tension gauge to your shrouds and stays. Measure the tension in each wire, adjusting as necessary to achieve the desired tension. Ensure that the tension is even on both sides of the boat. Step 5: Fine-Tune Your ...
To get the best performance from your boat and sails, the rigging needs to be set up correctly — often called "tuning the rig." The rig should be tuned with the boat in the water on a day with little to no wind. ... Have a helper release the main halyard and keep a little tension while you pull down the end that normally attaches to the ...
There are currently three makes of rig tension gauge on the UK market designed for yacht rigging: The Loos, which comes in Standard and Professional models, each in three different shroud diameter ranges, from 2.5 to 10mm. The SureCheck, which comes in four sizes, from 2 to 10mm. At the time of going to press, the newly-launched Spinlock Rig ...
Standing rigging tension is a peculiarly under-addressed subject. Easy to see how it would worry a new boat owner or someone going to sea. Most experts step aboard, yank or twang the shrouds and stays and mutter, Pretty slack, Too Tight, or, Thats about right. Youll find in the sailing literature very few discussions of the question: What does ...
The Loos tension Gauge is designed for accurate measurement of the tension in rigging wire and repeatable tuning of a sailboats standing rig. Each model covers a tension range of 5-25% of the breaking strength of the wire and a clear table with scale readings is provided.
1. Check by sighting up the backside of the mast to see how straight your spar is side to side. You can take a masthead halyard from side to side to ensure that the masthead is on center. Do this by placing a wrap of tape 3′ up from the upper chainplate pin hole on each upper shroud. Cleat the halyard and pull it to the tape mark on one side ...
Rig tension gauges: readings and equivalence charts. For most racers, repeatable tuning of the sailboat's standing rigging is a must when trying to reach the right tune that makes you the fastest crew in the fleet. Loos rig gauges allow quick and accurate measurement of shrouds and stays to achieve the perfect rig tune.
Sailboat rig A sailboat rig refers to the arrangement of sails and mast on a sailboat. It determines how the boat harnesses wind power for propulsion. ... Precise Tuning: Balancing Shroud Tension Professional sailboat rigging entails finding the right balance of tension between port and starboard shrouds. You can fine-tune this by adjusting the ...
Pull the lanyard until the indicator aligns with the mark on the gauge. 3. Read the (bend) number from the scale. This forestay has a tension of 13 or 110 pounds for a 1/8″ cable. 4. Measure the cable size and look up the tension in pounds that corresponds to the cable size in the chart on the gauge.
In this comprehensive guide, we will take you through the ins and outs of sail rigging, ensuring smooth sailing experiences ahead. 1. Unveiling the Anatomy of a Sailboat: ... Perfect for adjusting the tension of a line under load. Mastery of these knots will make sail rigging both efficient and effective. 4. Troubleshooting Common Rigging Issues
A fractional rig refers to the configuration of the mast and stays on a sailboat. Unlike a masthead rig where the forestay attaches at the very top of the mast, a fractional rig has its forestay attached at a point lower on the mast. This design offers increased maneuverability and performance, making it popular among racing sailors.
To step the mast of a sailboat, follow these steps: 1. Prepare the mast: Position the mast near the base of the boat. 2. Attach the base plate: Securely fasten the base plate to the designated area on the boat. 3. Insert the mast step: Lower the mast step into the base plate and align it with the holes or slots. 4.
Ideally of course your boat has been raced a lot and the class has a tuning guide for the boat. This is where tension gauges are great, because rig tension is the only way to exchange tuning numbers. 150lbs of tension on my J-22 is exactly the same as on your j-22, but 3.275" (stud to stud measurement) on my J-22 port cap shroud has no relation ...
To attach the boom and headsail on a gaff rig sailboat, follow these steps: 1. Position the boom: Place the boom on the mast and slide it toward the aft end until it aligns with the jaws of the gaff spar. 2. Secure the boom: Attach the boom to the jaws of the gaff spar using a stainless-steel pin or bolt.
Henry M. May 3, 2023 8:30:00 AM. A tension gauge is an essential tool for eliminating any guesswork from cable or rod tension adjustment. Tension gauges measures the tension in your sailboat standing rigging. In today's blog we are going to be looking at what a tension gauge is, how it is used in sailboat rigging, and some of the different ...